Coolify Deployment Guide
What is Coolify?
Coolify is an open-source, self-hostable platform-as-a-service (PaaS) that simplifies the deployment of applications. It provides a user-friendly interface for managing Docker containers, databases, and other services.Prerequisites
Before deploying Usertour with Coolify, ensure you have a Coolify instance running (see Coolify installation guide).Deployment Steps
-
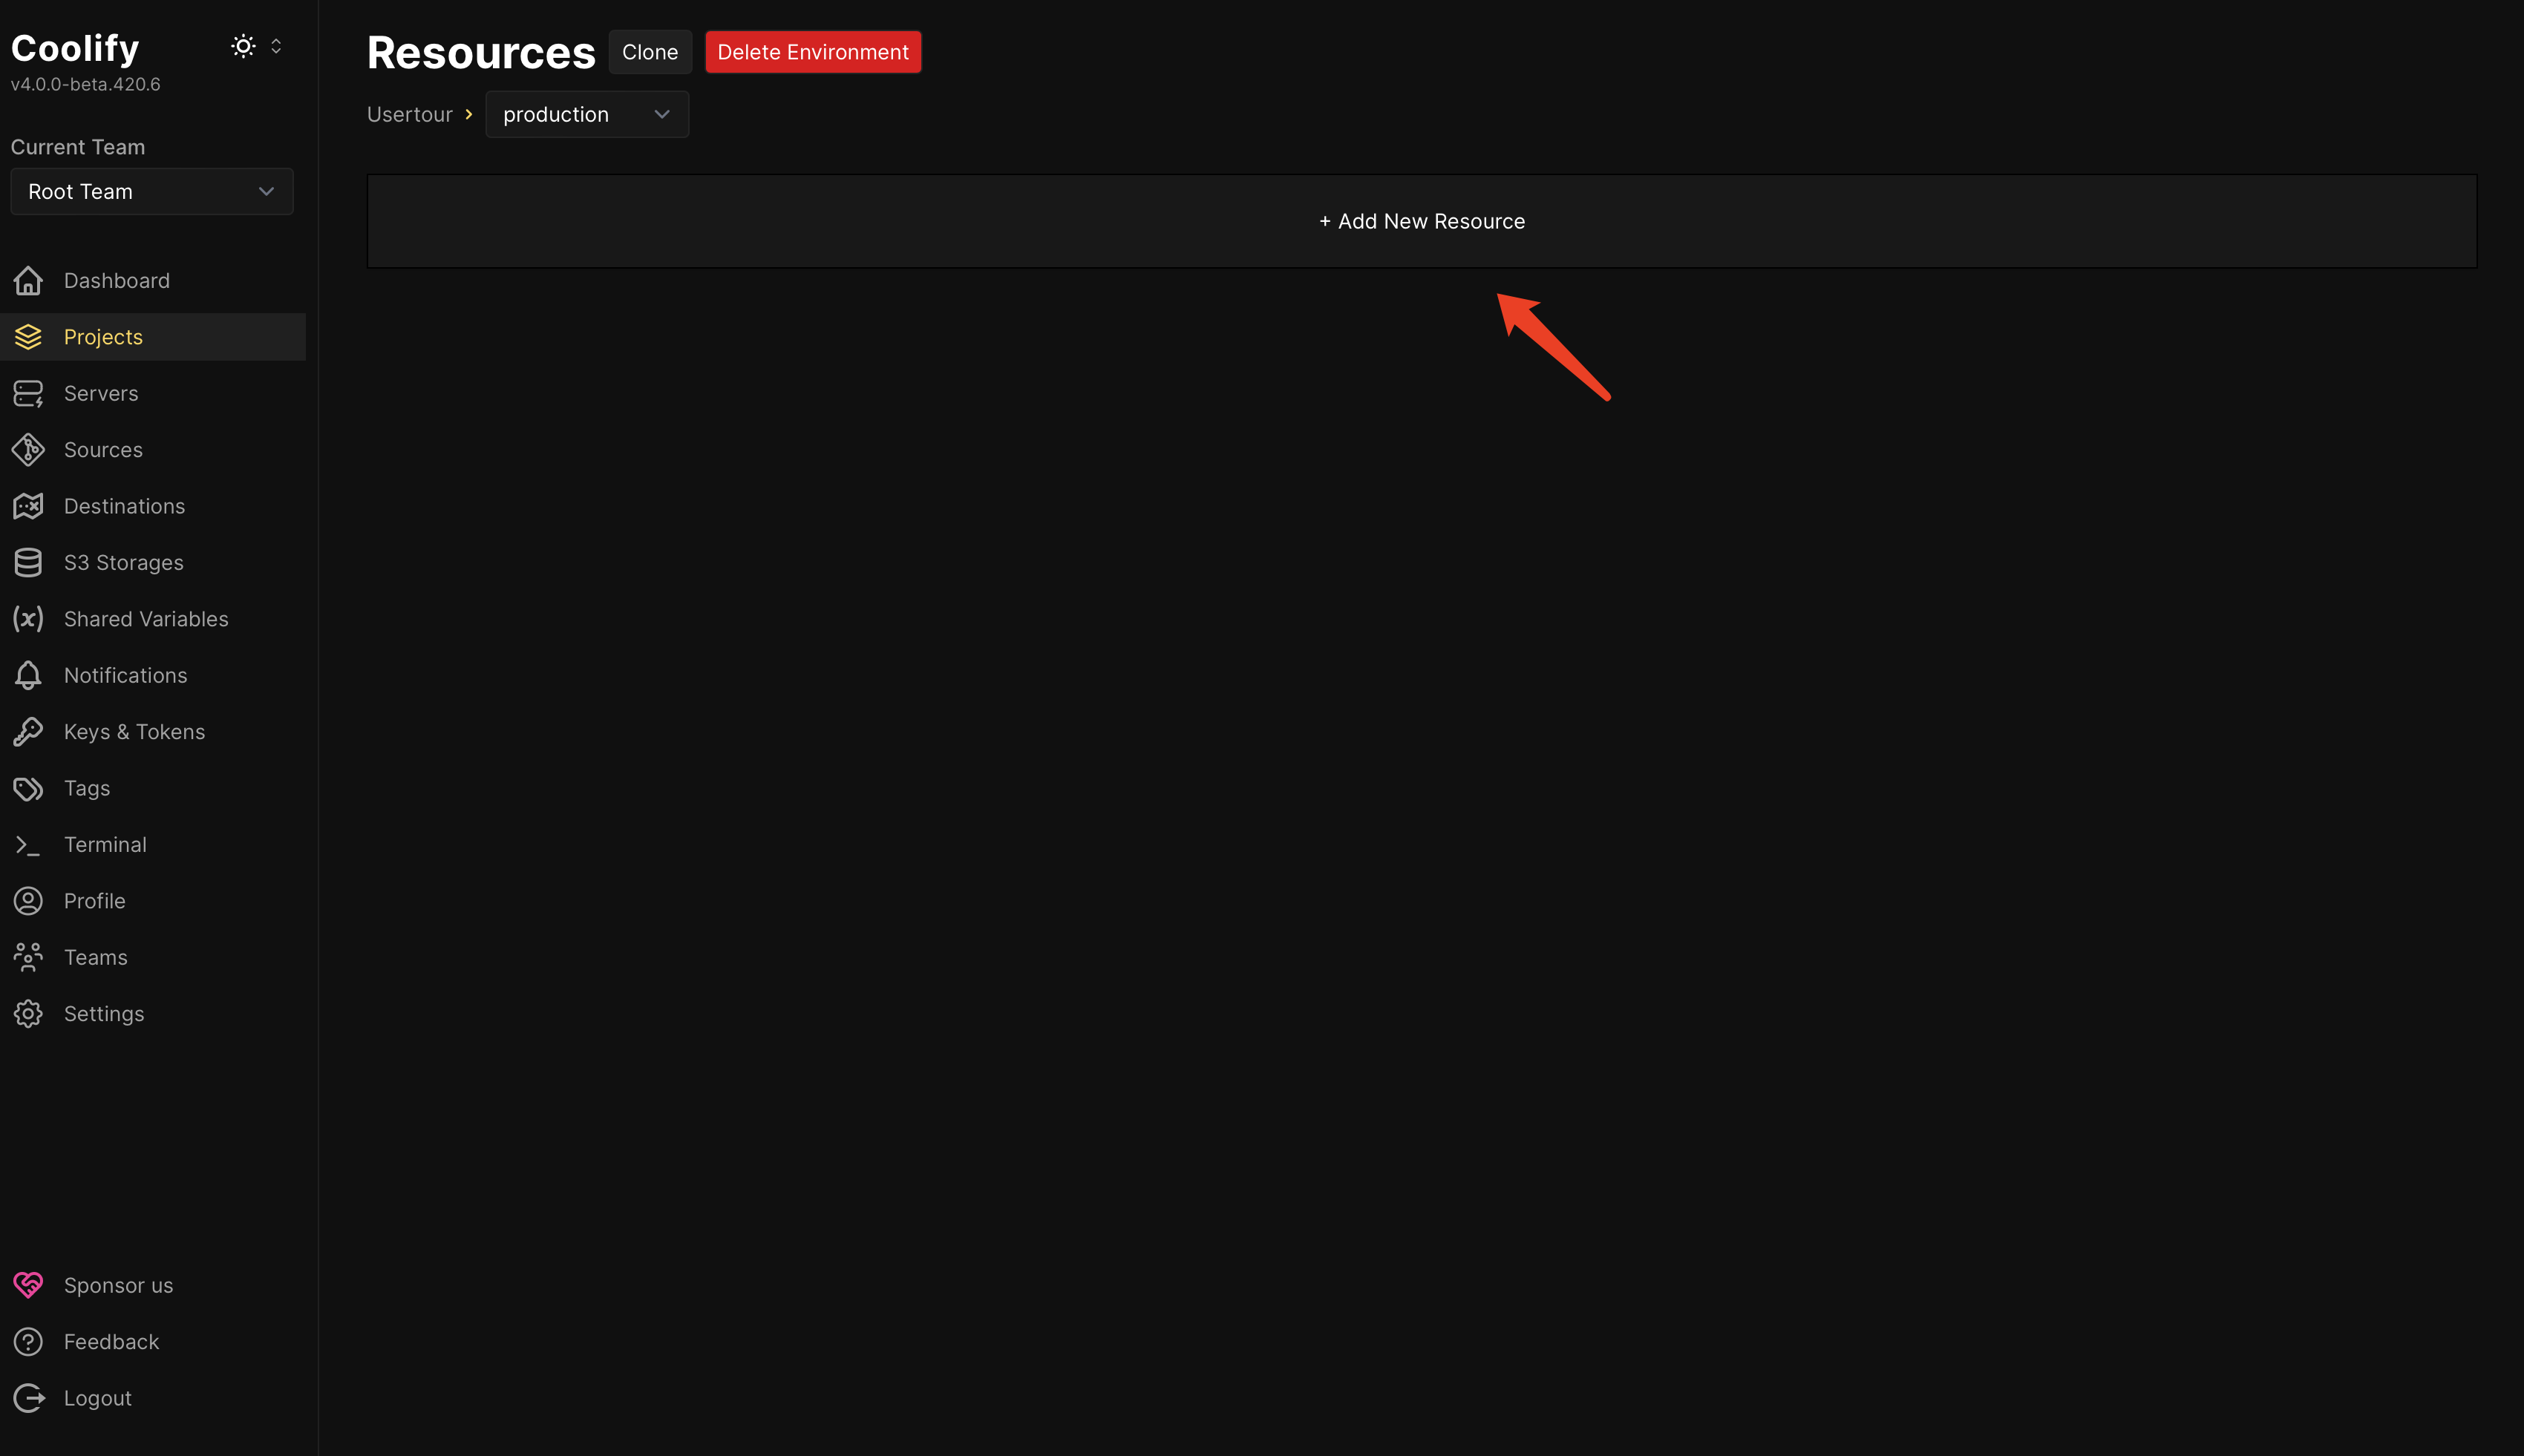
Create a New Resource in Coolify
Navigate to your Coolify dashboard, open your project, and click the Add New Resource button.
-
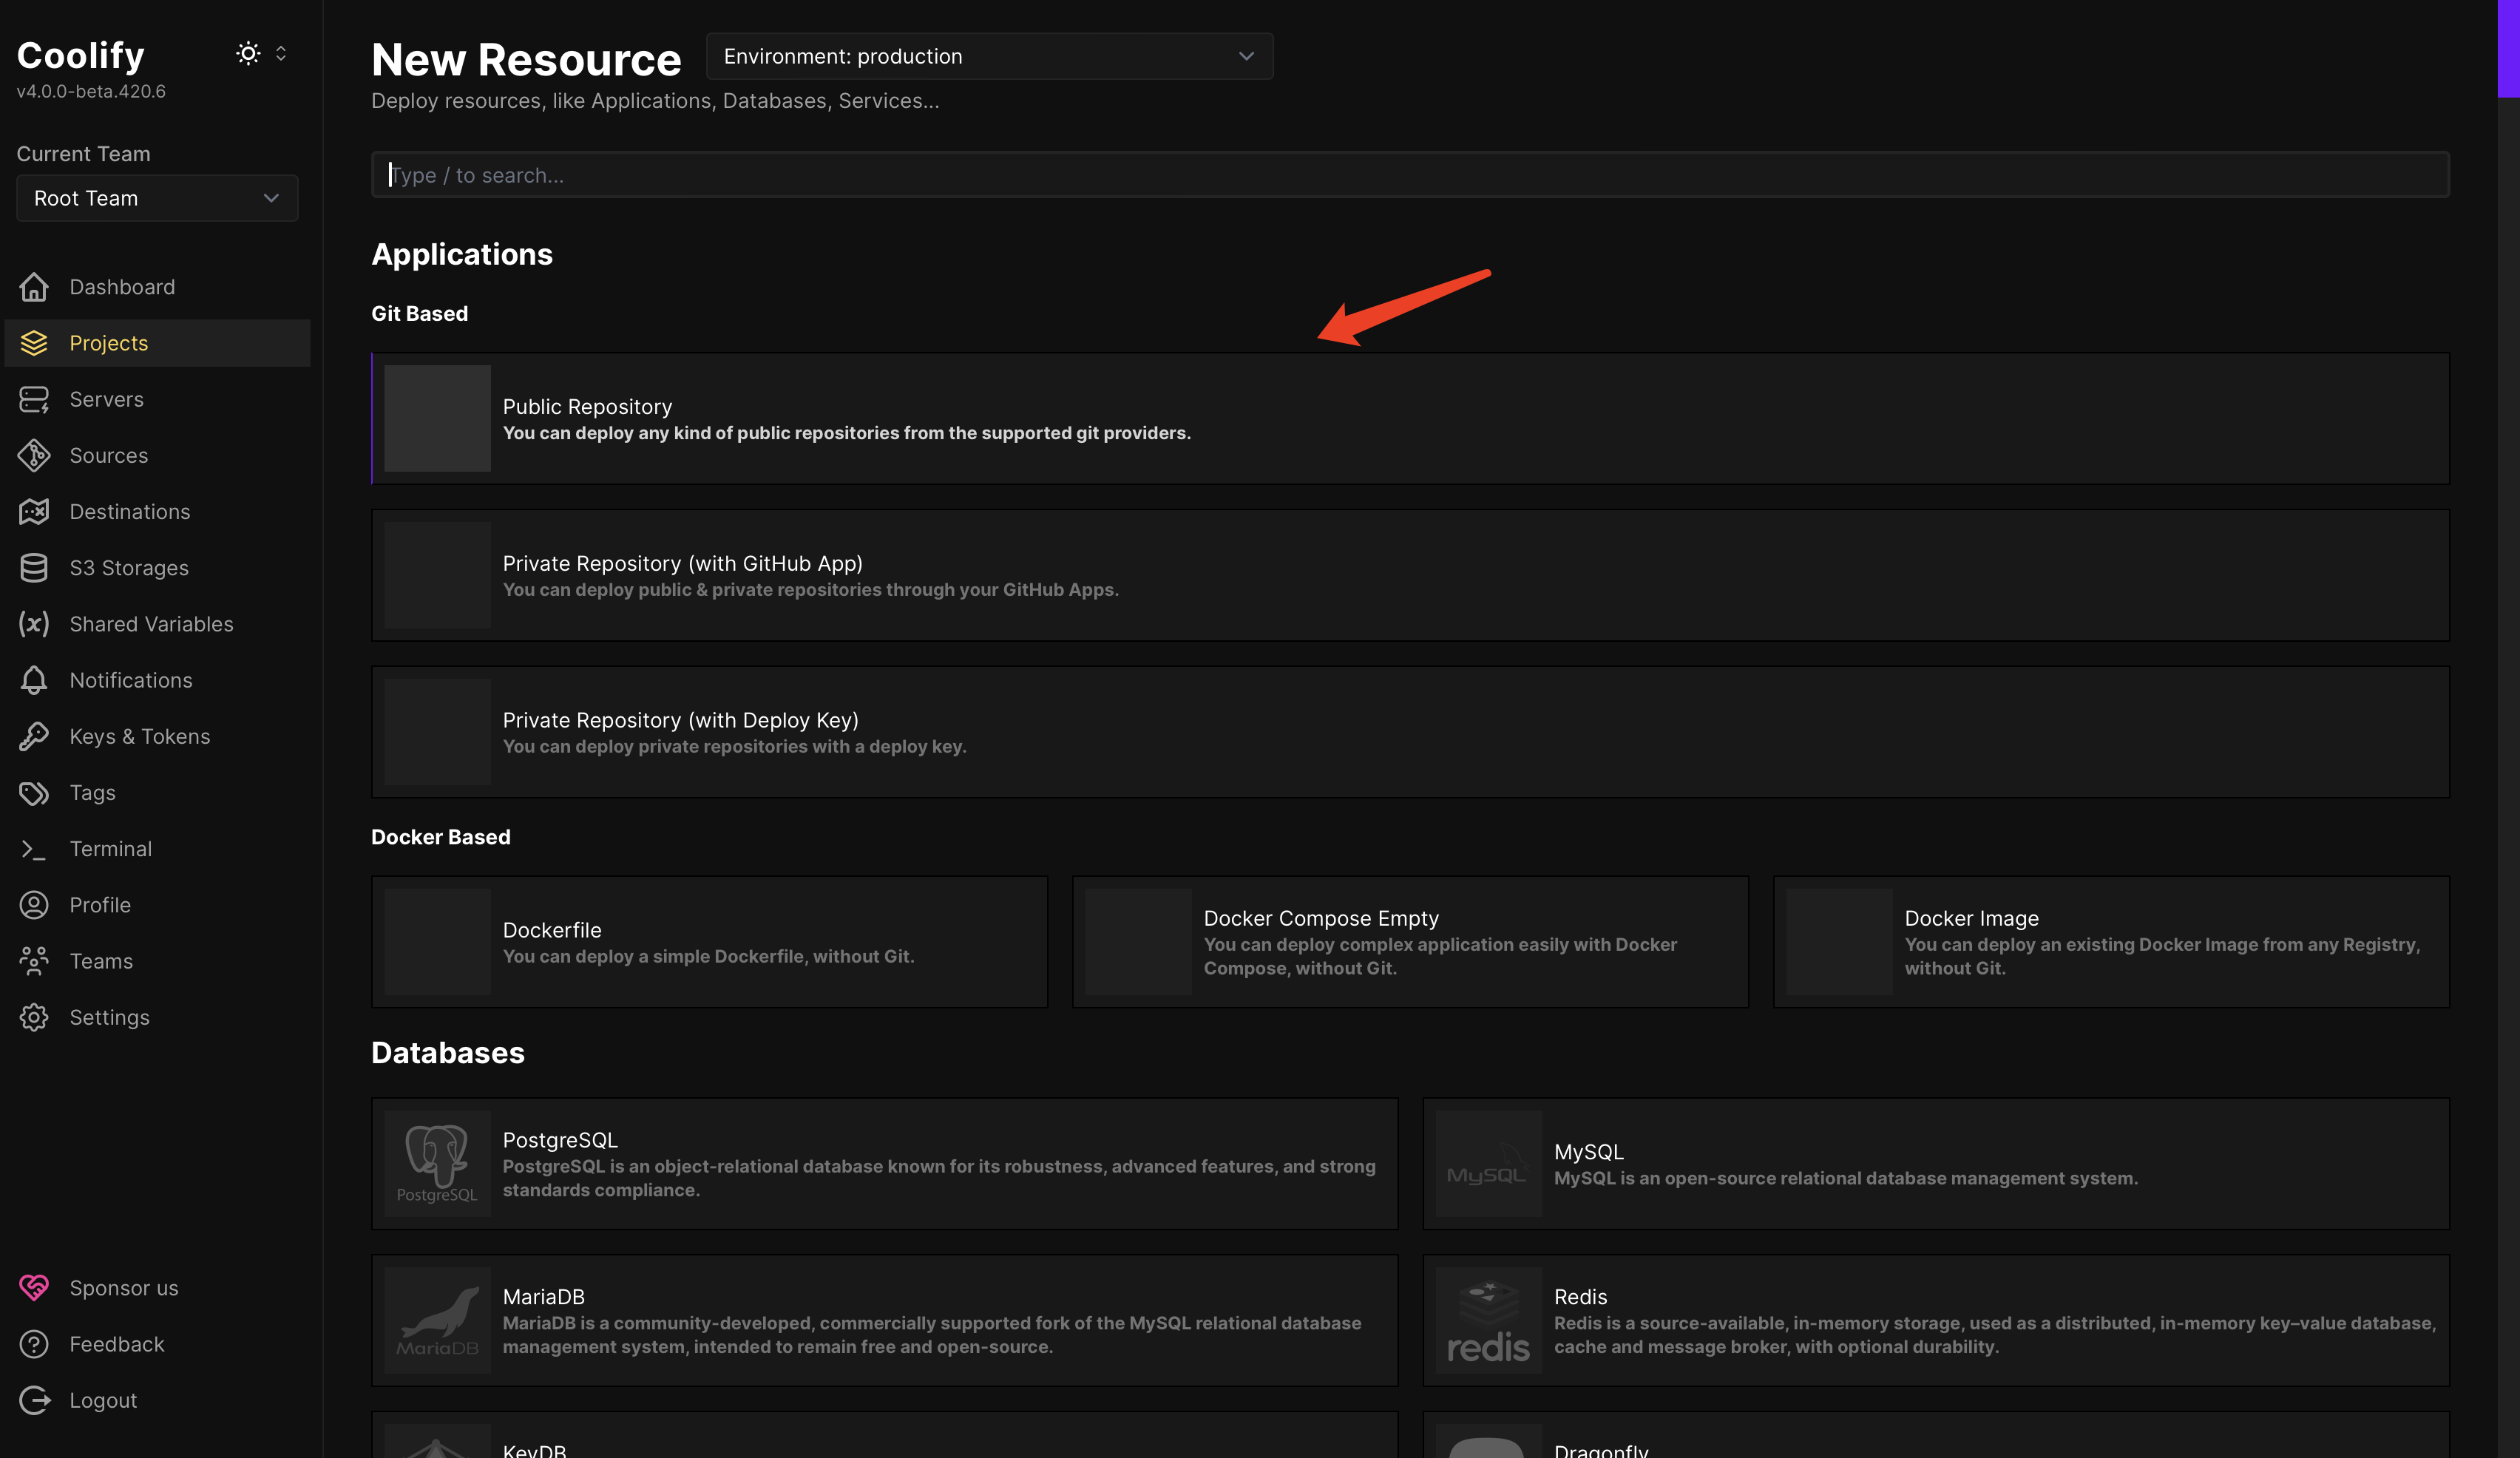
Select Deployment Method
Choose Public Repository as your deployment option.
If you’re using your own repository, please select Public Repository or Private Repository based on your repository’s visibility settings.
-
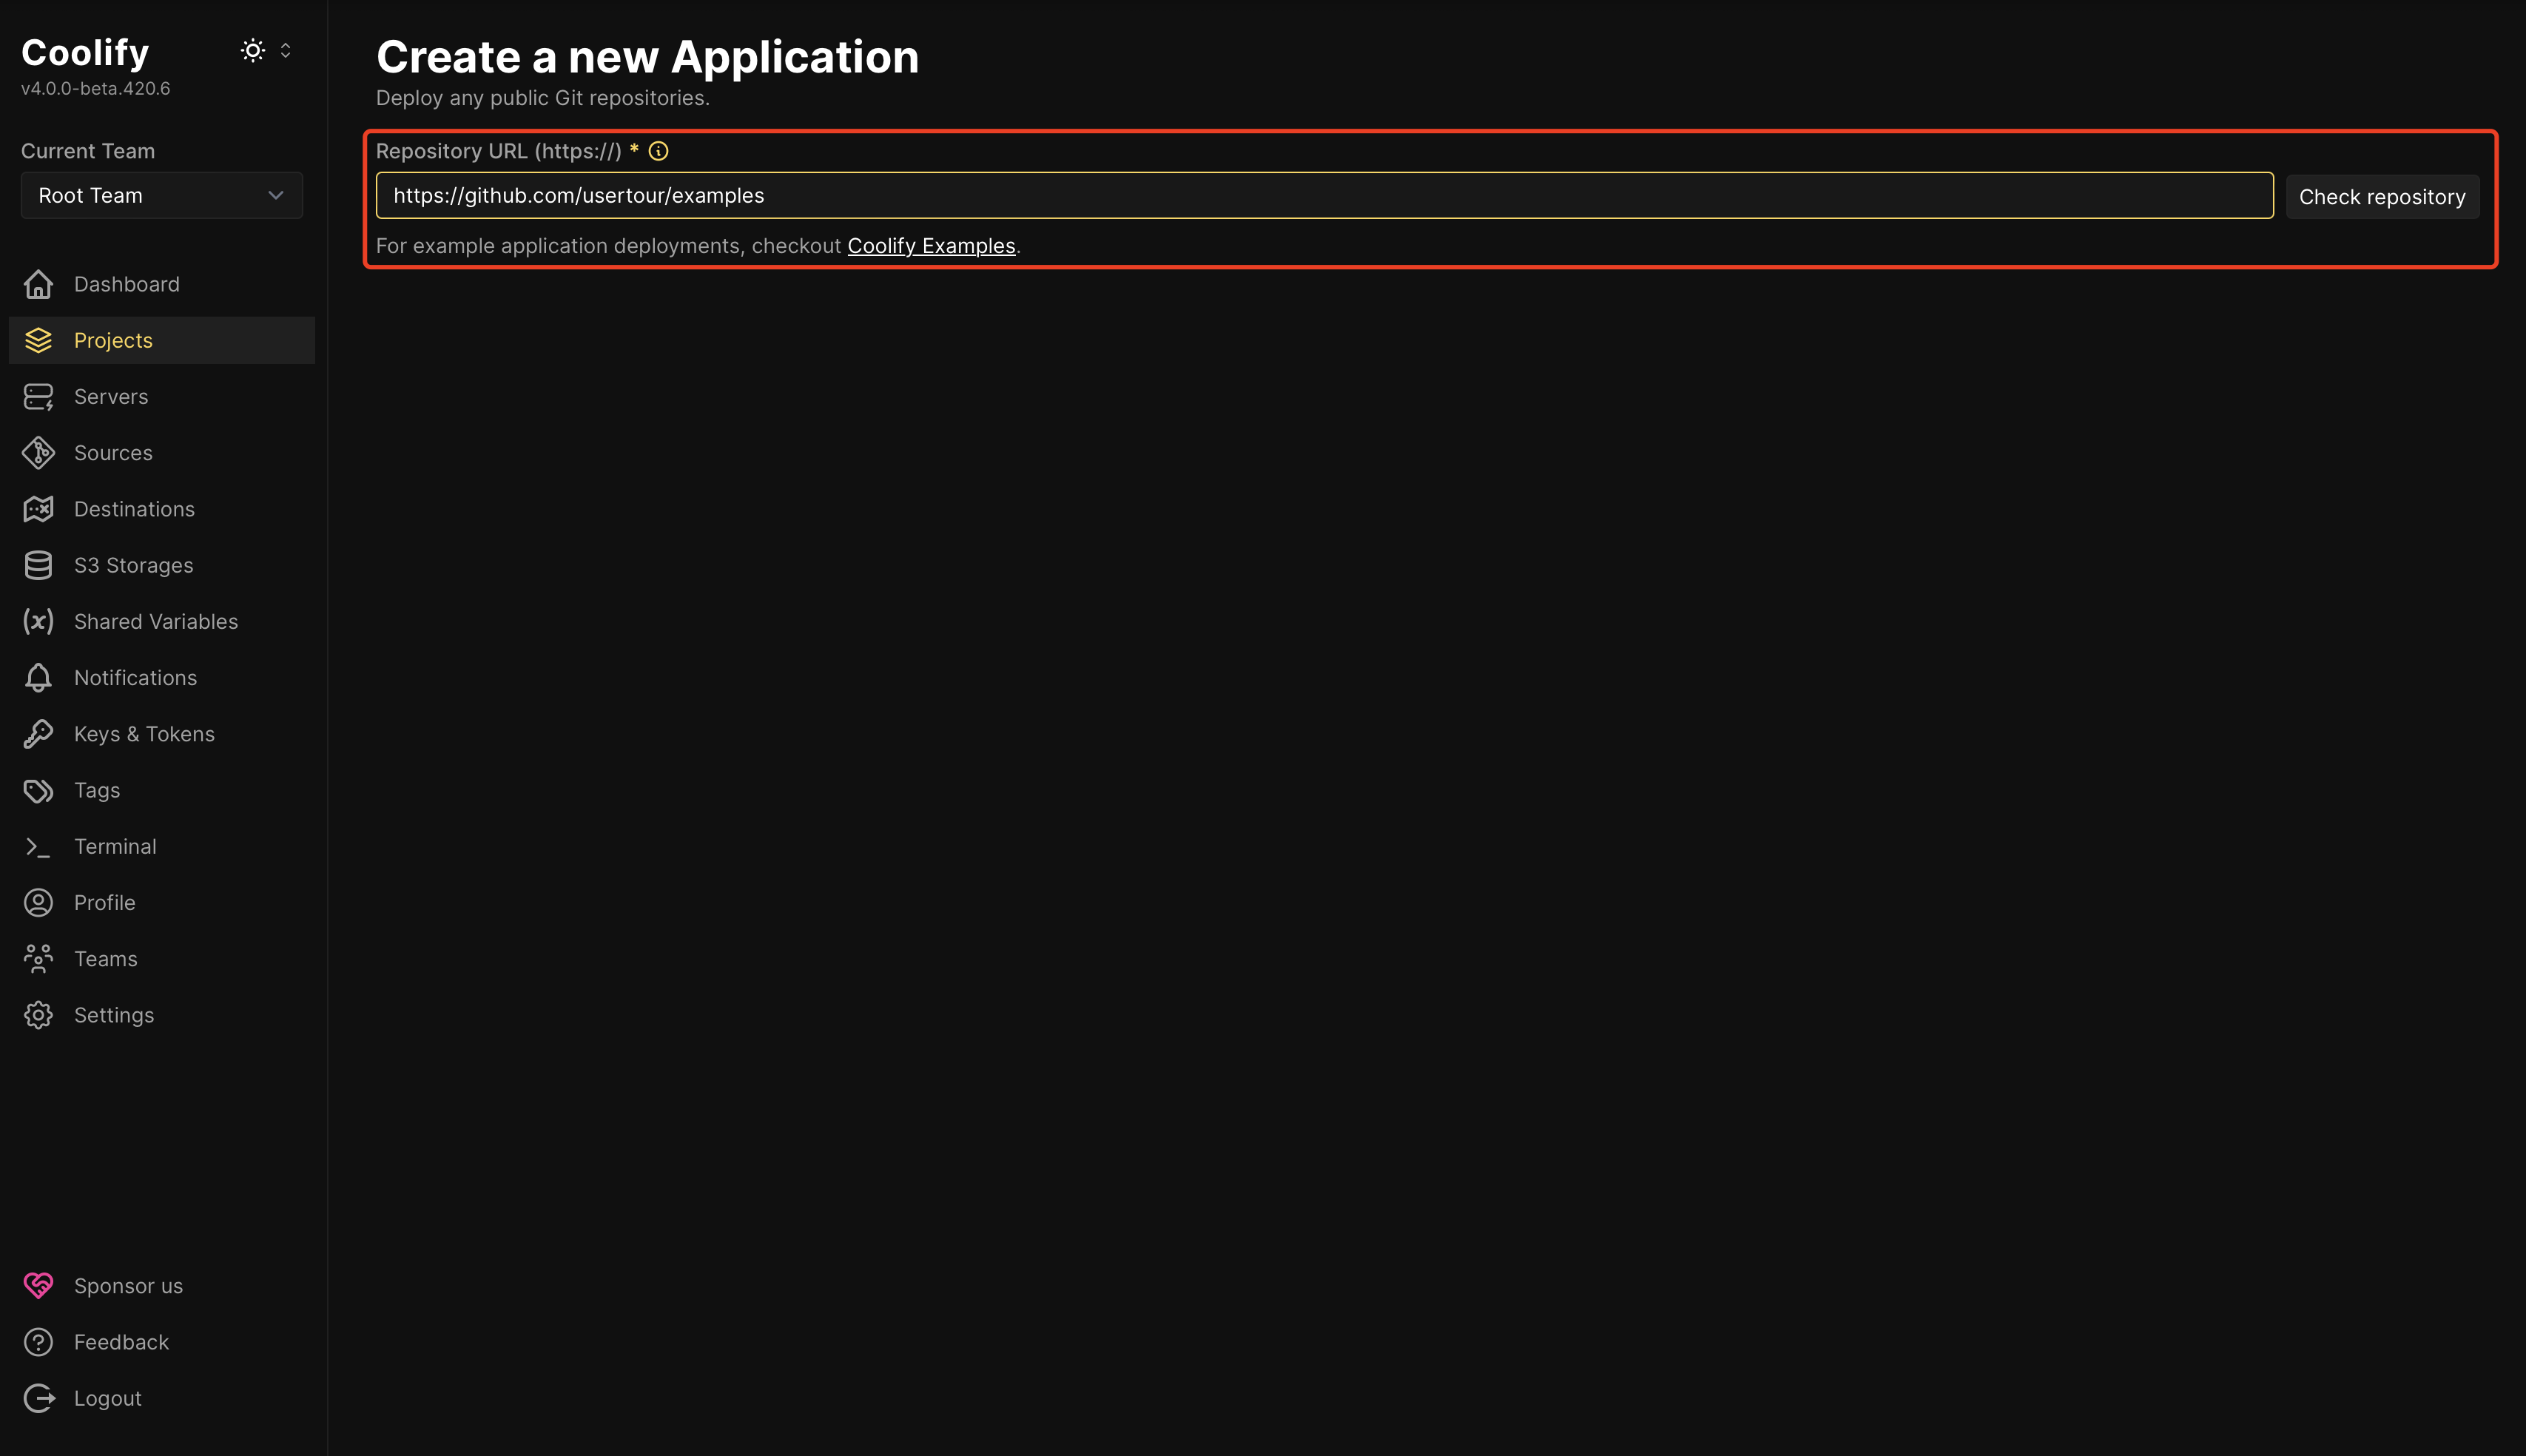
Configure Repository URL
Enter the following repository URL (this is an example, we recommend using your own configuration):
Then click Check repository to validate the connection.Recommendation: We suggest cloning the code to your own repository and maintaining the configuration yourself for better control and customization.
-
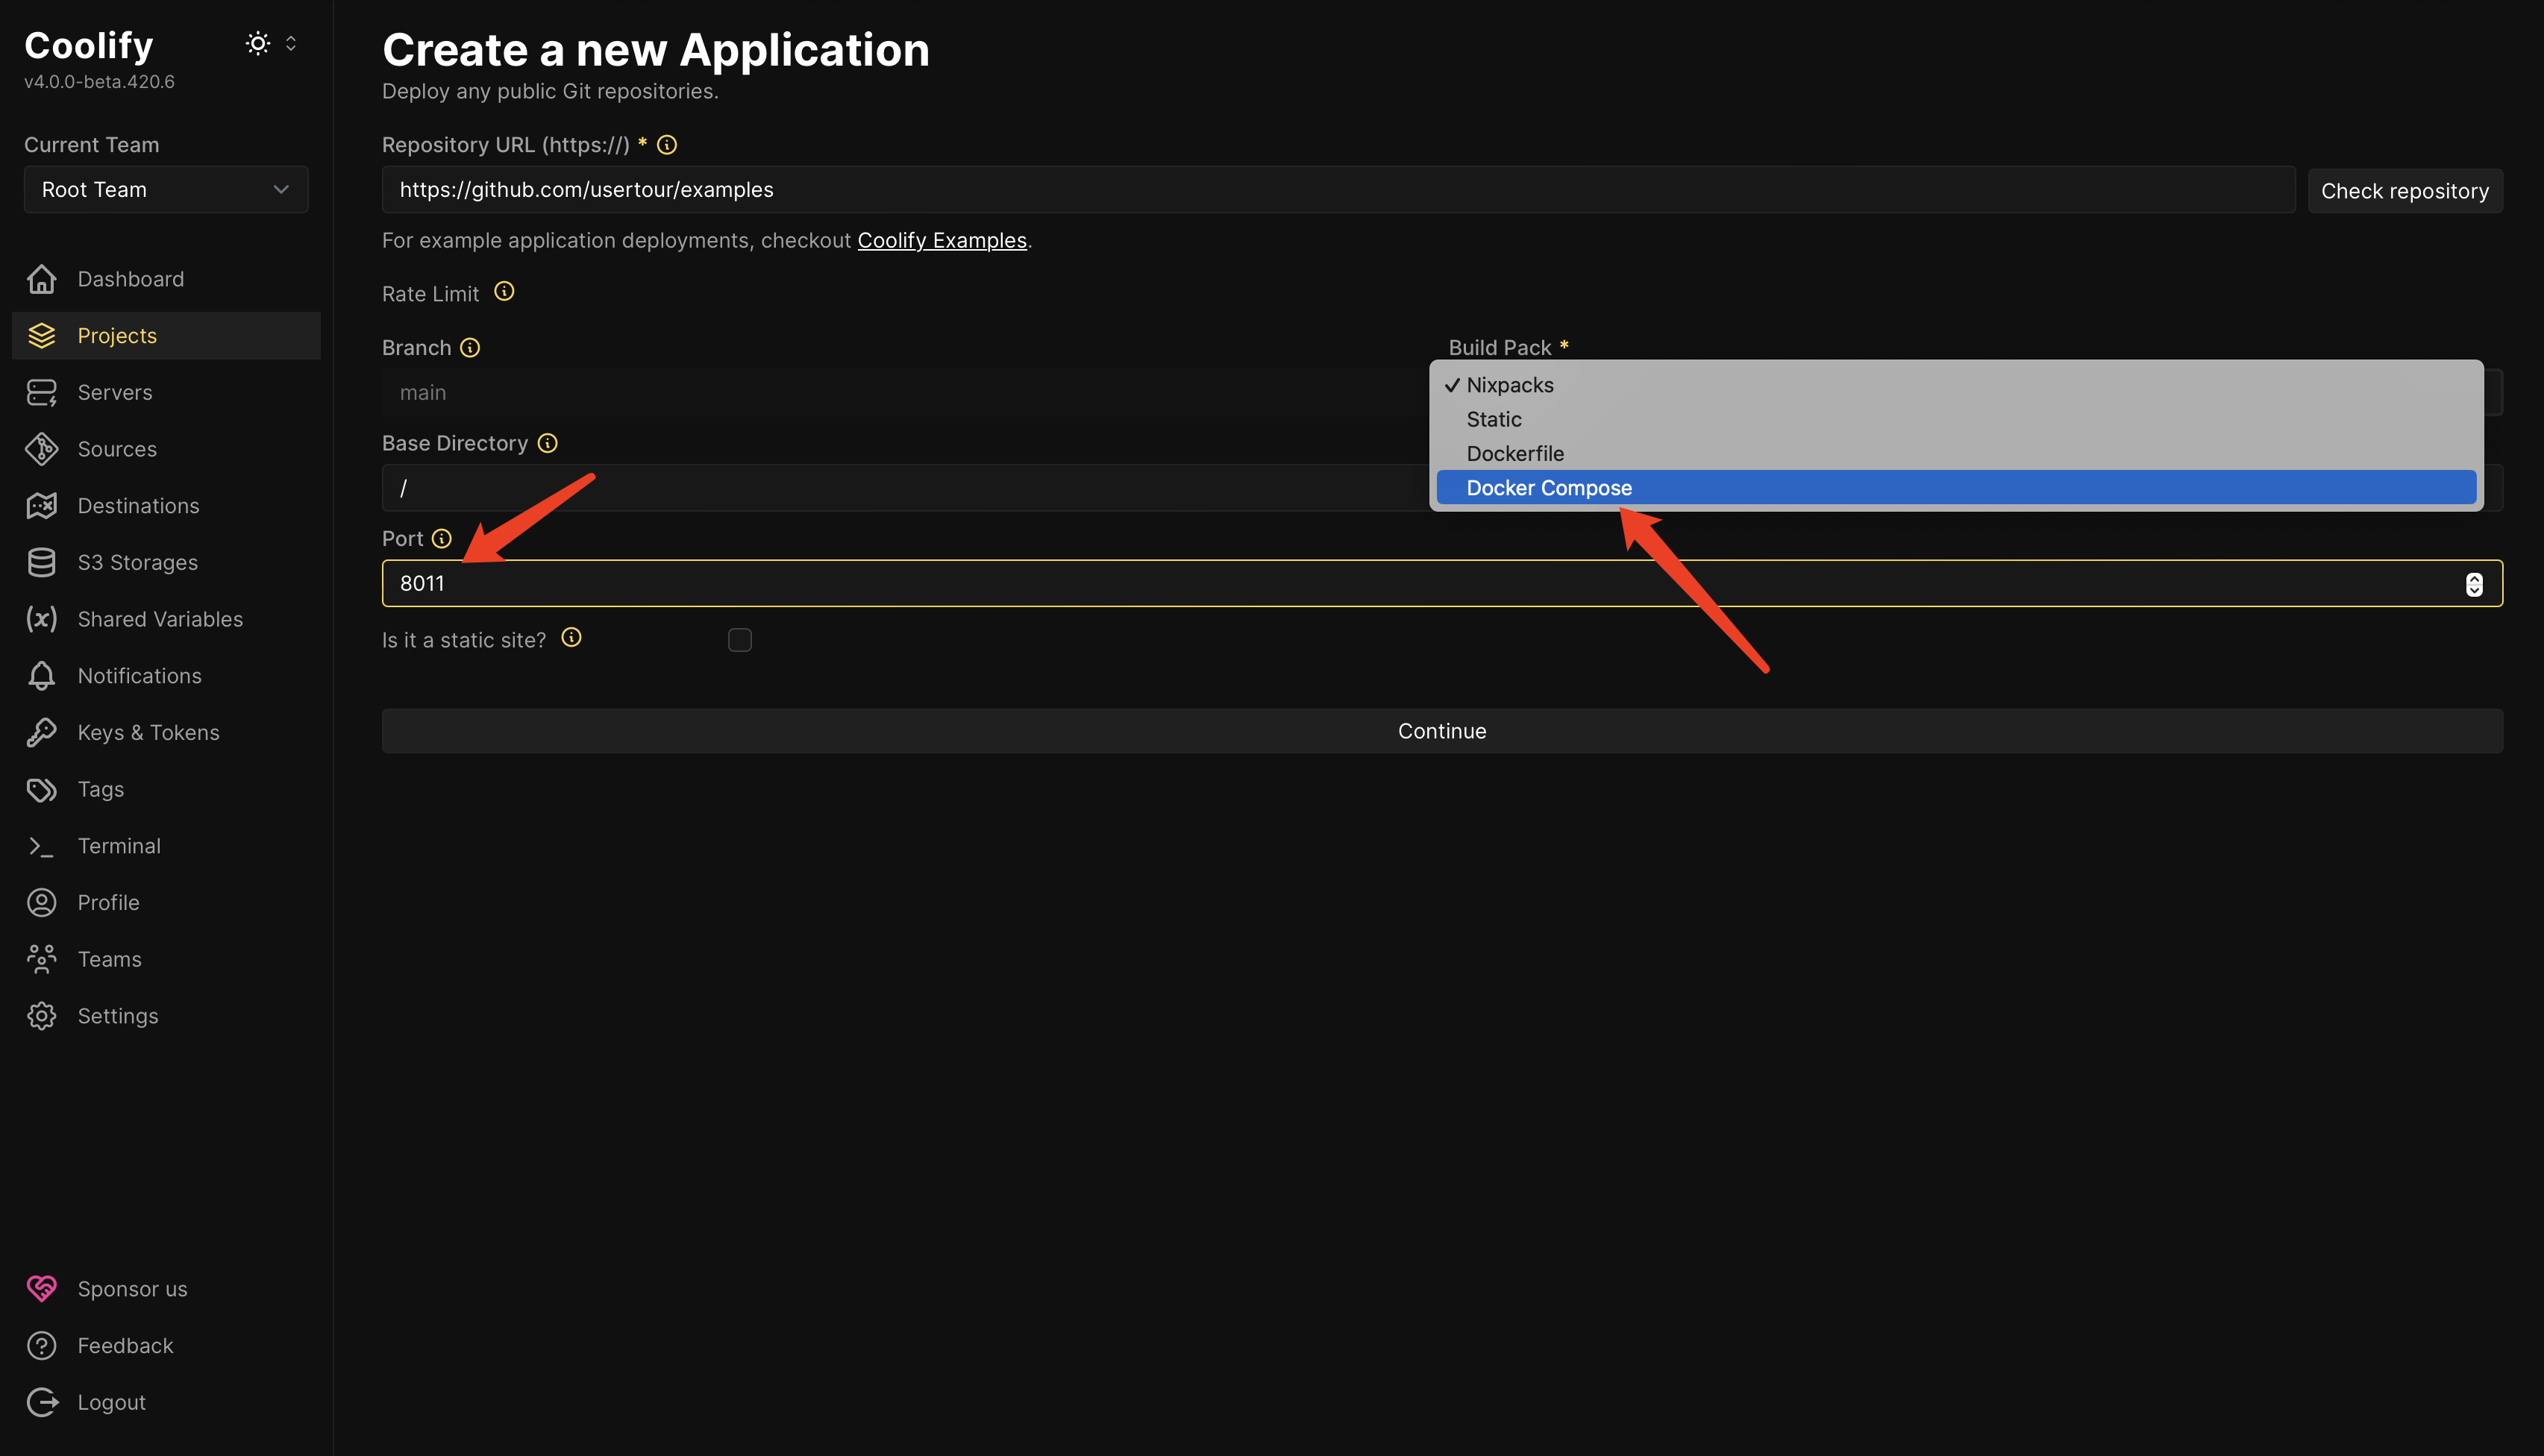
Select Build Pack
Choose Docker Compose as your build pack and click the Continue button.
You can also choose Dockerfile to deploy only Usertour (without Redis and PostgreSQL).
-
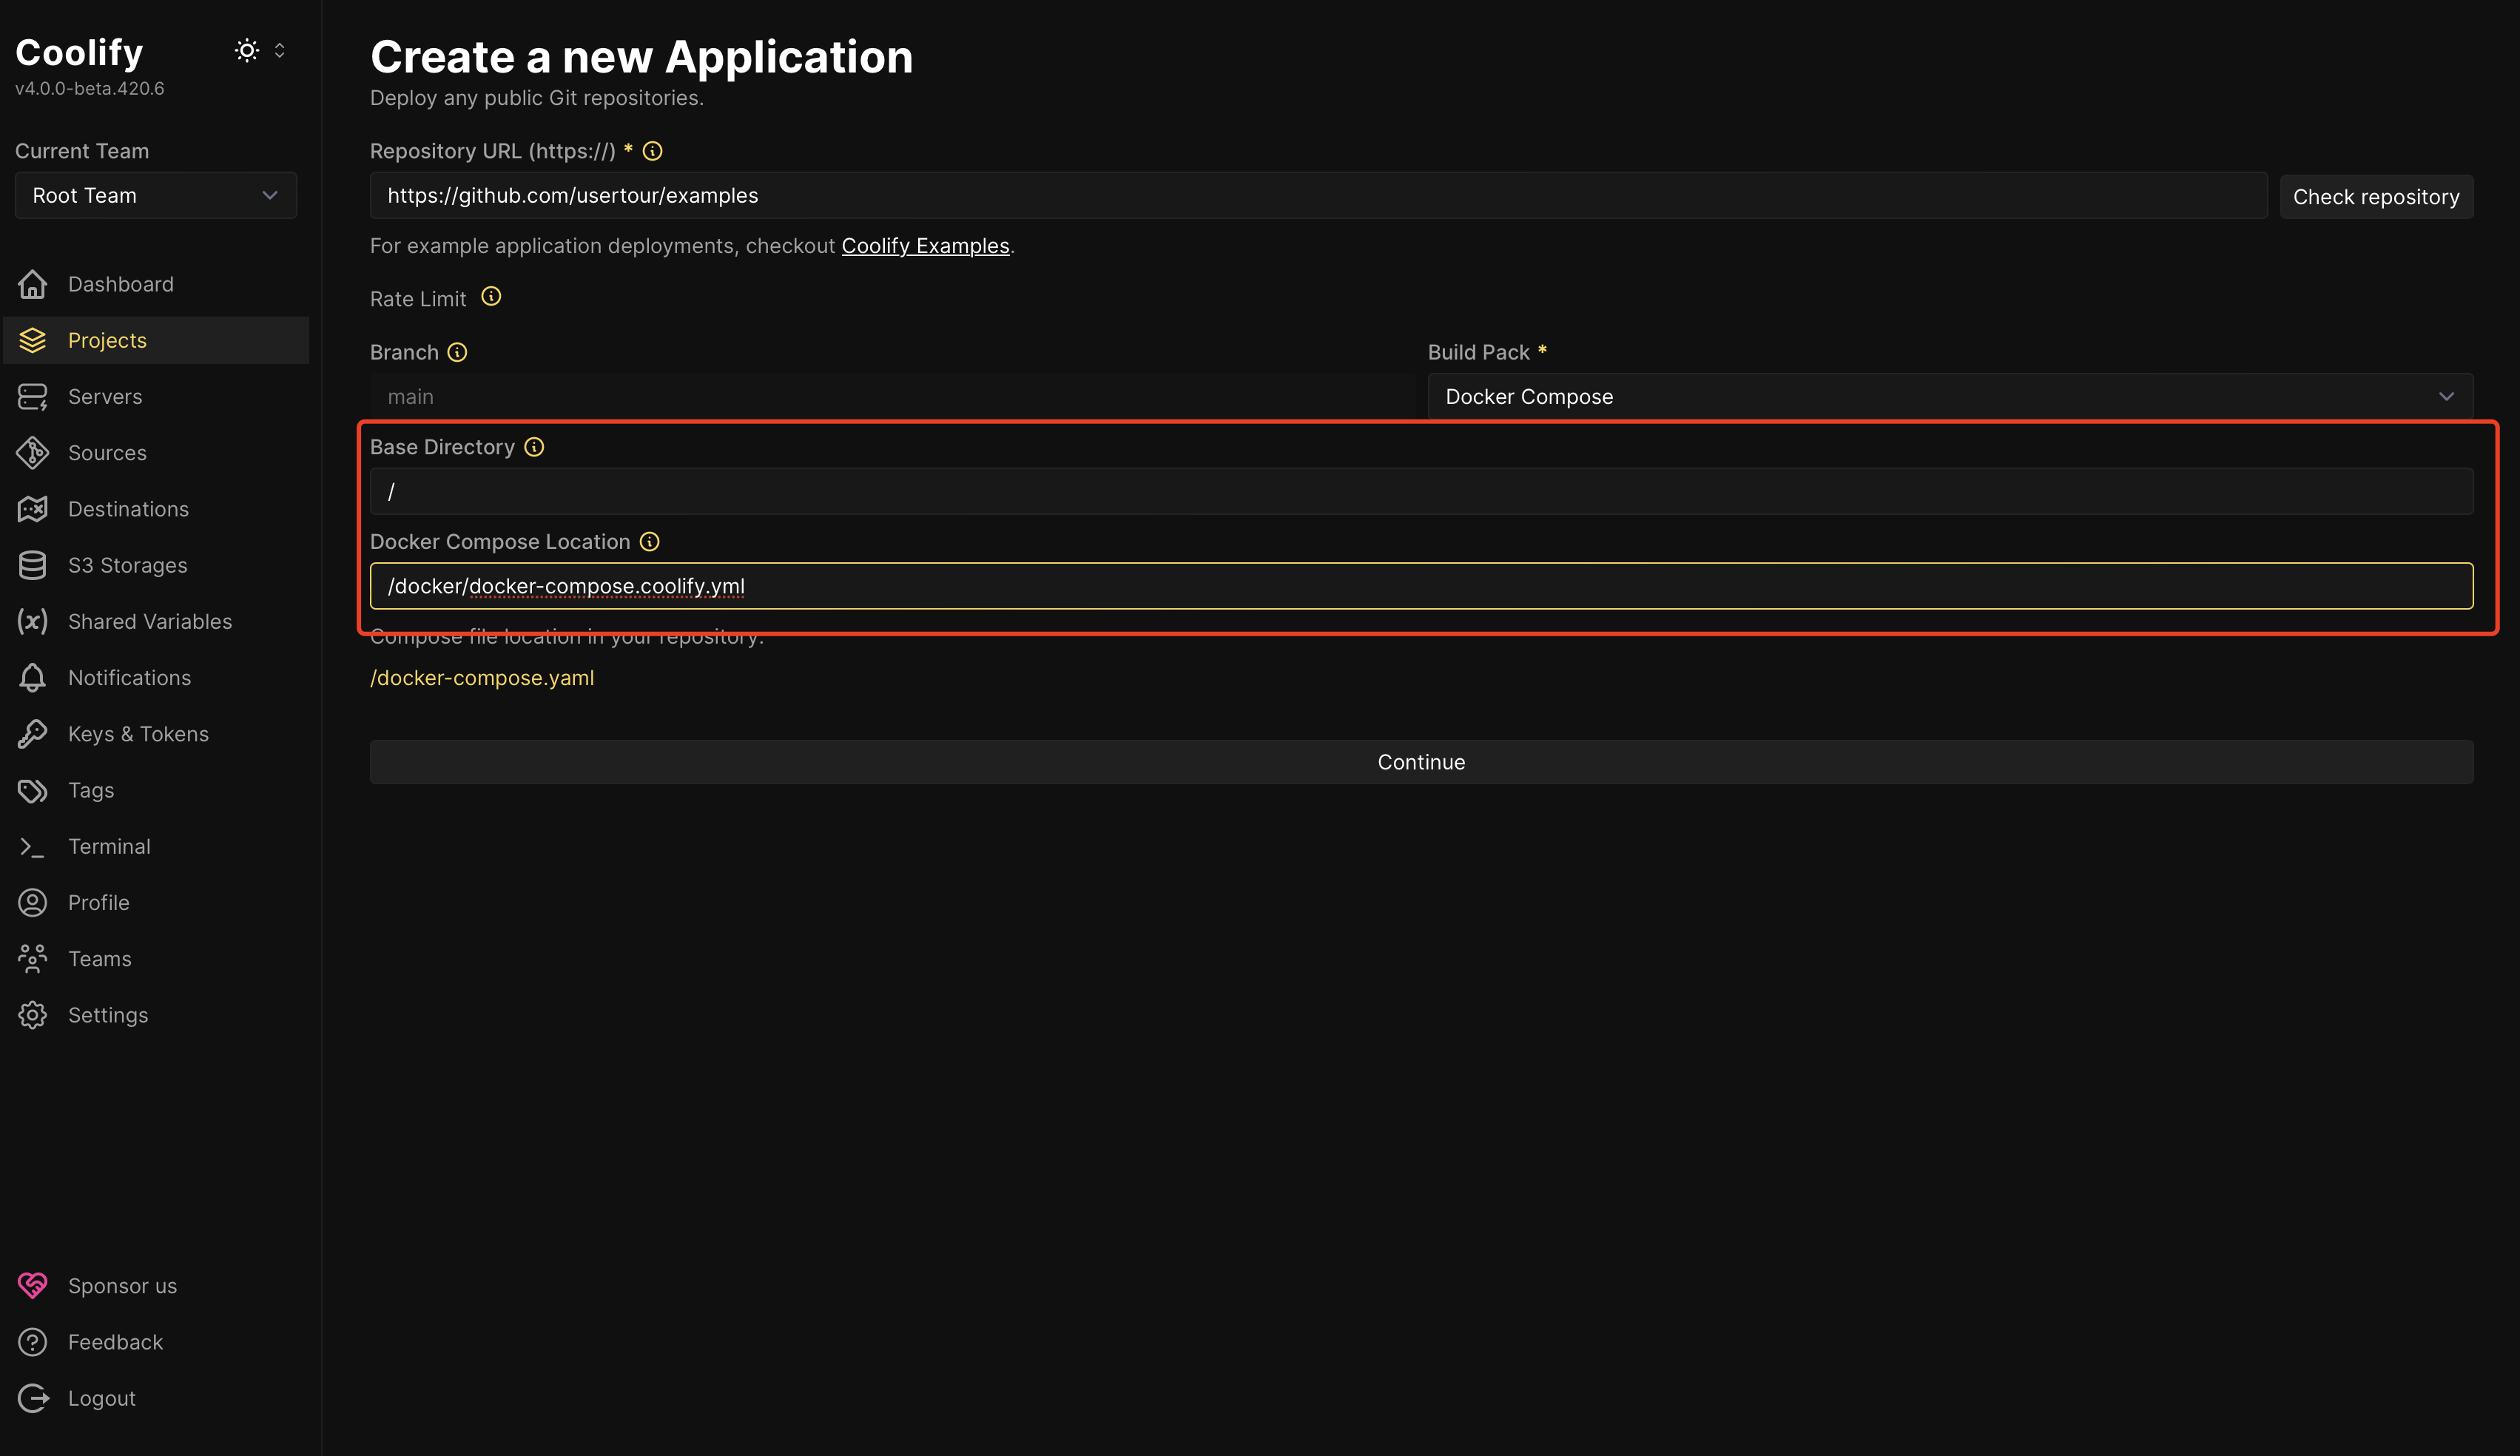
Configure Docker Compose Location
Update the Docker Compose location to:
If you’re using your own repository, please configure this path according to your repository’s directory structure.
-
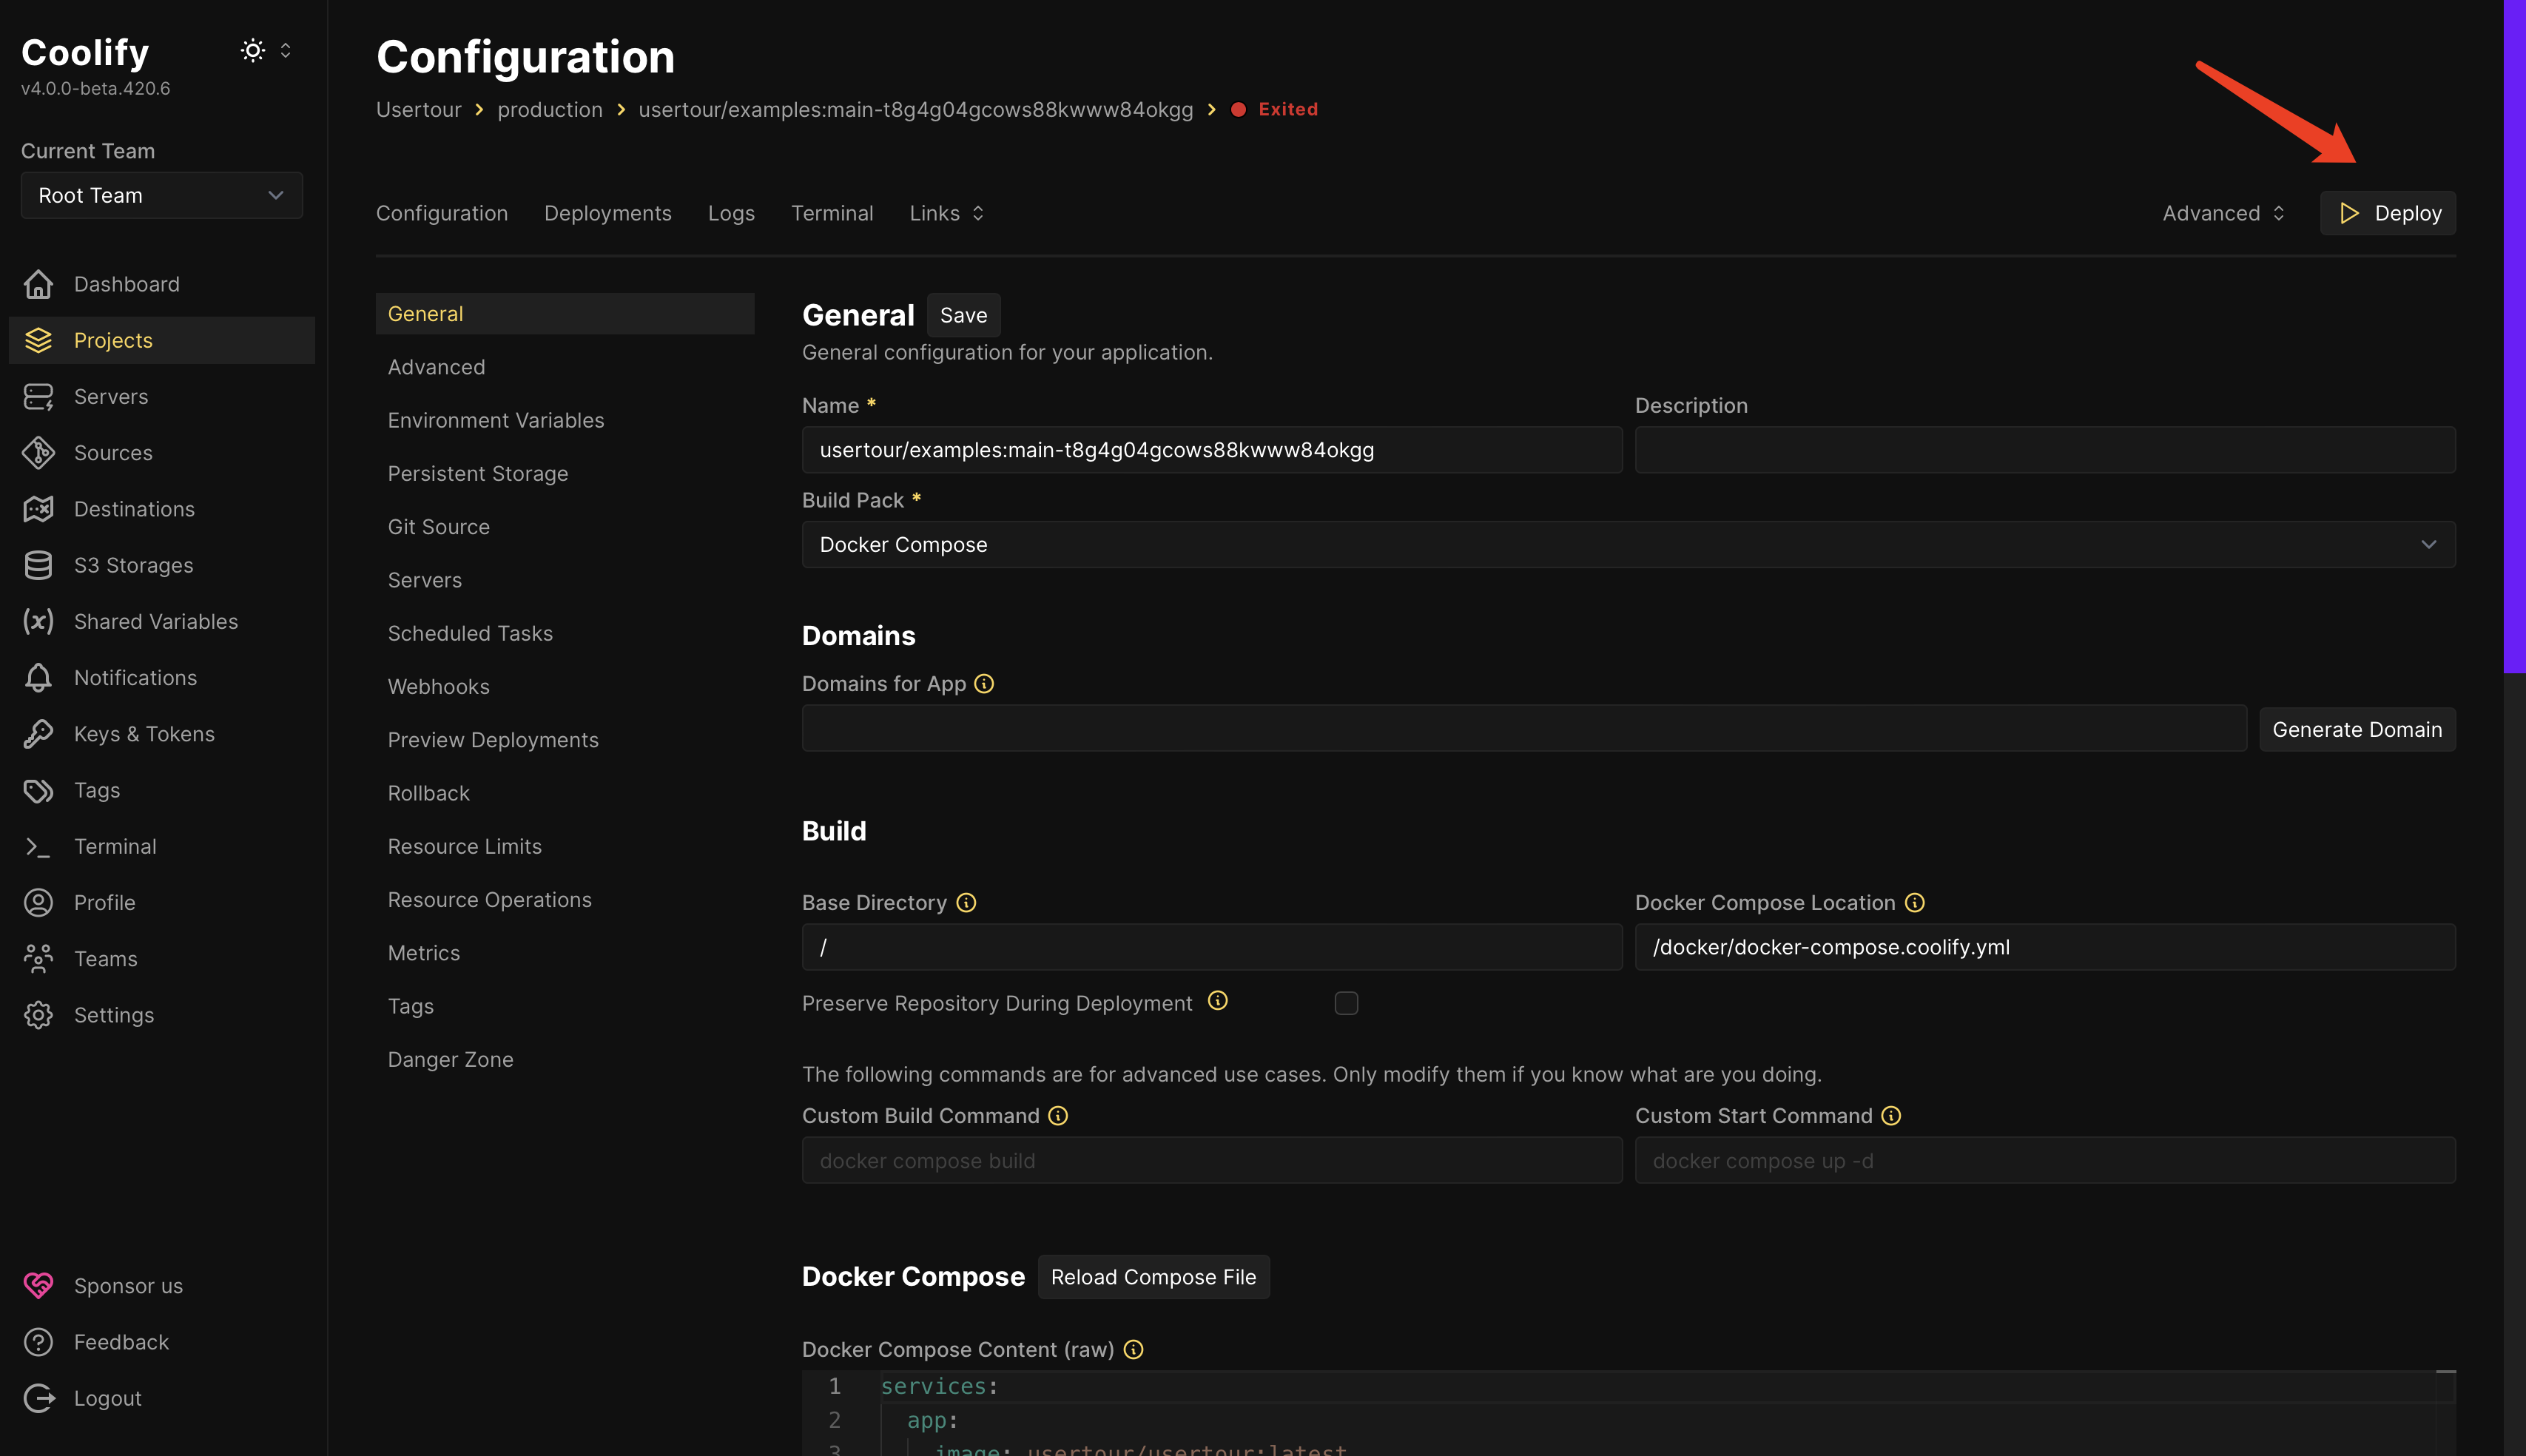
Initiate Deployment
Click the Deploy button to start the deployment process.
-
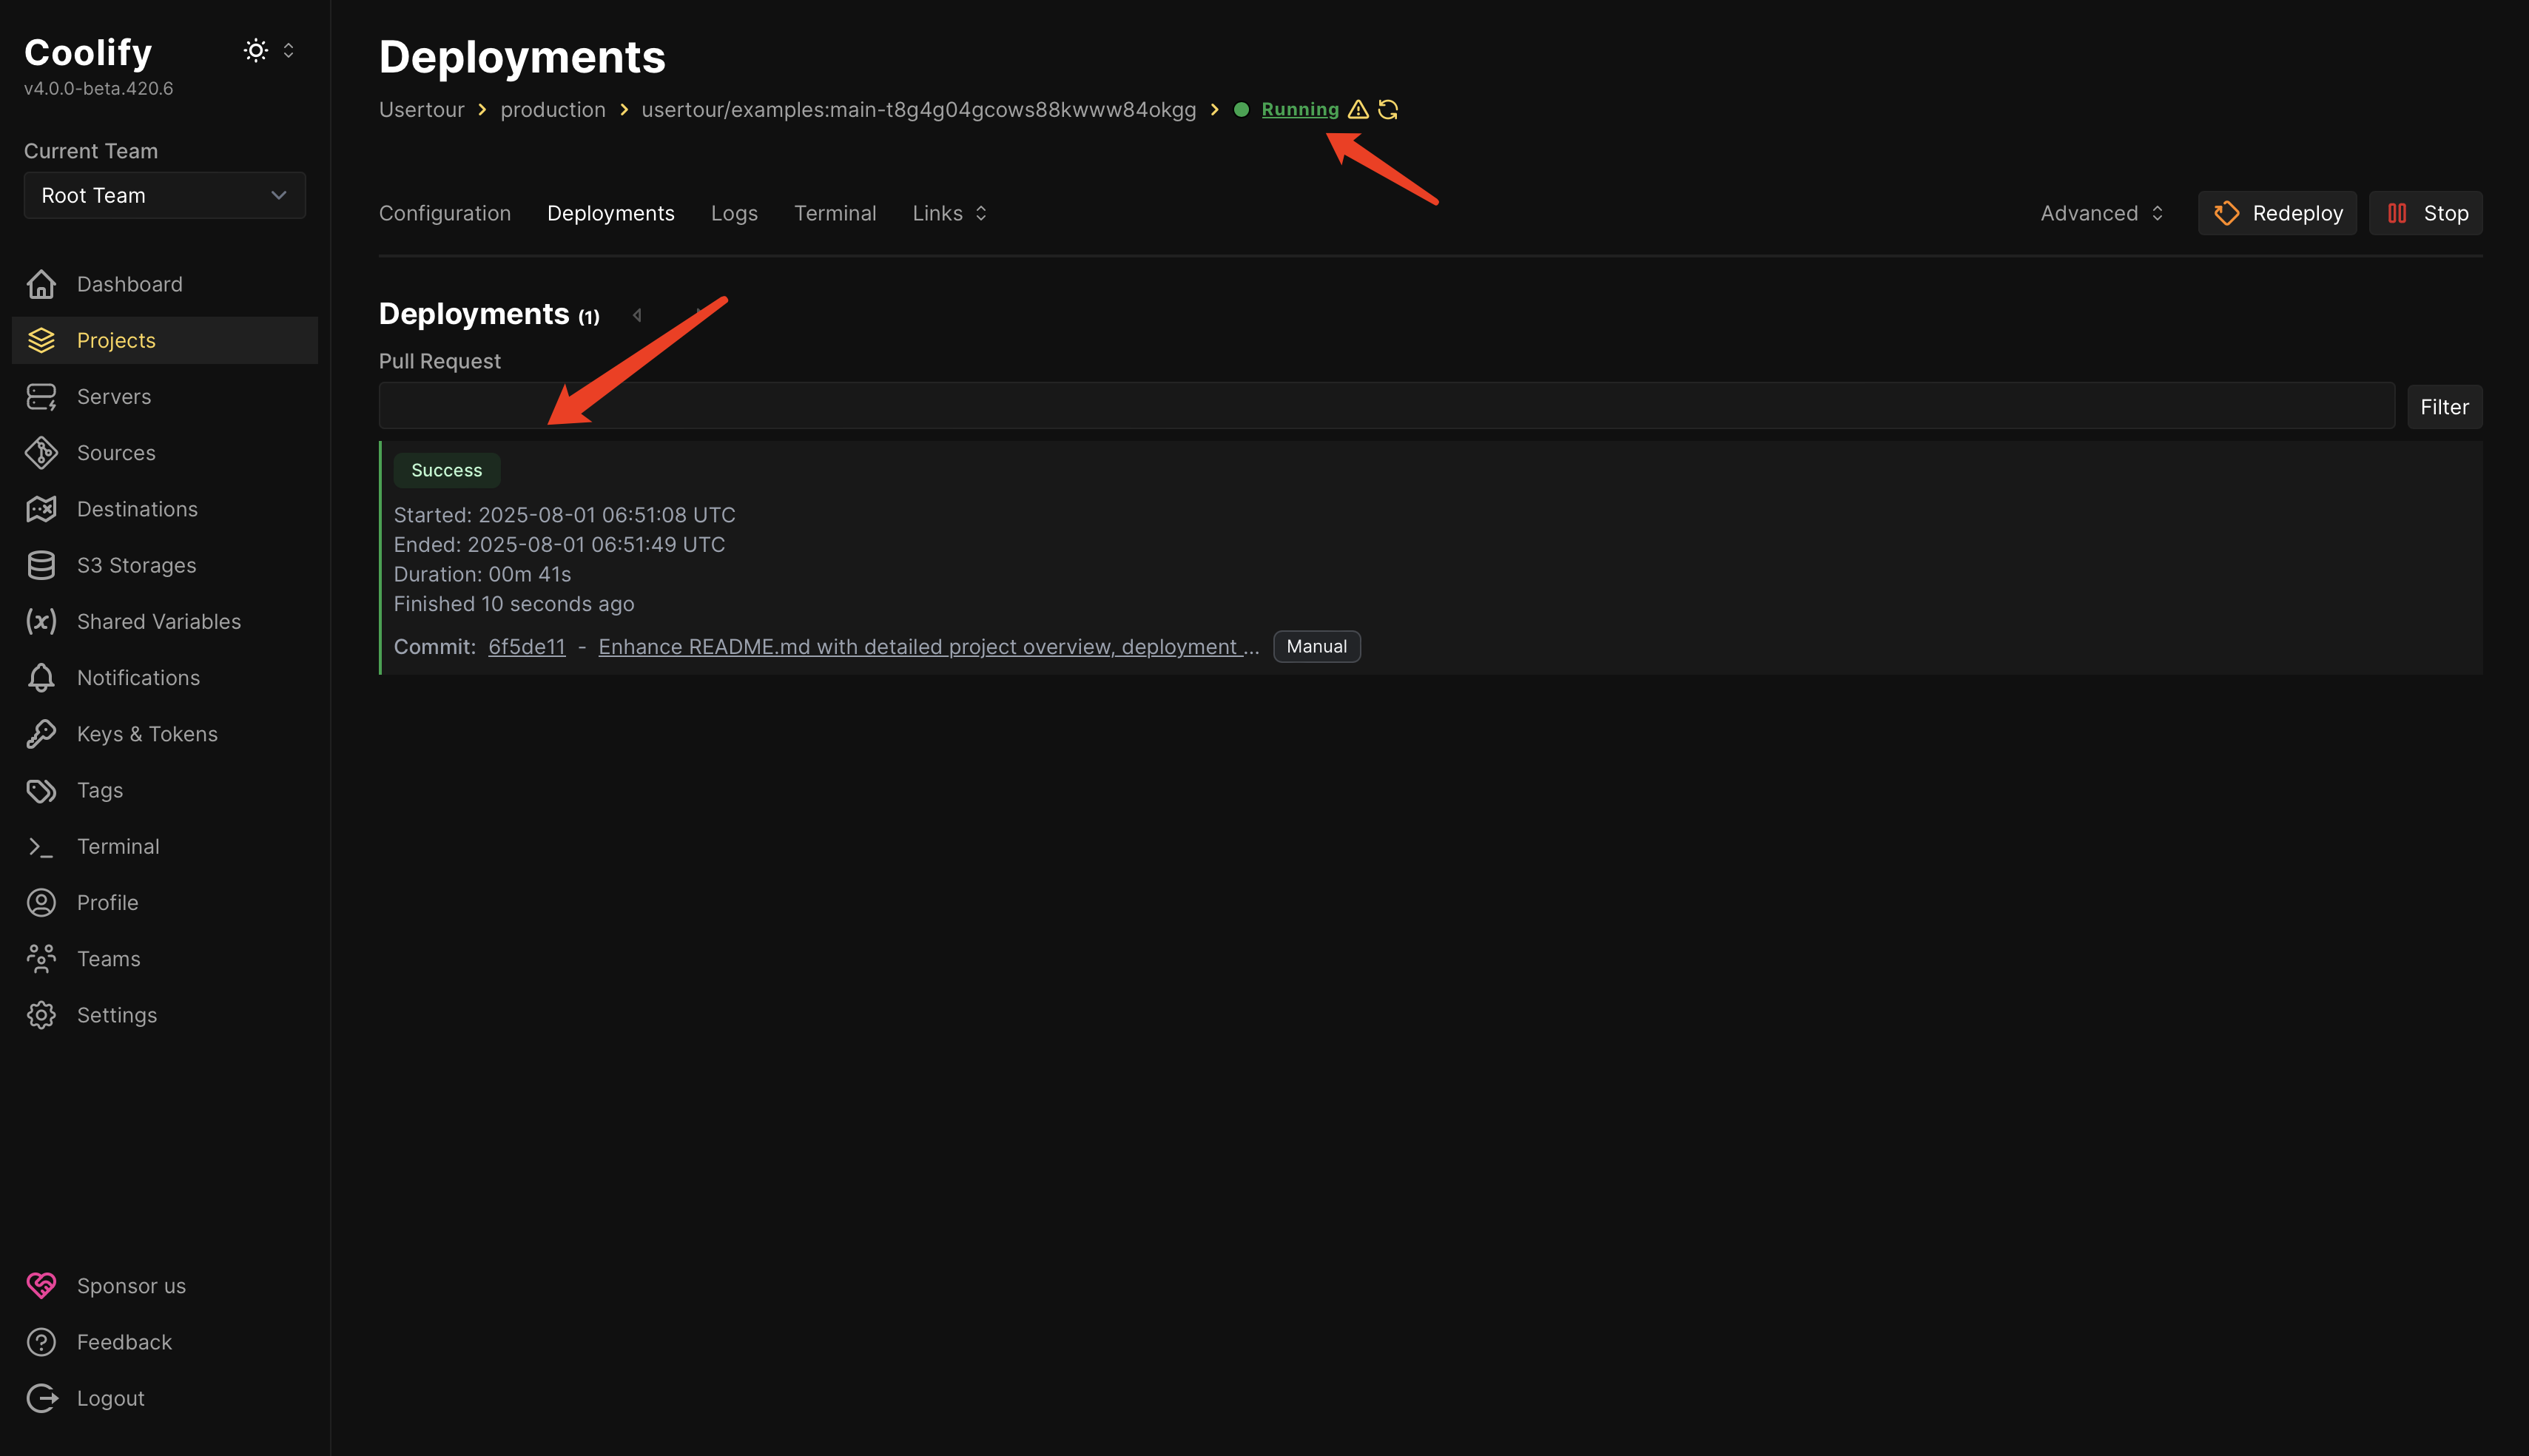
Verify Deployment Status
Once deployment completes successfully, you should see:
- Green Running status
- Deployments showing success
Accessing Usertour
-
Initial Access
- Navigate to
http://<your-server-ip>:8011or your configured domain and port - Note: Usertour runs on HTTP by default. For HTTPS, you’ll need to set up a reverse proxy
- Navigate to
-
Set up the first admin account
- Open the site in your browser
- On a fresh self-hosted deployment, Usertour will guide you to create the first System Admin account
- After setup, sign in with that account and open System Admin from the account menu
-
Upgrading older deployments
- If you are upgrading from an older self-hosted version and do not yet have a System Admin, assign one manually before signing in
- A PostgreSQL example is available in the System Admin guide
- If you are running version
0.5.0or earlier, the seeded bootstrap admin is stilllisa@simpson.comwith passwordsecret42