Overview
Event Trackers let you capture product behavior directly in Usertour with a faster, more flexible setup for common tracking needs.
It is a good fit when you want to answer questions like:
- Are users clicking a key action?
- Did they finish an important setup step?
- Which product moments should trigger onboarding or segmentation?
- What behavior should define an engaged user?
Once an event is being tracked, you can use it across targeting, reporting, and product analysis.
Building an event tracker
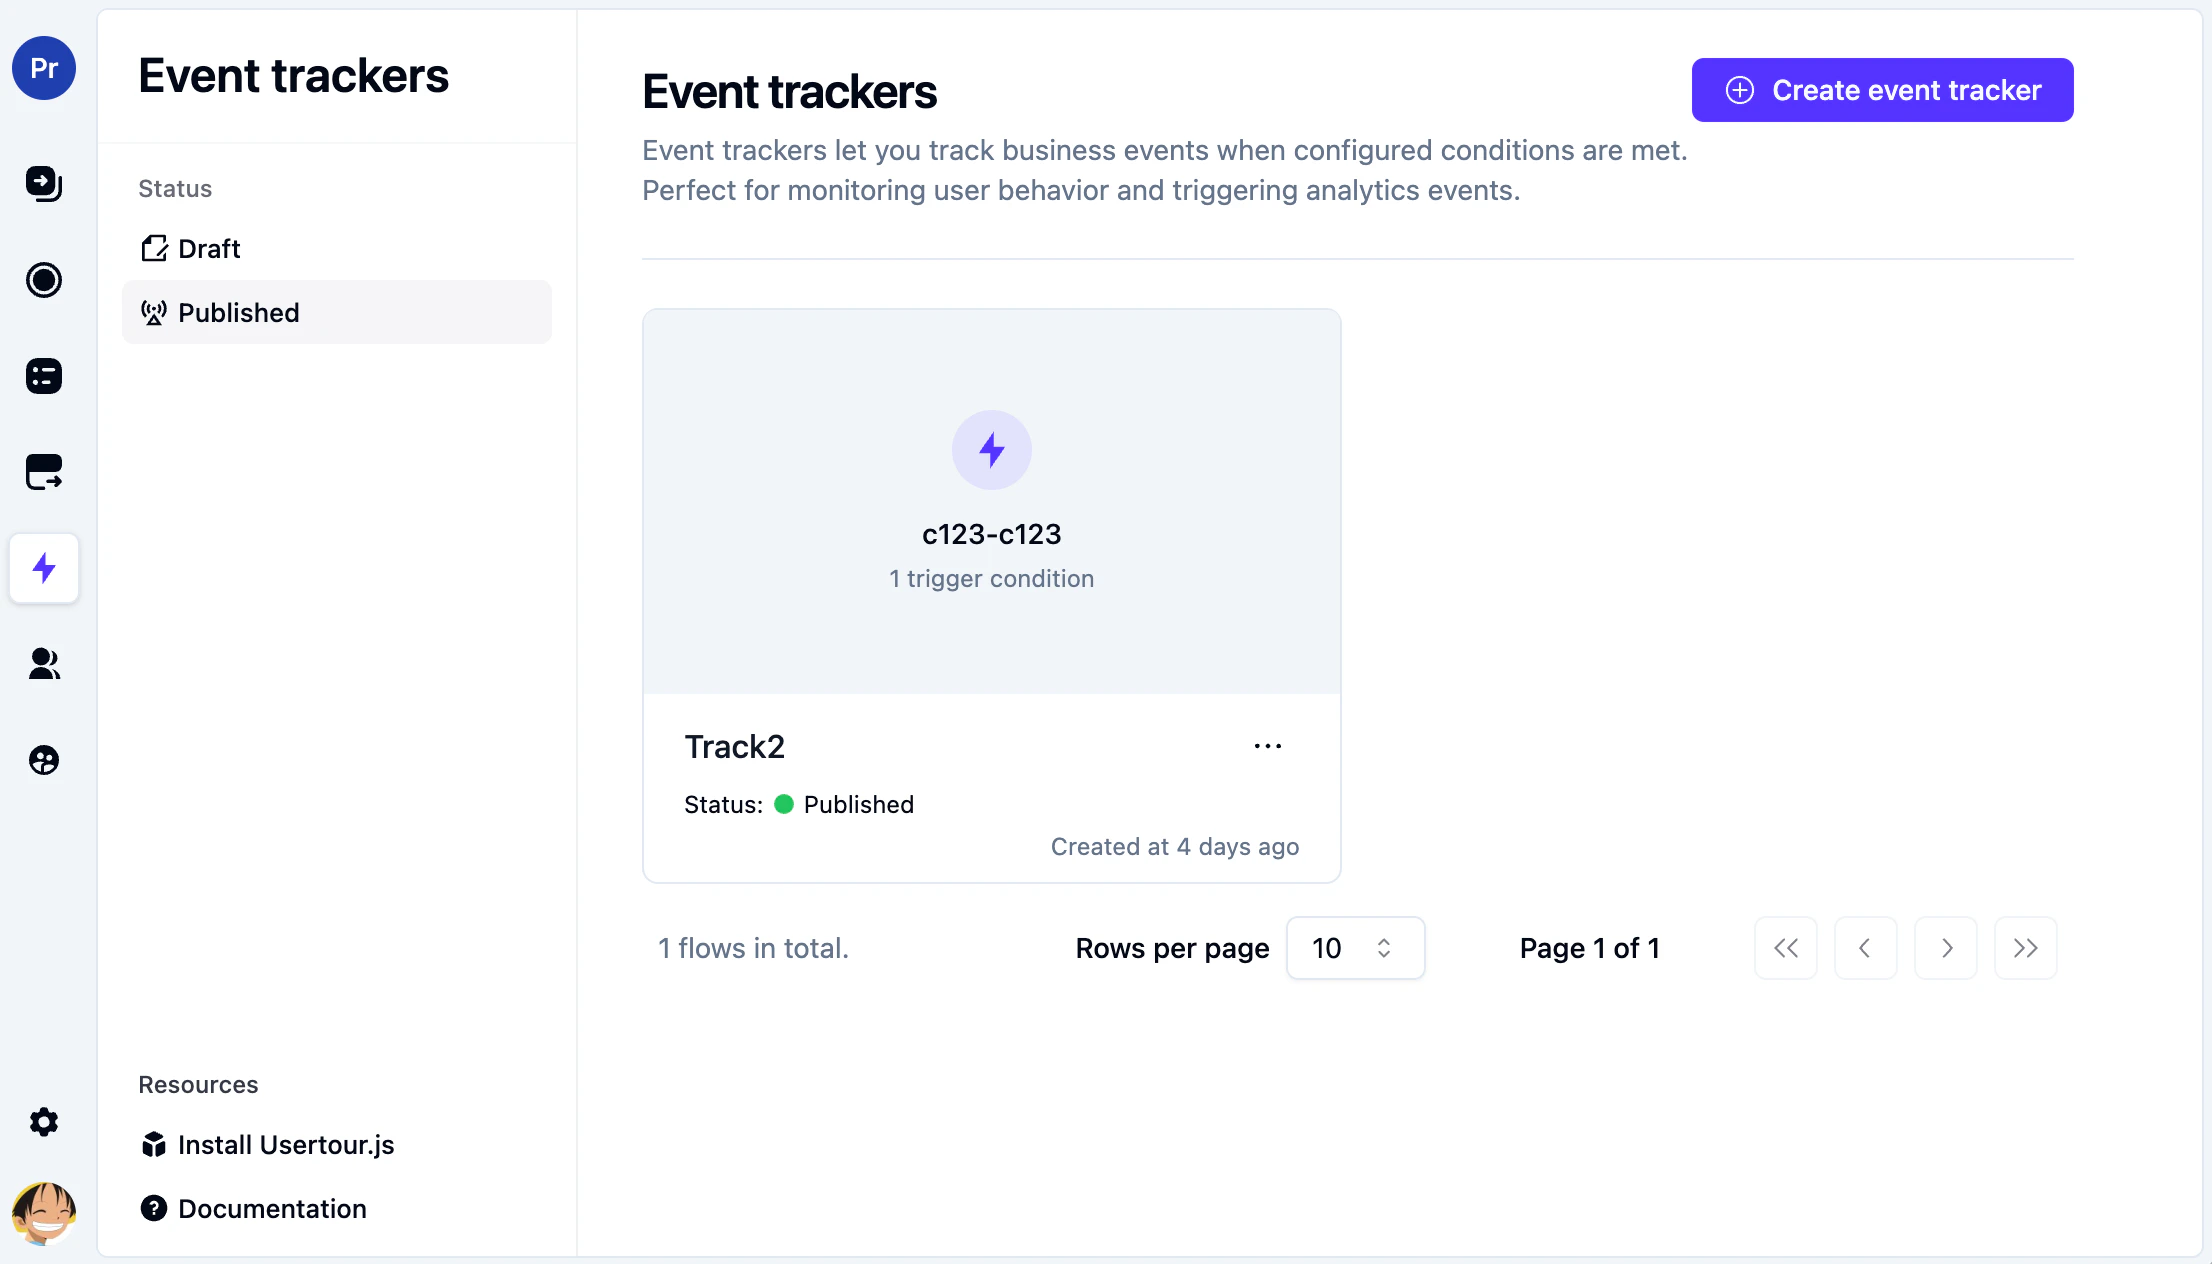
To create a new tracker:
- Open Event Trackers in the sidebar
- Click Create event tracker
- Enter a name for the tracker
- Open the tracker detail page
- Add the conditions that define when the tracker should fire
- Select or create the event that should be tracked
- Publish it when you are happy with the result
 When a tracker is triggered, it does not create a brand-new event automatically. Instead, it tracks the event you choose in the tracker detail page.
The tracker setup is split into two parts:
When a tracker is triggered, it does not create a brand-new event automatically. Instead, it tracks the event you choose in the tracker detail page.
The tracker setup is split into two parts:
- When this happens: the conditions that determine when the tracker fires
- Then track this event: the event that Usertour records when those conditions are met
Add or create the event
When setting up the tracker, choose the event you want to track or create a new one by entering a name.
If you already have the right event, you can select it from the list. If not, click Create new event and define one from there.
Use a name that clearly describes the product action you care about.
Good examples:
Project CreatedTime TrackedChecklist Completed
We recommend using a descriptive format that includes both the object and the action, so the event is easy to understand later in analytics and conditions.
If you are creating a new event, keep the name specific and product-oriented. Names like Project Created or Time Tracked are much more useful than generic labels like Button Clicked.
Each event should also be easy to understand for both humans and systems.
For the display name, use a plain-language label that makes sense in the dashboard, such as:
Workspace CreatedInvite SentChecklist Completed
For the code name, use a stable technical name that is safe to keep long term:
workspace_createdinvite_sentchecklist_completed
As a rule of thumb, code names should be:
- Lowercase
- In
snake_case
- Focused on the business action
- Stable even if the UI copy changes later
In the current UI:
Display name can be updated laterCode name cannot be changed after creation- Both fields currently have a 20-character limit in the form
If you are creating a new event from a tracker, think of the tracker as the trigger and the event as the reusable business action you want to record.
Add tracking conditions
Conditions define exactly when the tracker should fire.
For example, if you want to track when users click a specific element:
- Click Add condition
- Select Element
- Click Select element
- Enter your app URL
- Choose the element in your app that should trigger the event
The more precise your conditions are, the more reliable your tracker will be.
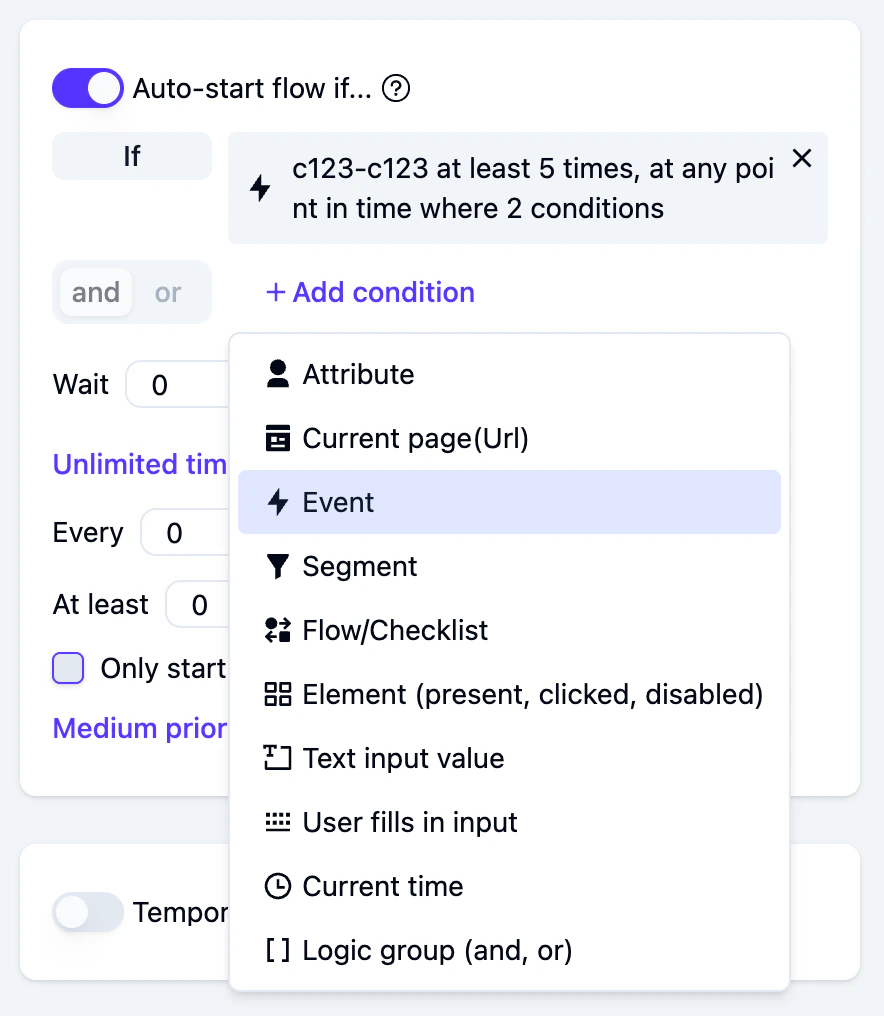
Add a Current page condition
In most cases, you should also add a Current page condition so the tracker only runs where it is actually needed.
For example, if the action only happens on a project settings page, the tracker should be limited to that page instead of scanning your whole app.
We strongly recommend adding a Current page (URL) condition. Without a URL
condition, the tracker may run on every page while looking for the interaction
it needs to detect. That can create unnecessary overhead and may lead to
performance issues or latency.
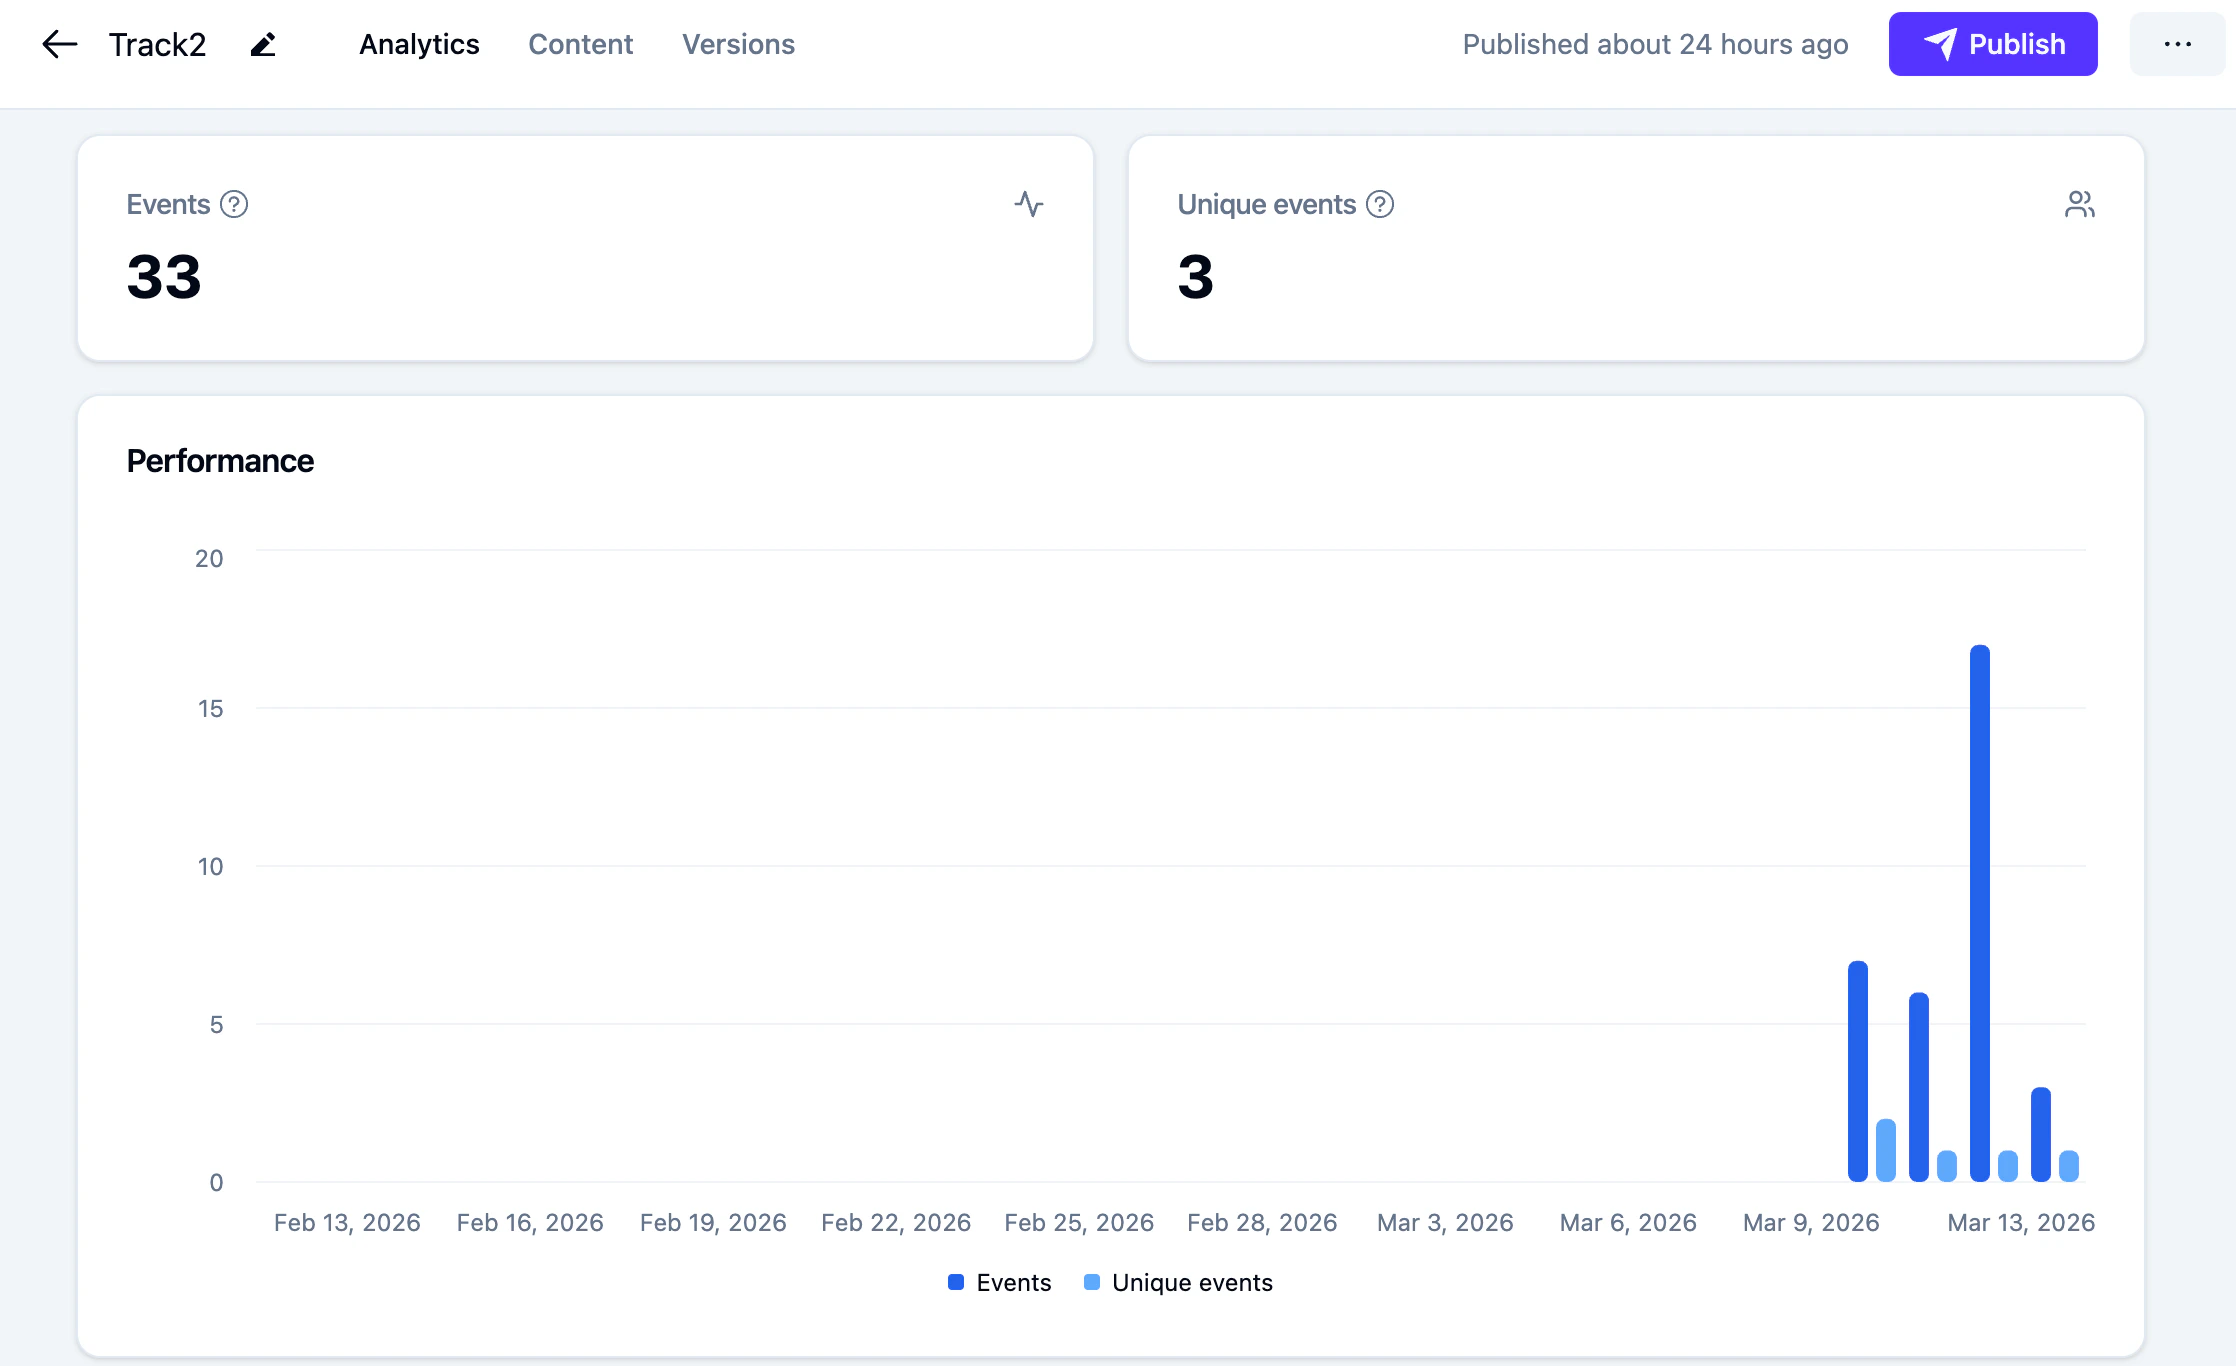
Event Tracking Analytics
Each event tracker includes an Analytics tab where you can review how that tracker is performing.
To view tracker analytics:
- Open the event tracker you want to review
- Select the Analytics tab
From there, you can see:
- Overall event volume
- Unique users who triggered the tracker
- Activity over time
- A user-level table showing who triggered the event, when they first triggered it, when they last triggered it, and how many times it happened
You can also export the tracker user data to CSV from the analytics view.
 If you need deeper analysis such as funnels, retention, or more advanced product analytics workflows, it is usually best to use a dedicated analytics platform such as Mixpanel alongside Usertour.
Using event trackers in conditions
Tracked events can be used in conditions across Usertour.
Two common examples are:
- Auto-starting a flow or checklist
- Marking a checklist task as completed
For example, a checklist task can be marked as complete as soon as the Project Created event has been tracked at least once.
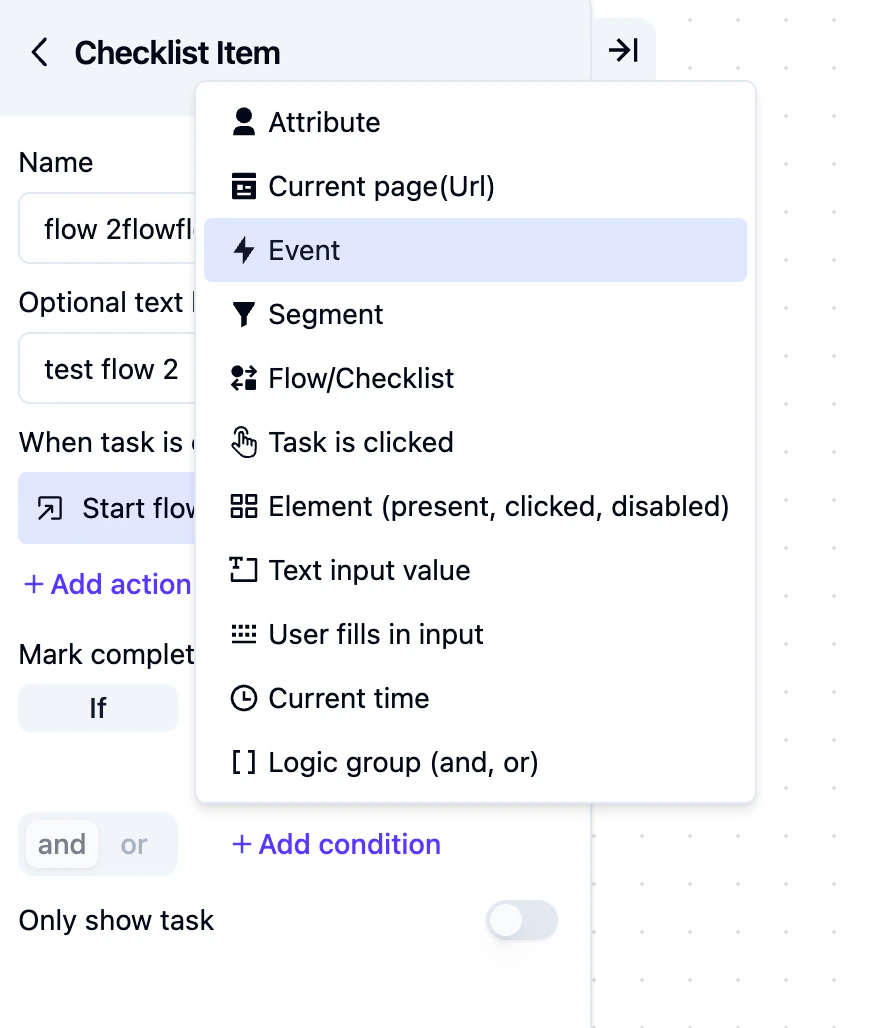 To add an event condition:
- Click Add condition
- Select Event
- Choose the event you want to use
- Set the frequency
- Set the time period
- Optionally choose the scope
- Optionally narrow it further with Where conditions based on event attributes
You will usually find this under the auto-start section for flows and checklists, or in the side panel for checklist tasks.
This makes event conditions more flexible than a simple “has this happened or not” check. For example, you can target:
- Users who completed an event at least once
- Users who completed an event recently
- Users in the current company
- Users whose event matched a specific event attribute value
Best practices
- Track meaningful product actions, not generic clicks
- Reuse existing events when possible instead of creating duplicates
- Use clear display names and stable code names
- Add a Current page condition whenever possible to keep tracking scoped and efficient