

What is an announcement?
Announcements let you share product news — release notes, new features, upcoming maintenance, events — right inside your app. Published announcements appear as a feed in the Resource Center: newest first, grouped by date, each entry showing a short summary with an optional “Read more” detail page. Unlike a banner (which takes over part of the page) or a flow (which walks users through steps), announcements live in one persistent, low-pressure place users can browse on their own time. And when something deserves more attention, you decide how loudly each announcement speaks up: silently in the feed, with an unread badge, or as a one-time pop-up.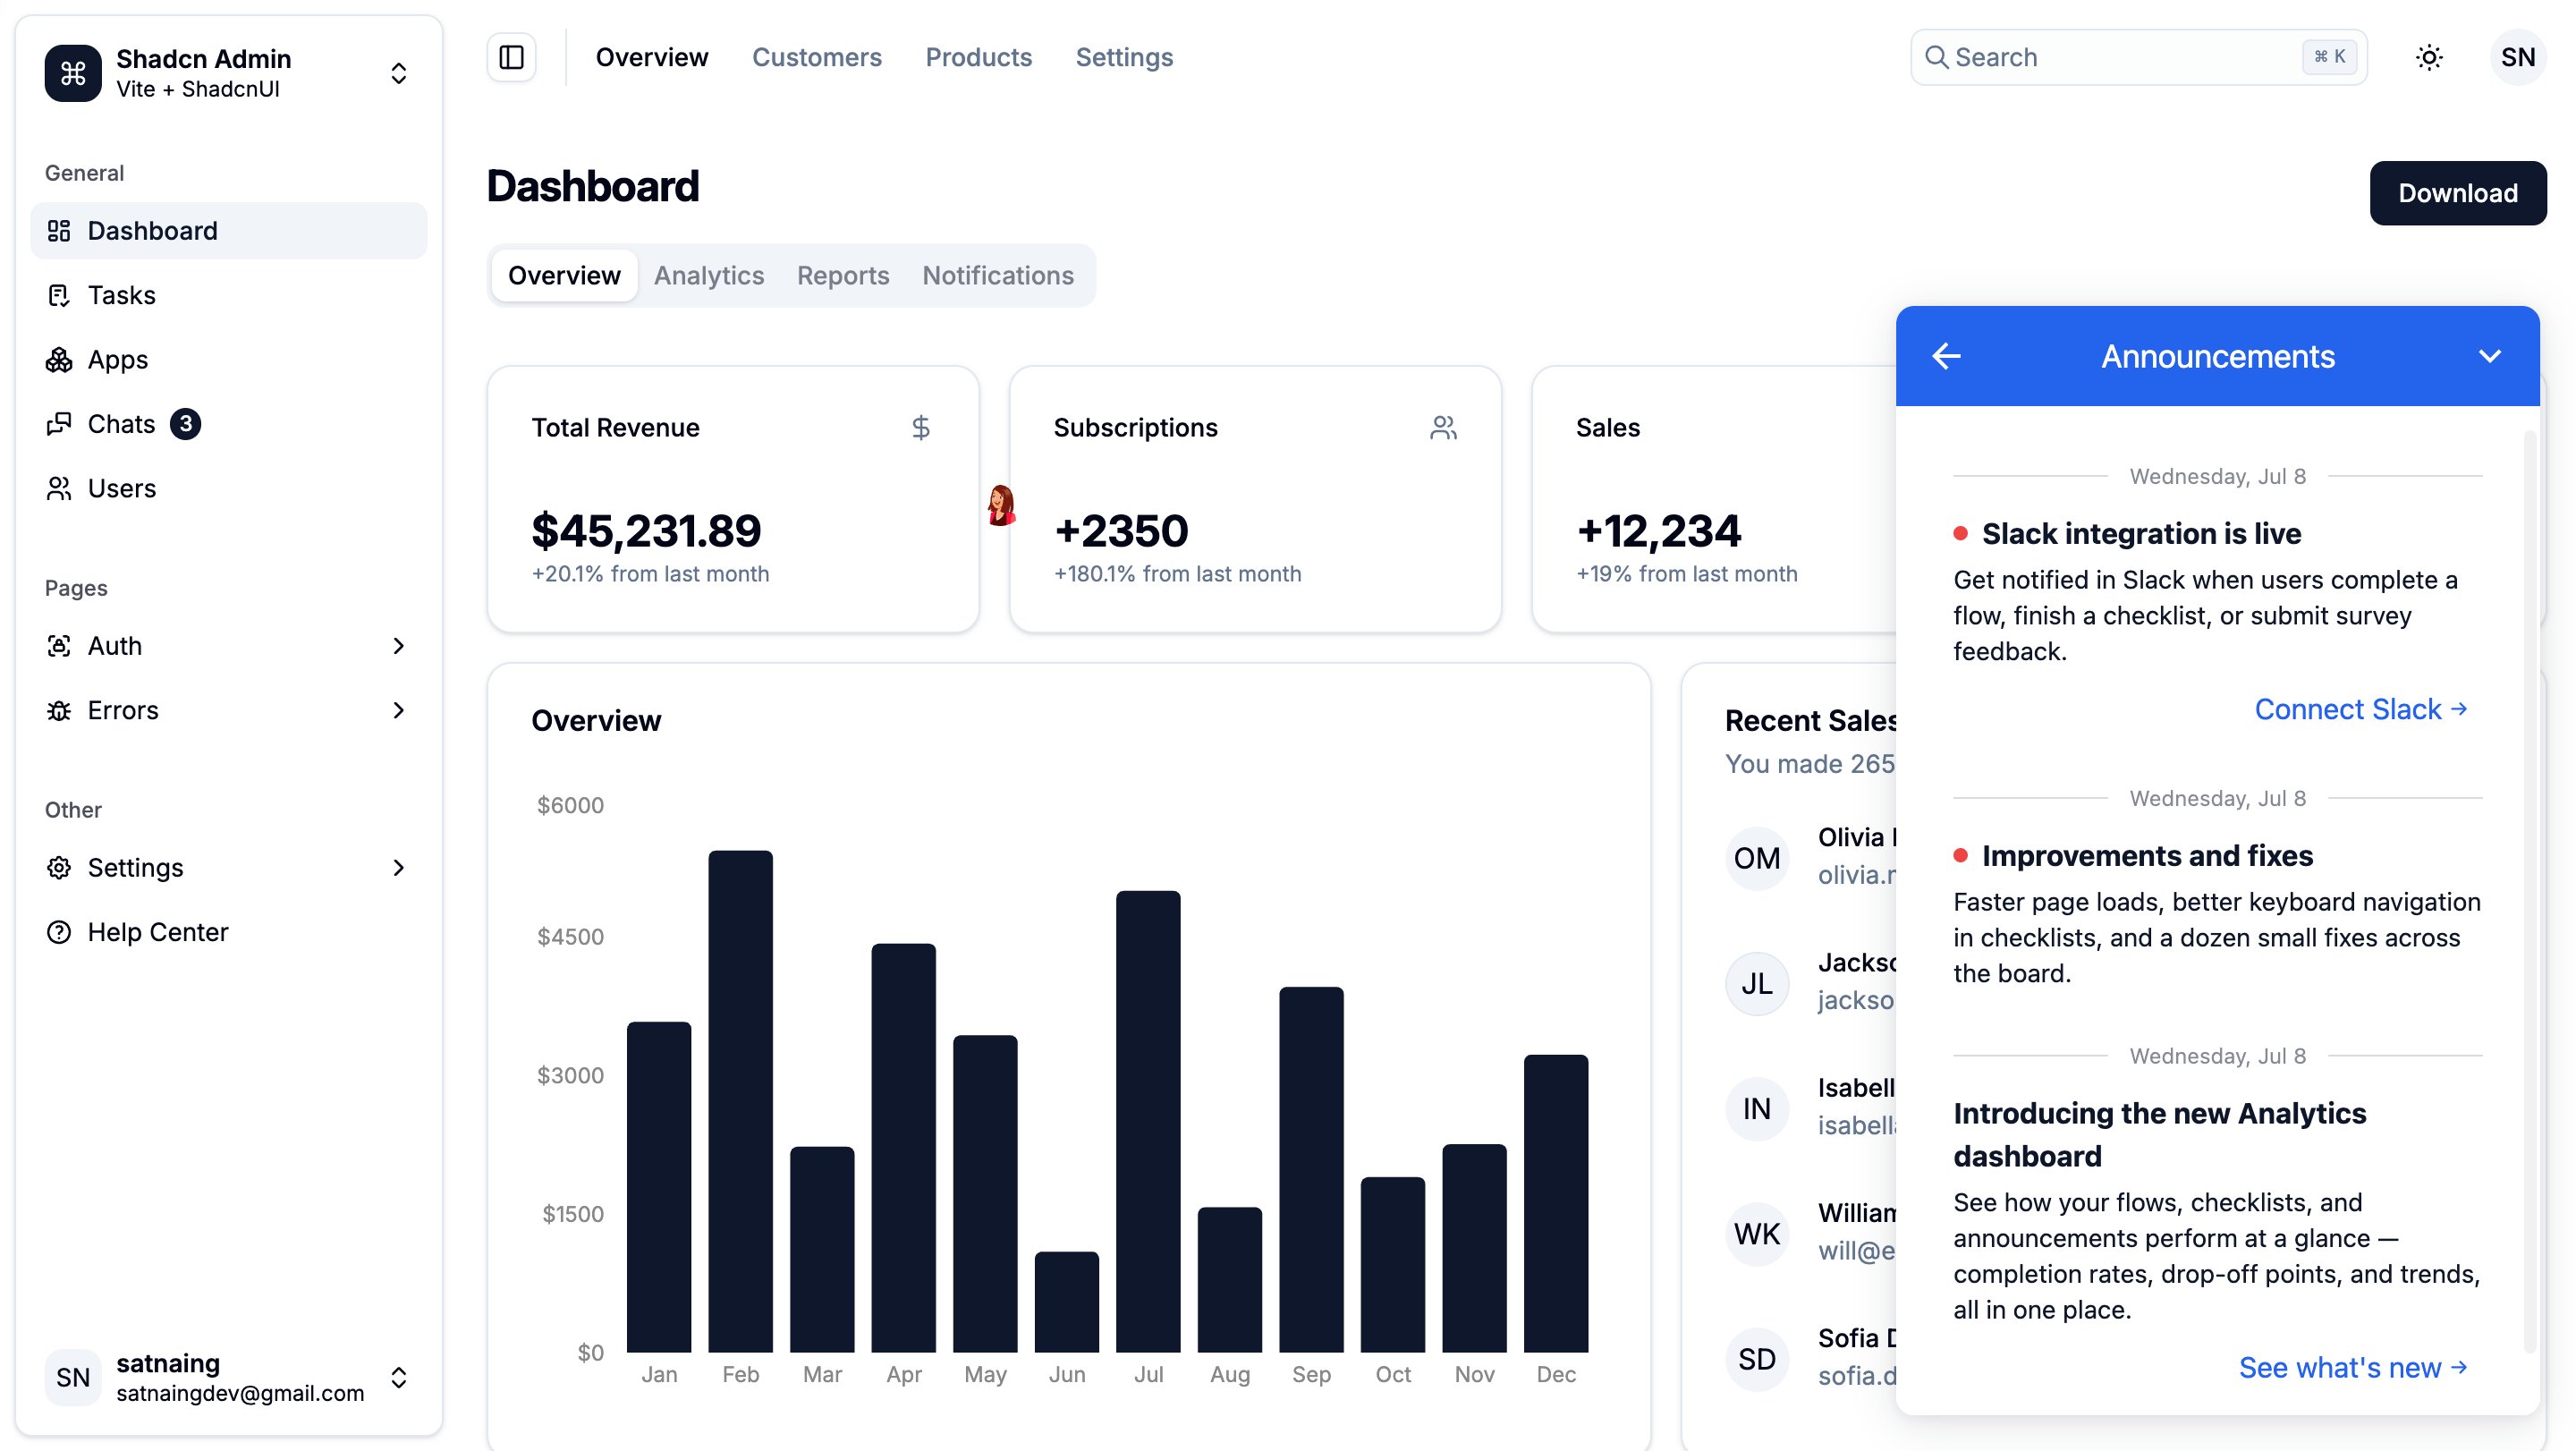
Before you start: add the Announcements block to your Resource Center
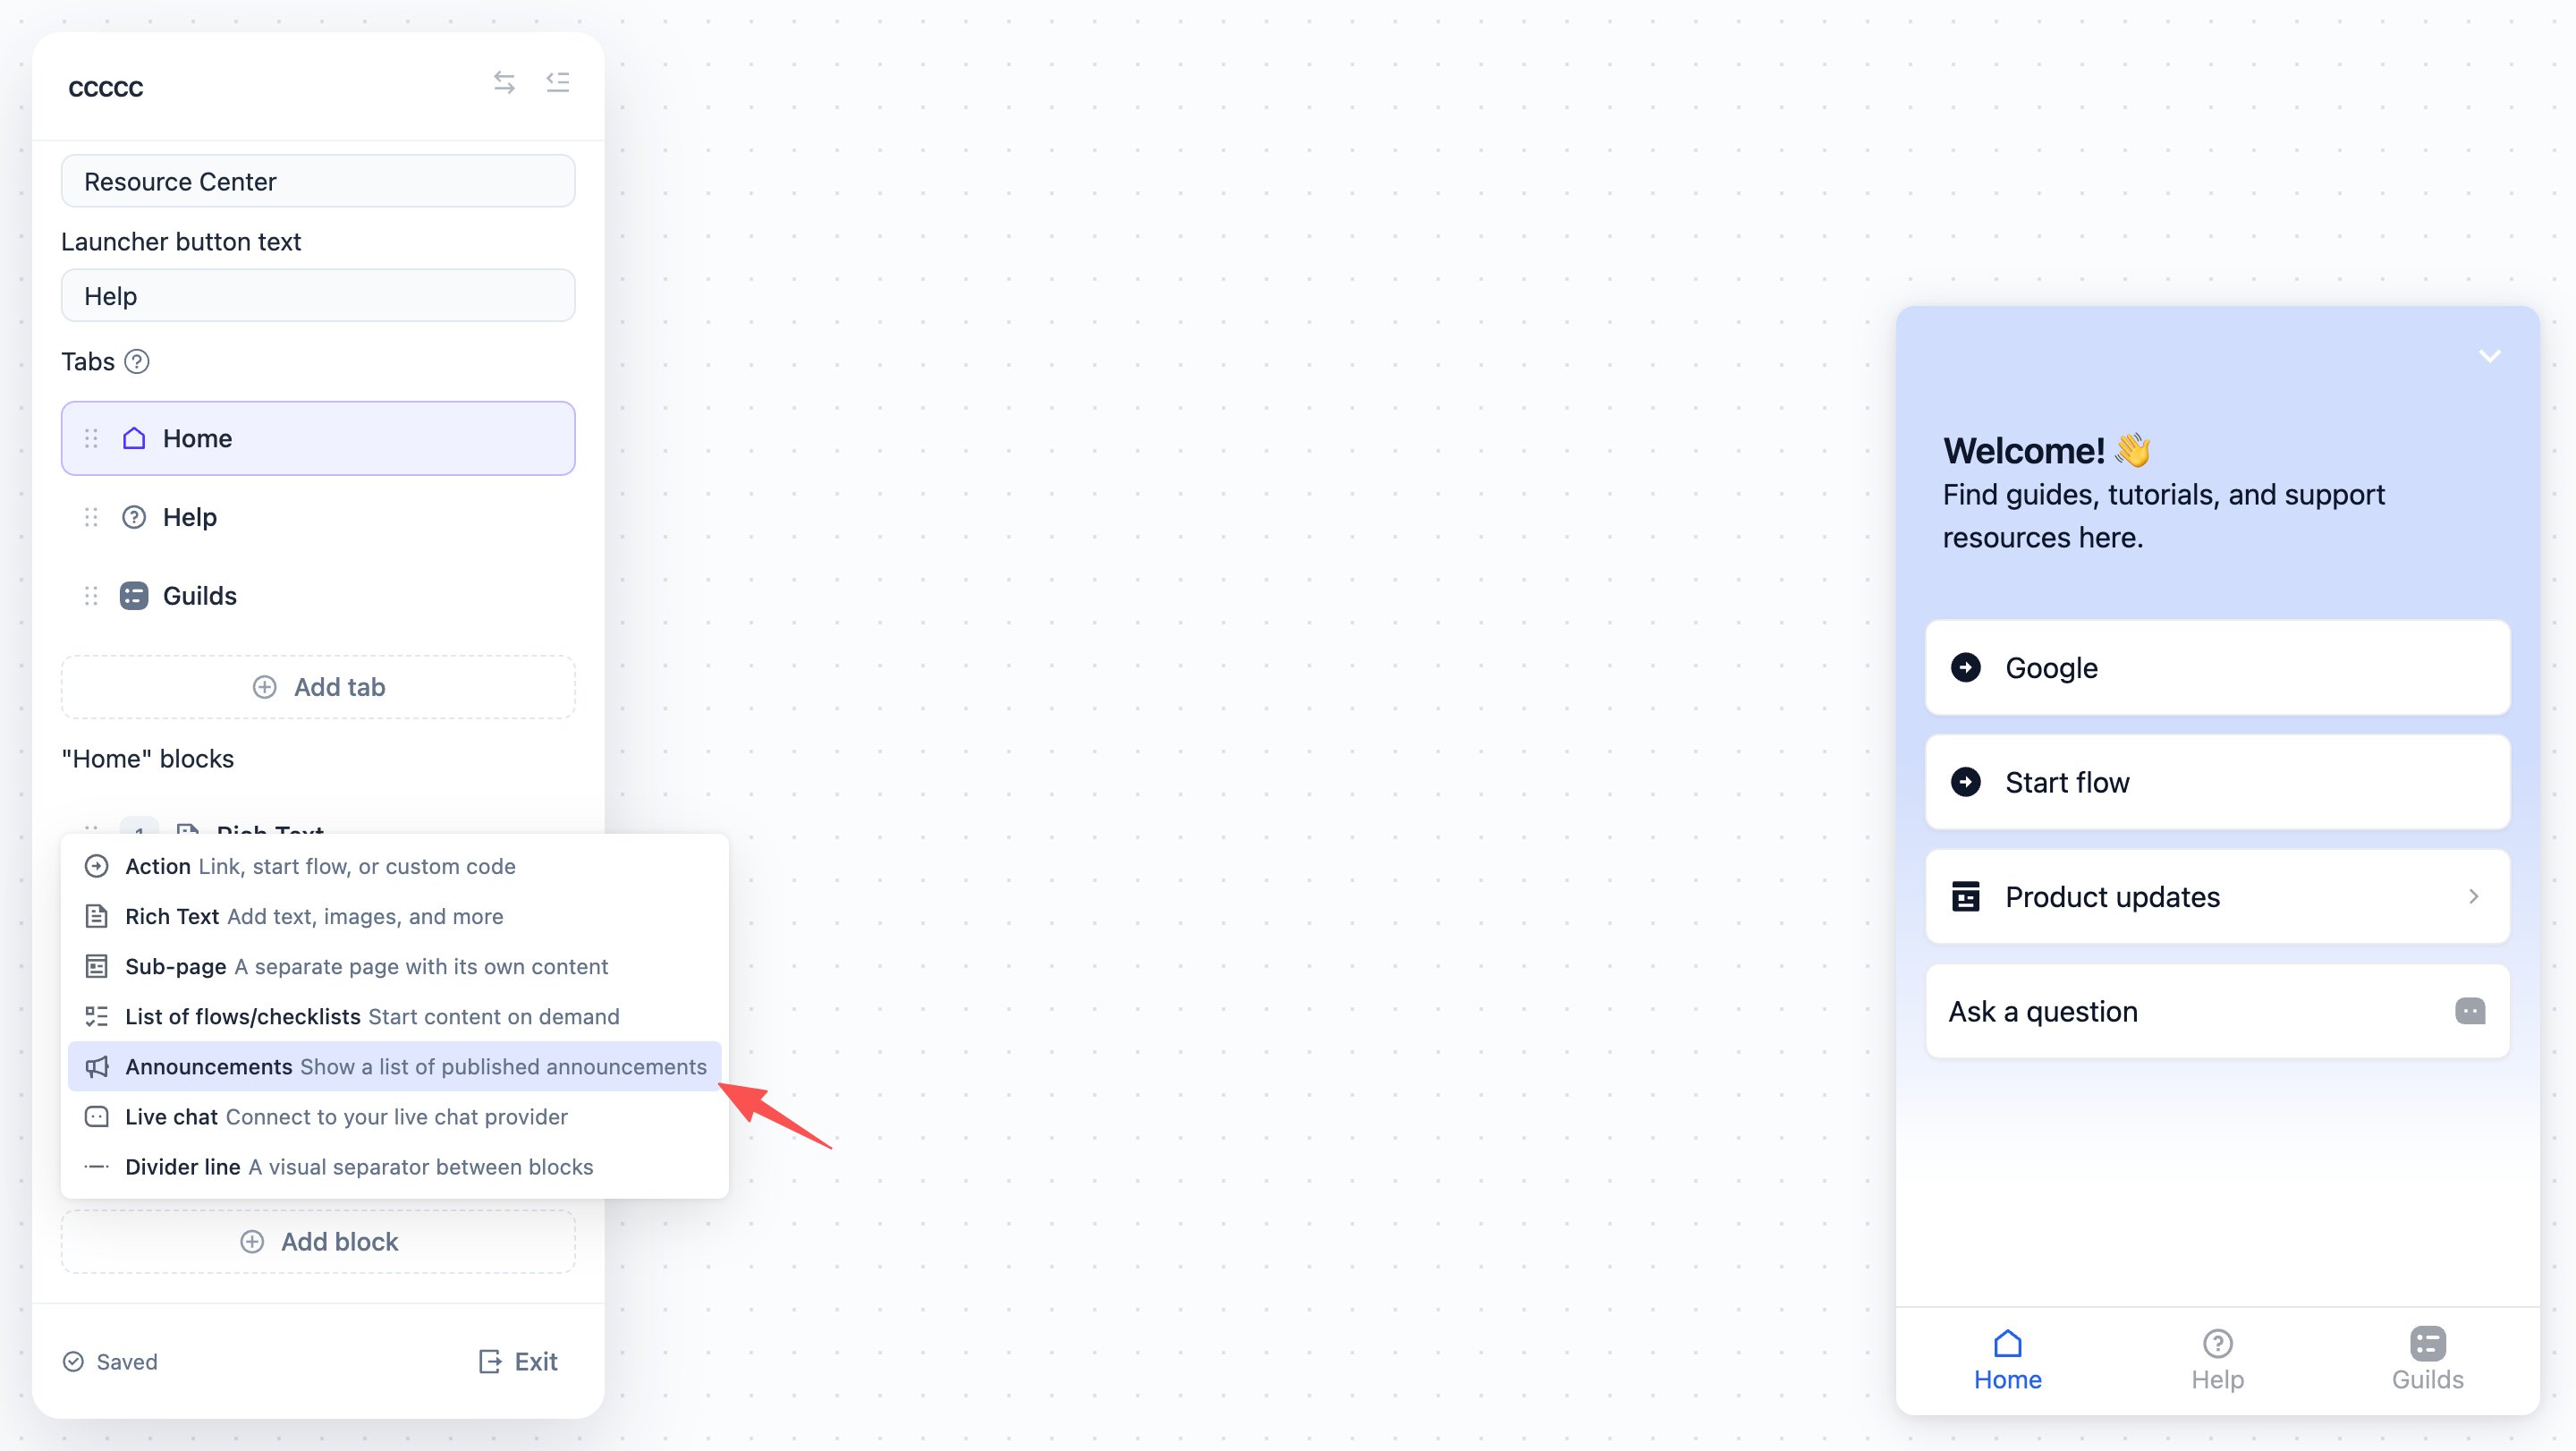
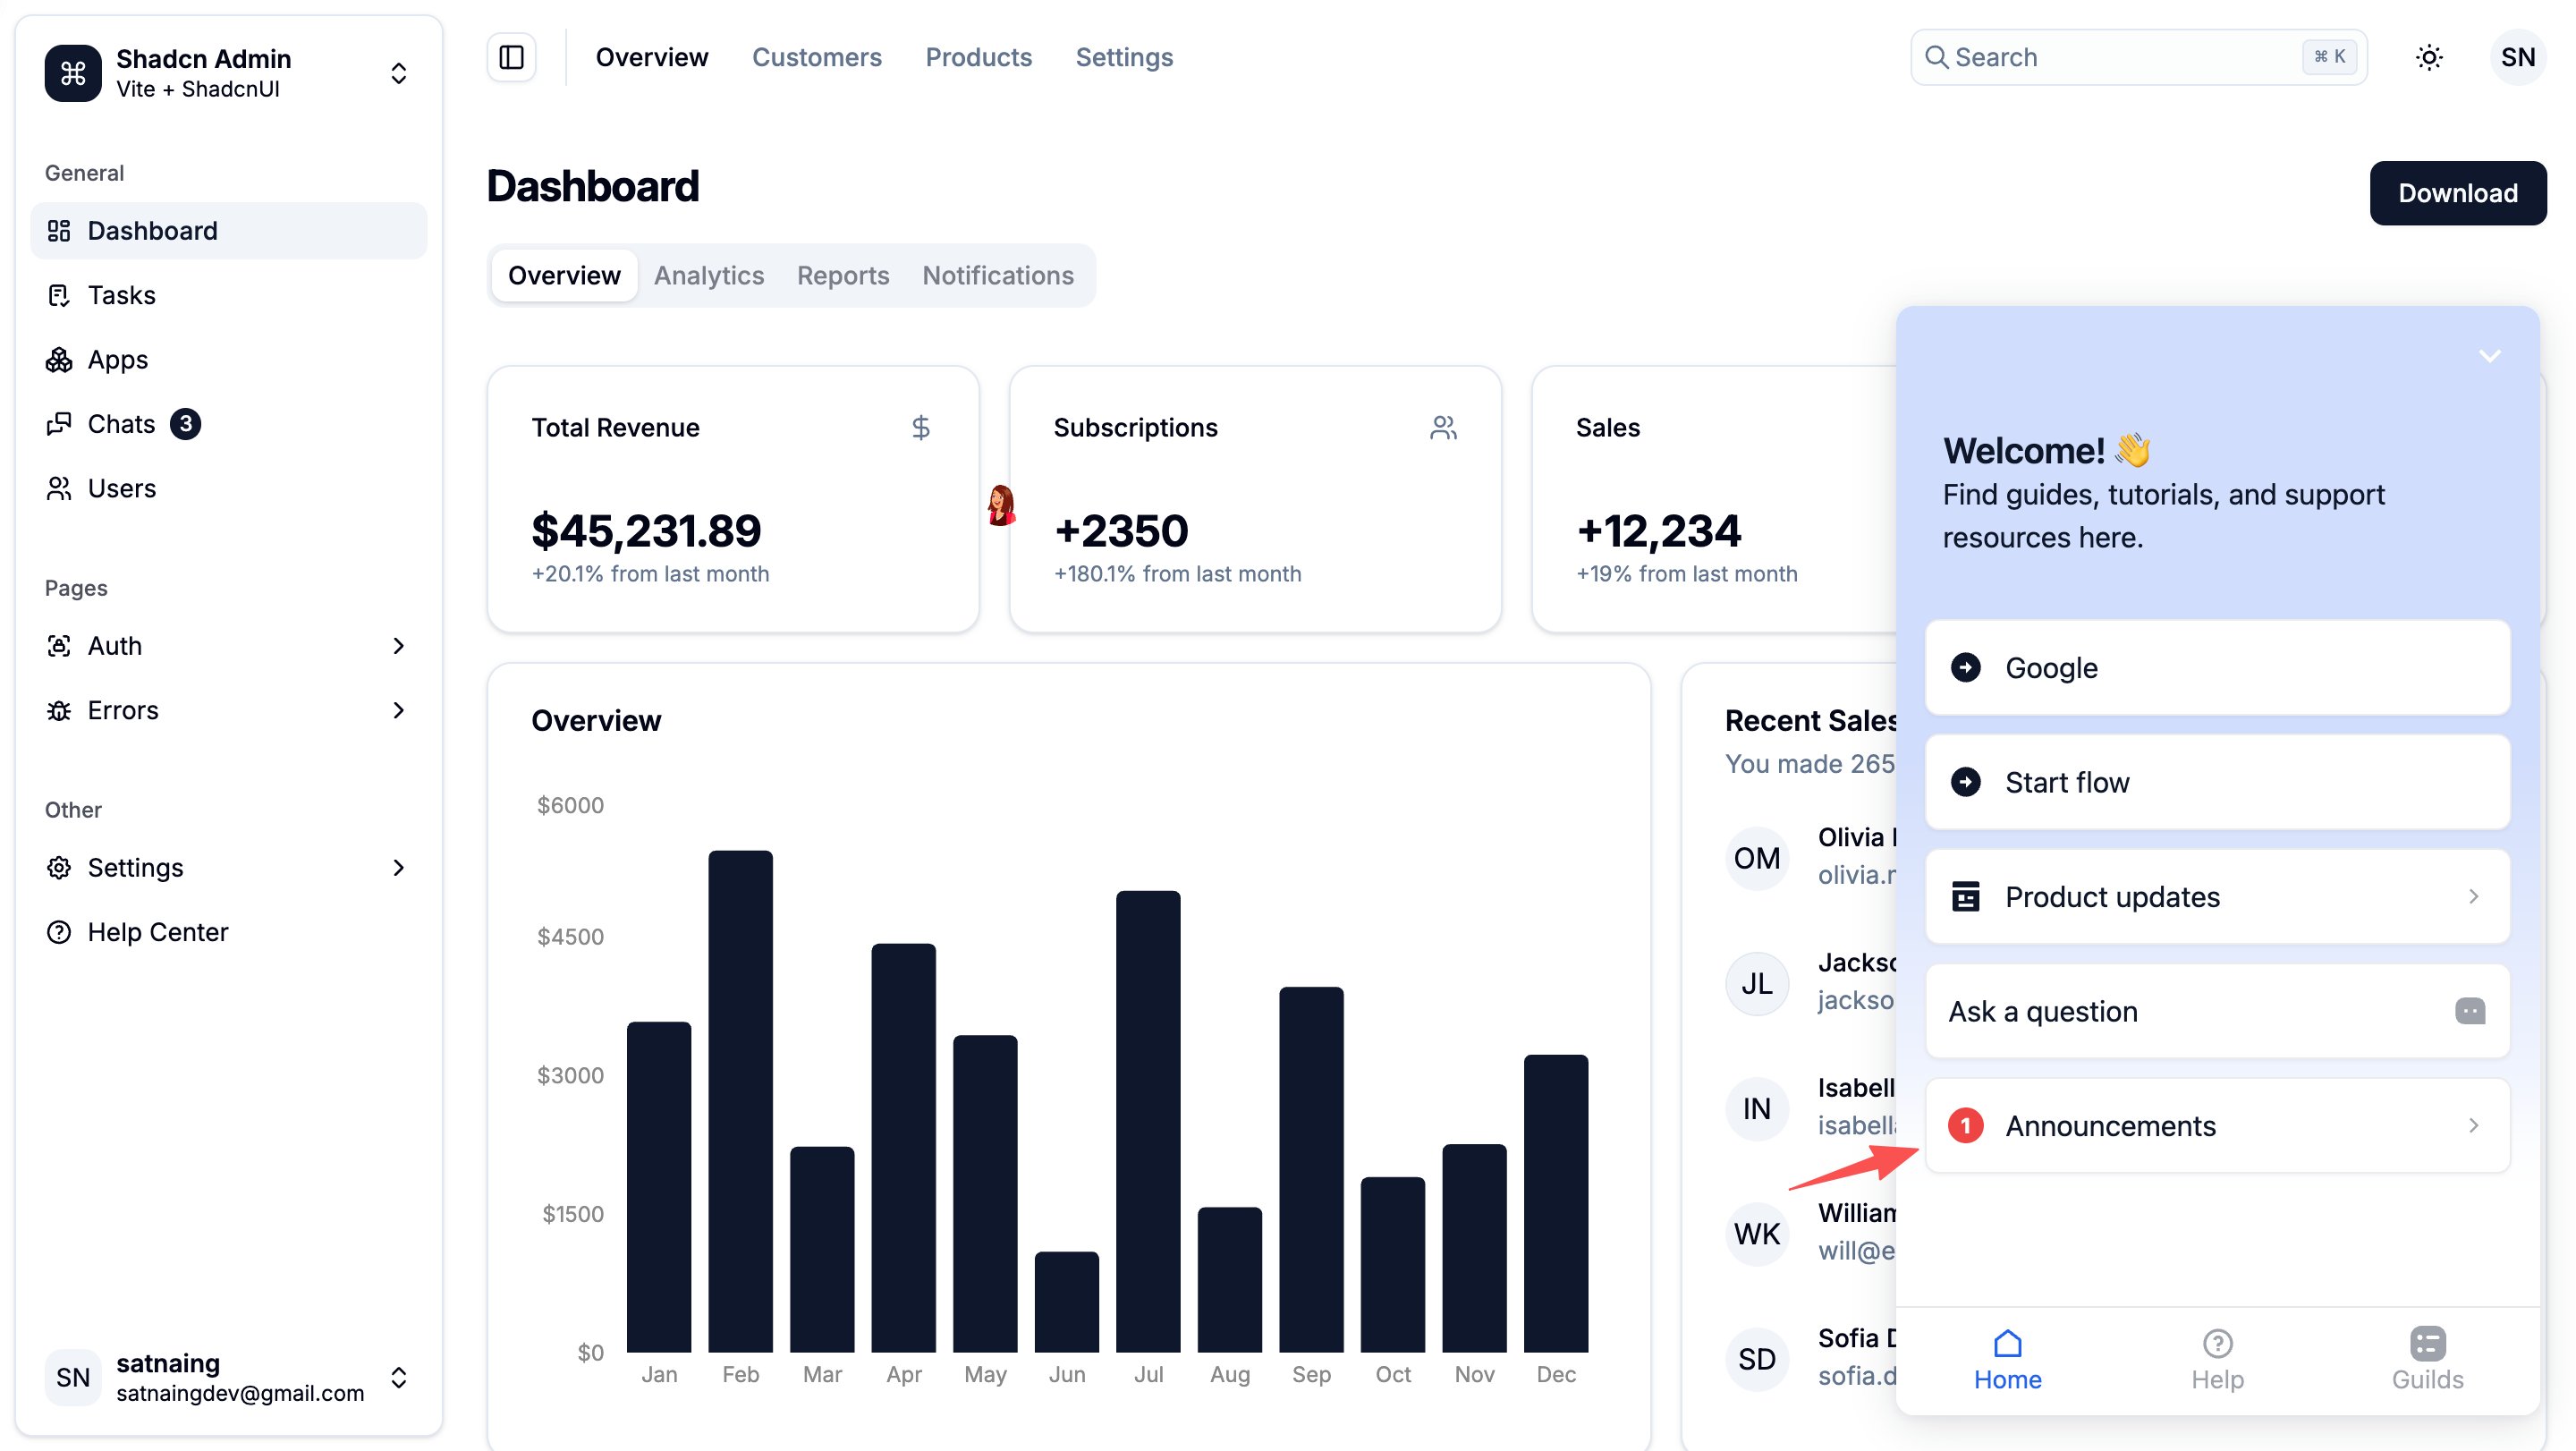
Announcements are displayed through the Resource Center, so you need one published Resource Center with an Announcements block:- Open your Resource Center in the builder
- On the tab where you want the feed, click Add block and pick Announcements
- Save and publish the Resource Center
Make sure Usertour.js is
installed in your app and the Resource Center is published. Without both,
announcements have nowhere to appear.
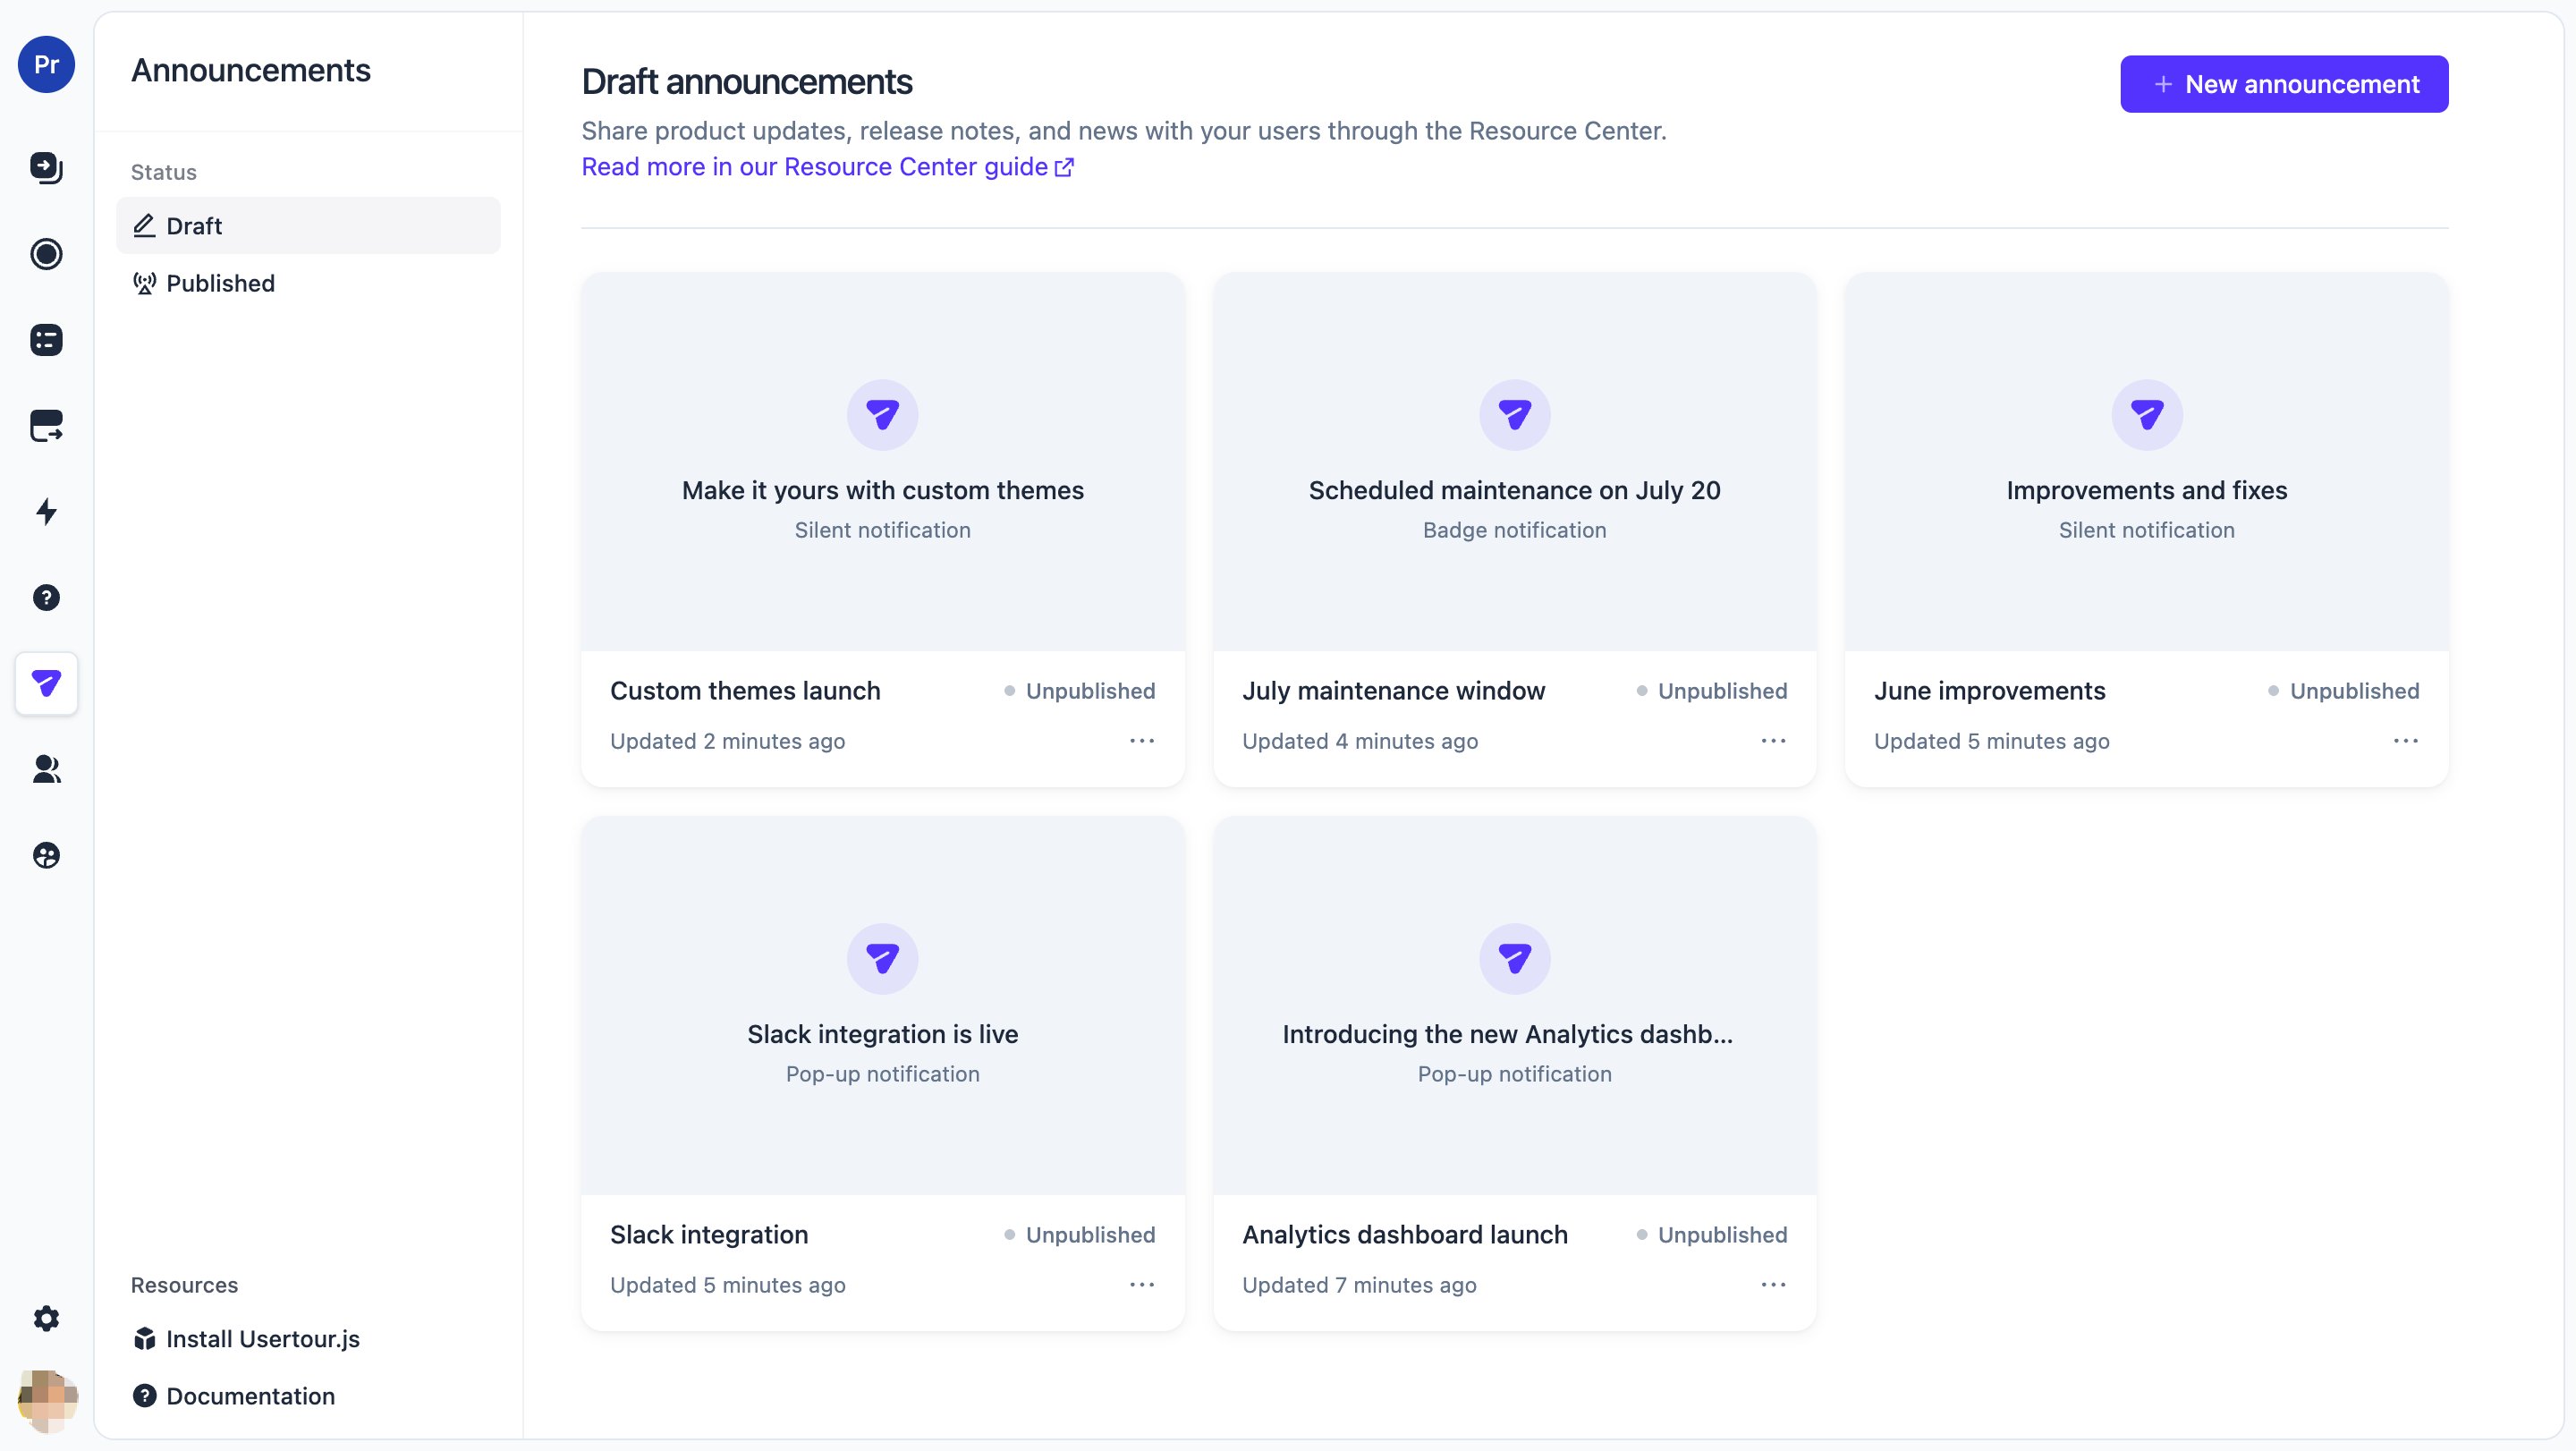
Creating an announcement
- Click Announcements in the left sidebar
- Click New announcement, enter a name, and confirm
- The announcement detail page opens with content on one side and settings on the other
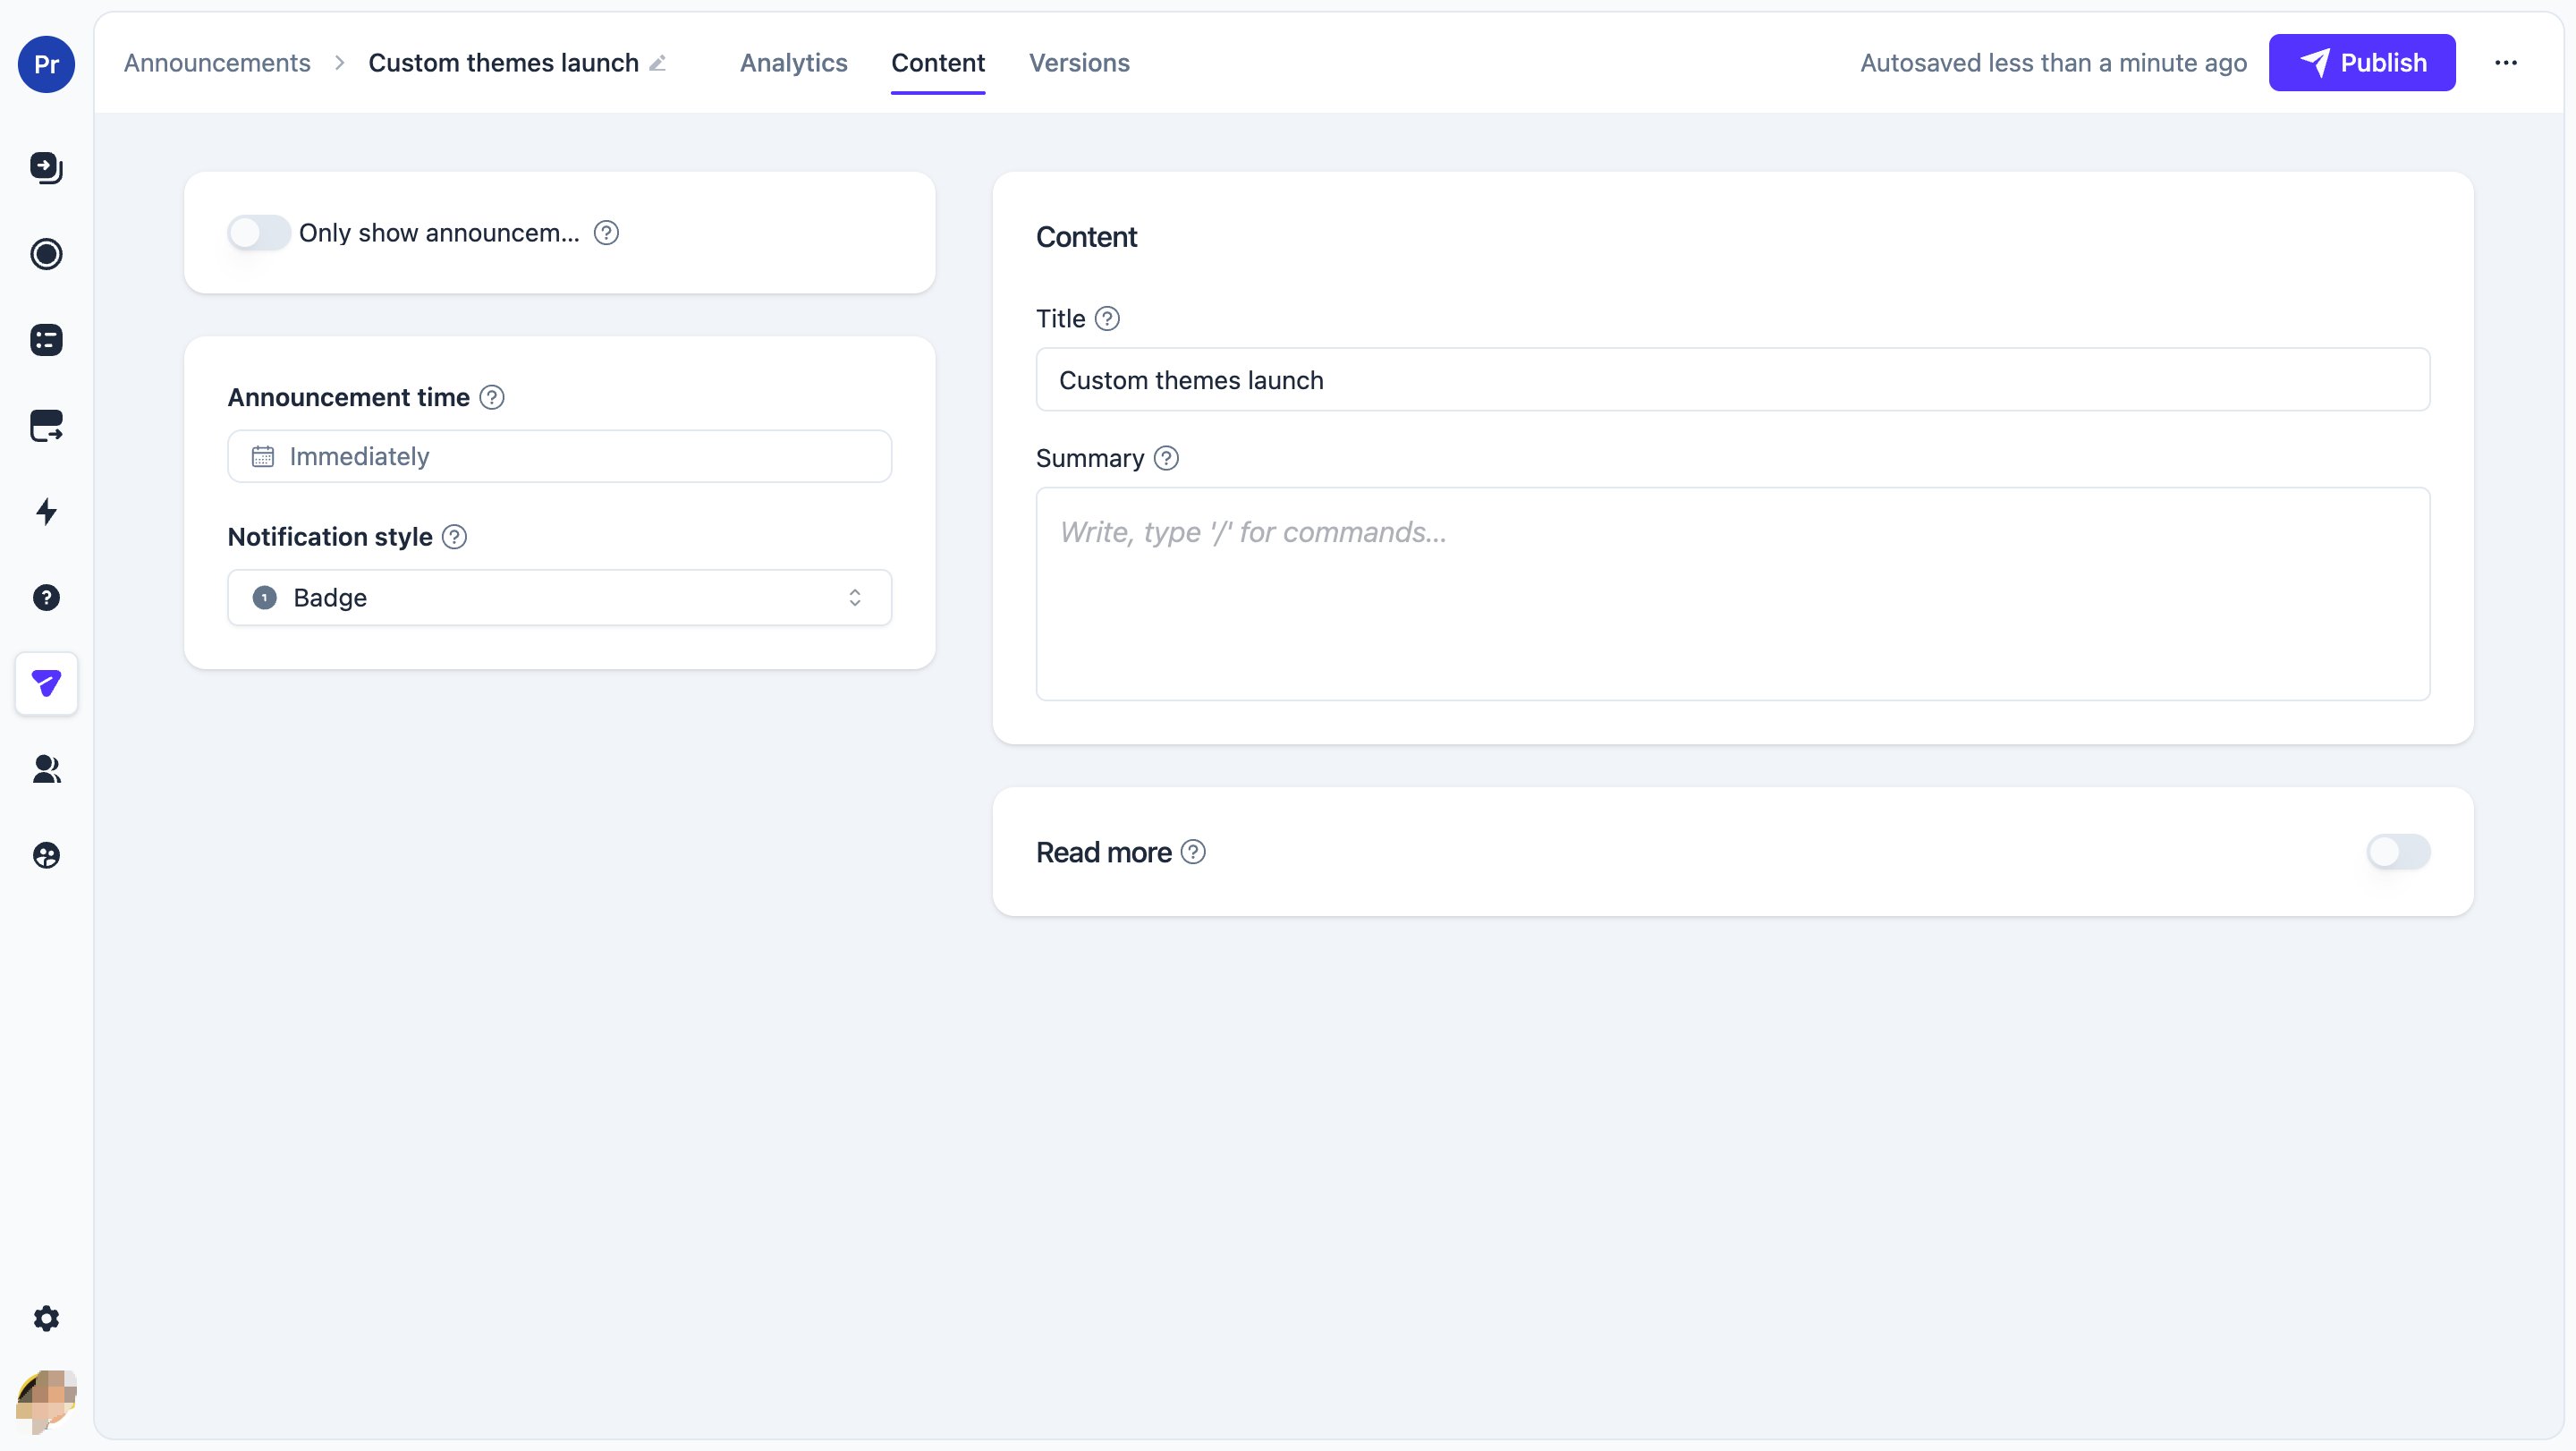
Writing the content
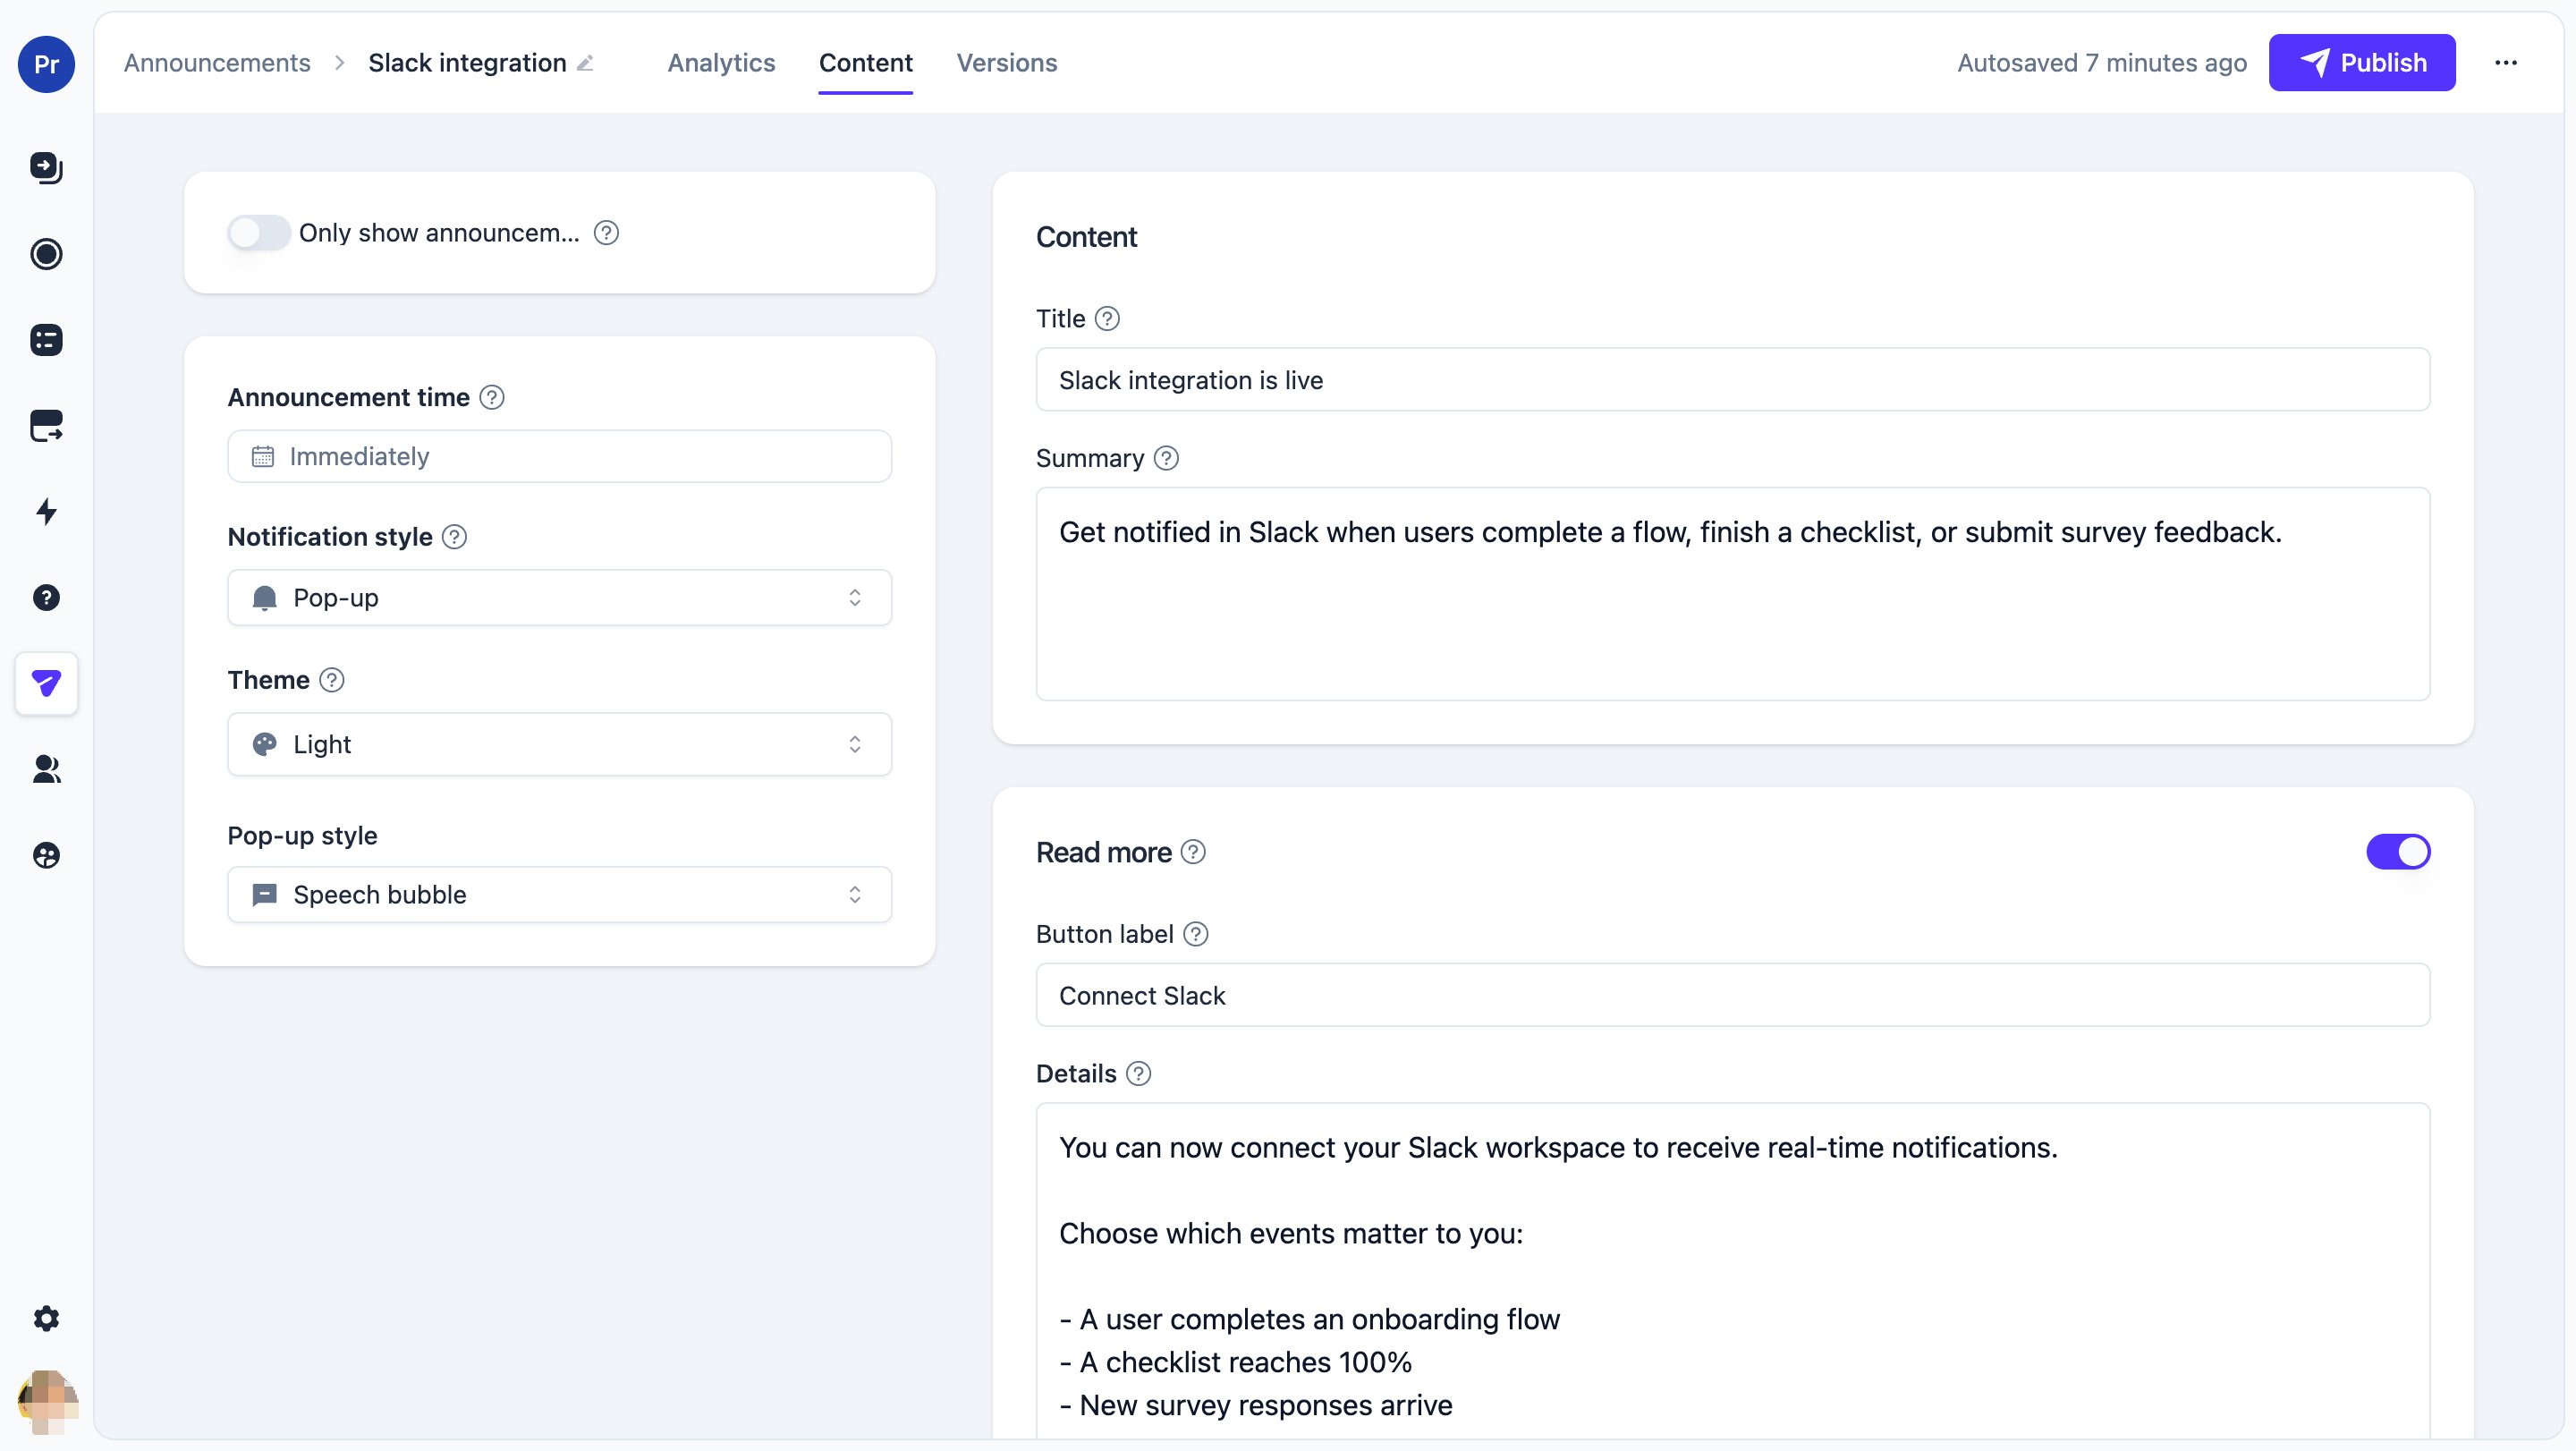
An announcement has two layers: what users see in the feed, and an optional full article behind it.- Title — displayed in the feed and on the detail page
- Summary — the brief content shown in the feed row (and in the pop-up, if you use one). Keep it to a couple of sentences
- Read more — enable this to give the announcement a detail page users can open from the feed. You can change the button’s label (default: “Read more”)
- Details — the full article shown on the detail page
Choosing a notification style
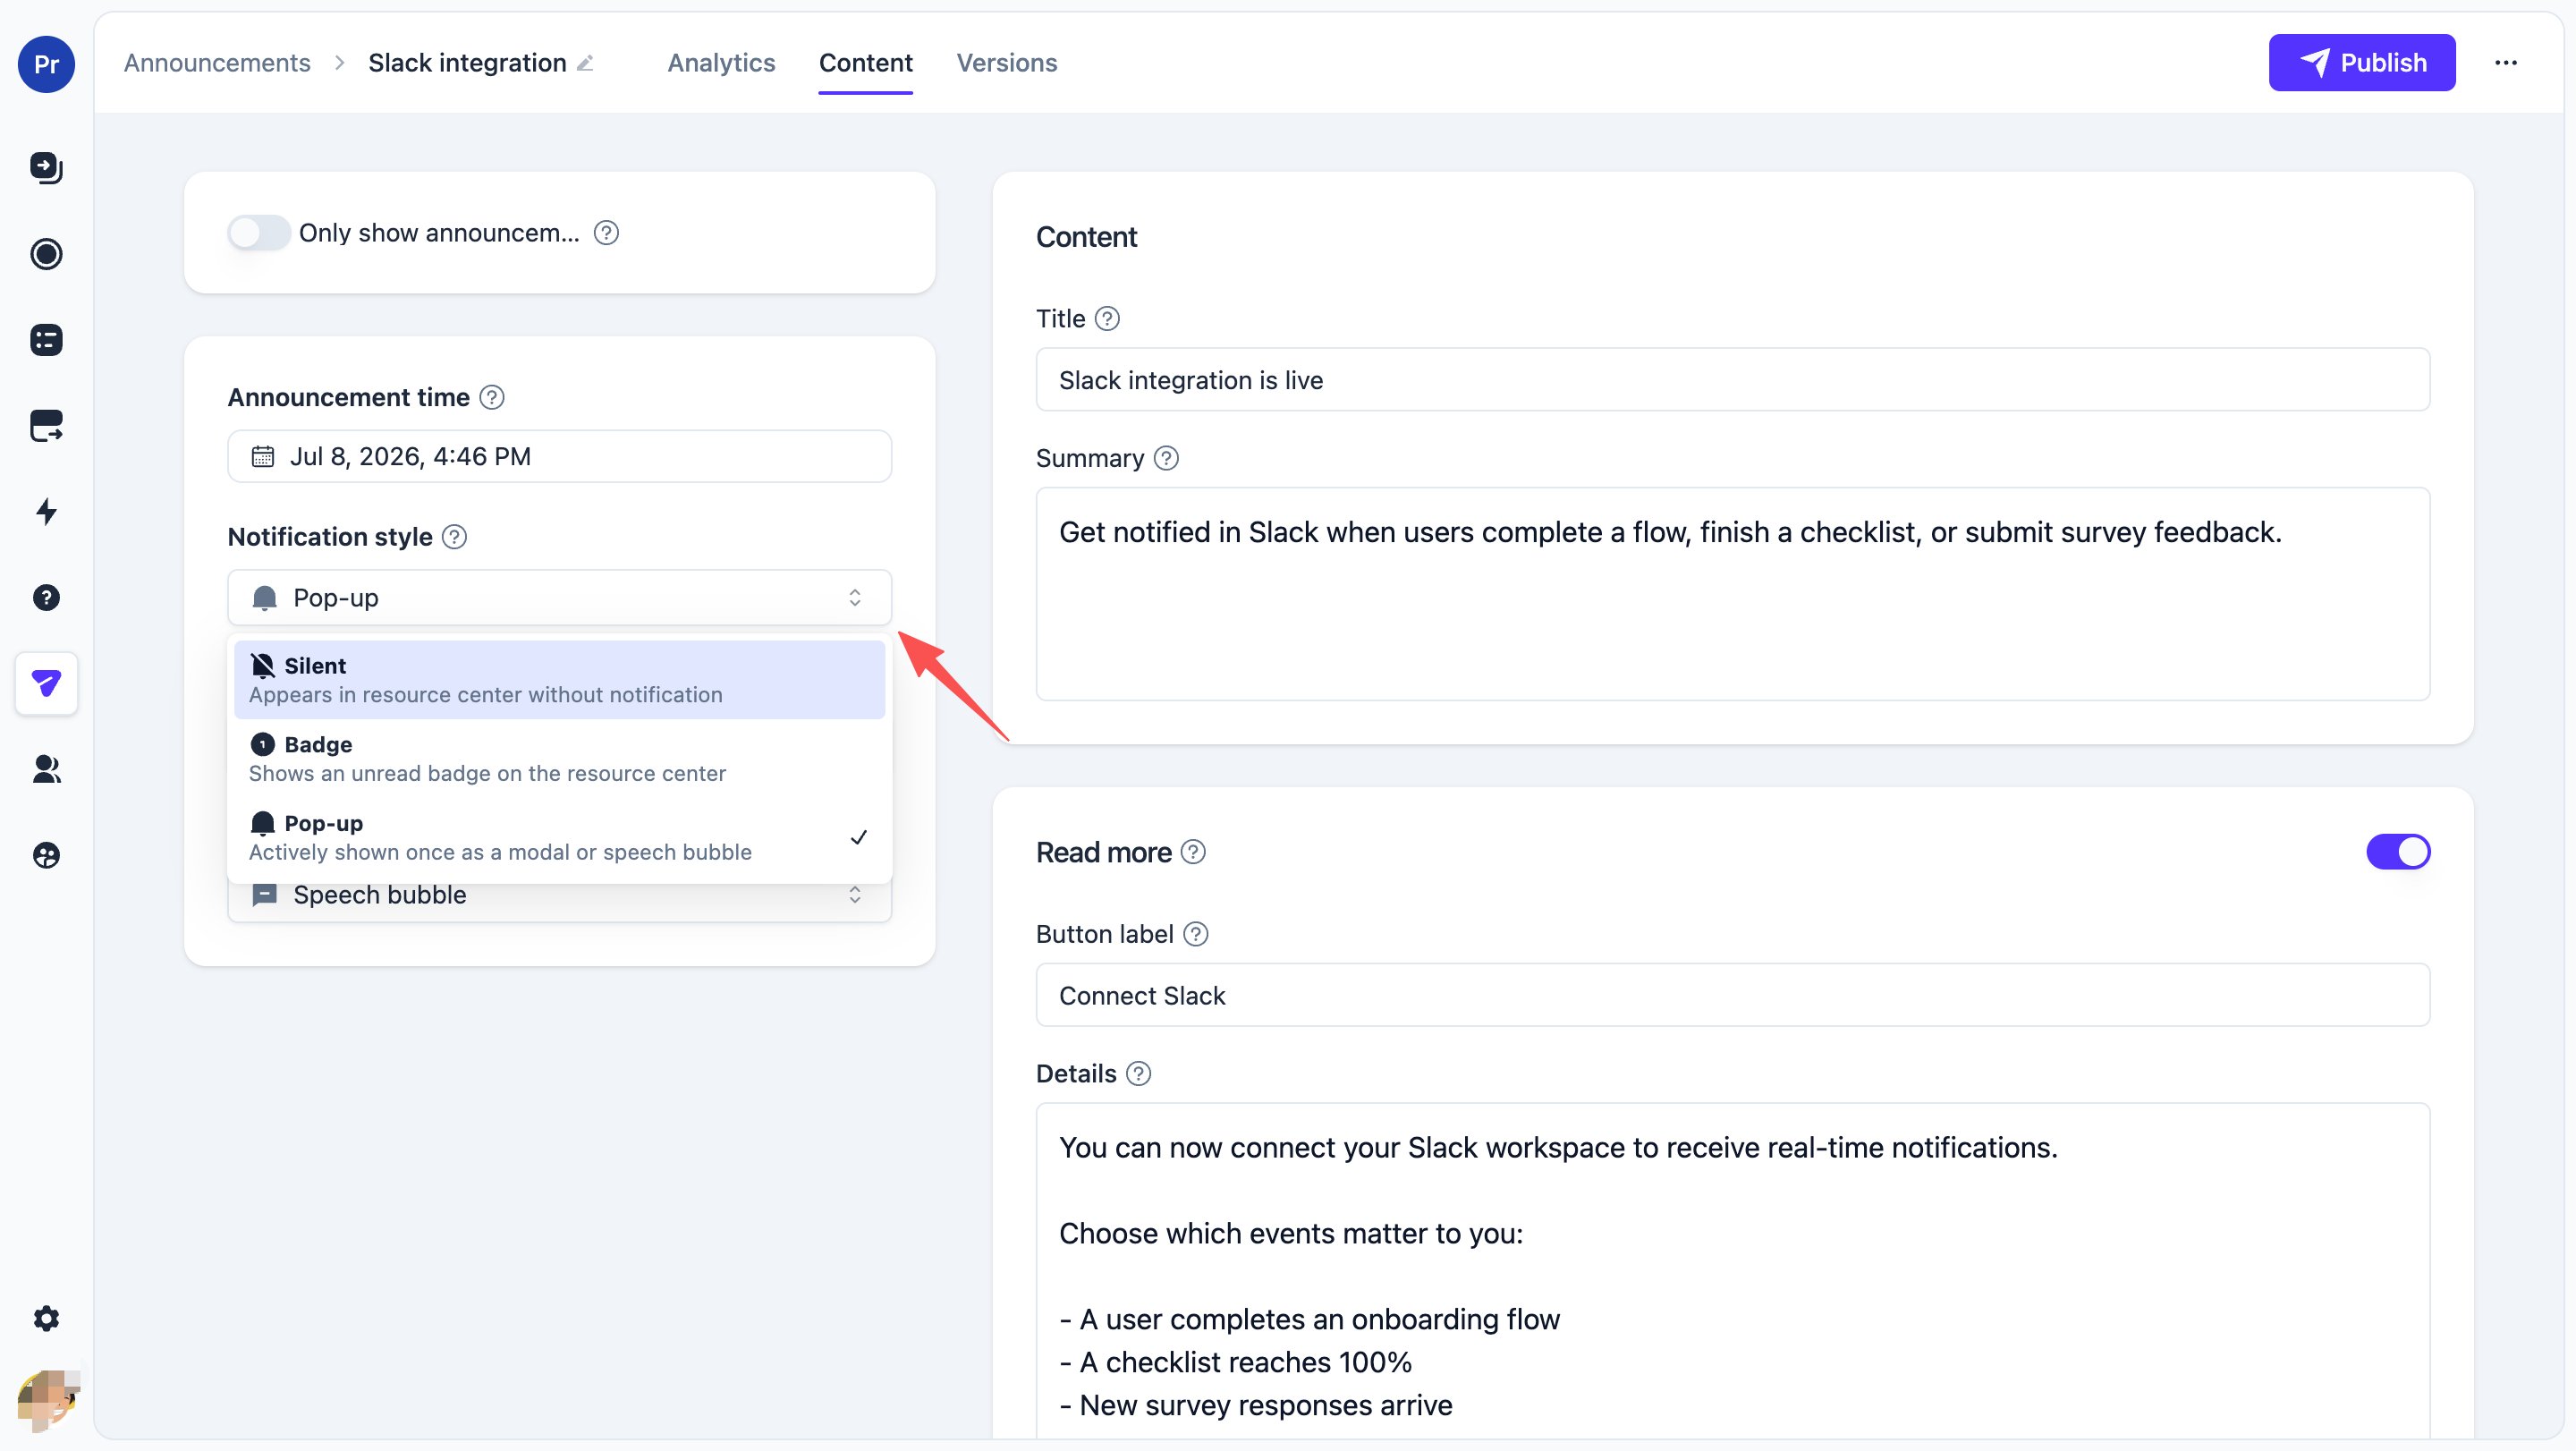
Each announcement decides how actively users are notified about it:- Silent — appears in the Resource Center feed without any notification. Good for routine changelog entries
- Badge — additionally shows an unread badge on the Resource Center launcher and the announcements tab, cleared as soon as the user opens the feed
- Pop-up — additionally presented once to each user, then it behaves like a badge announcement. Reserve this for the news that really matters
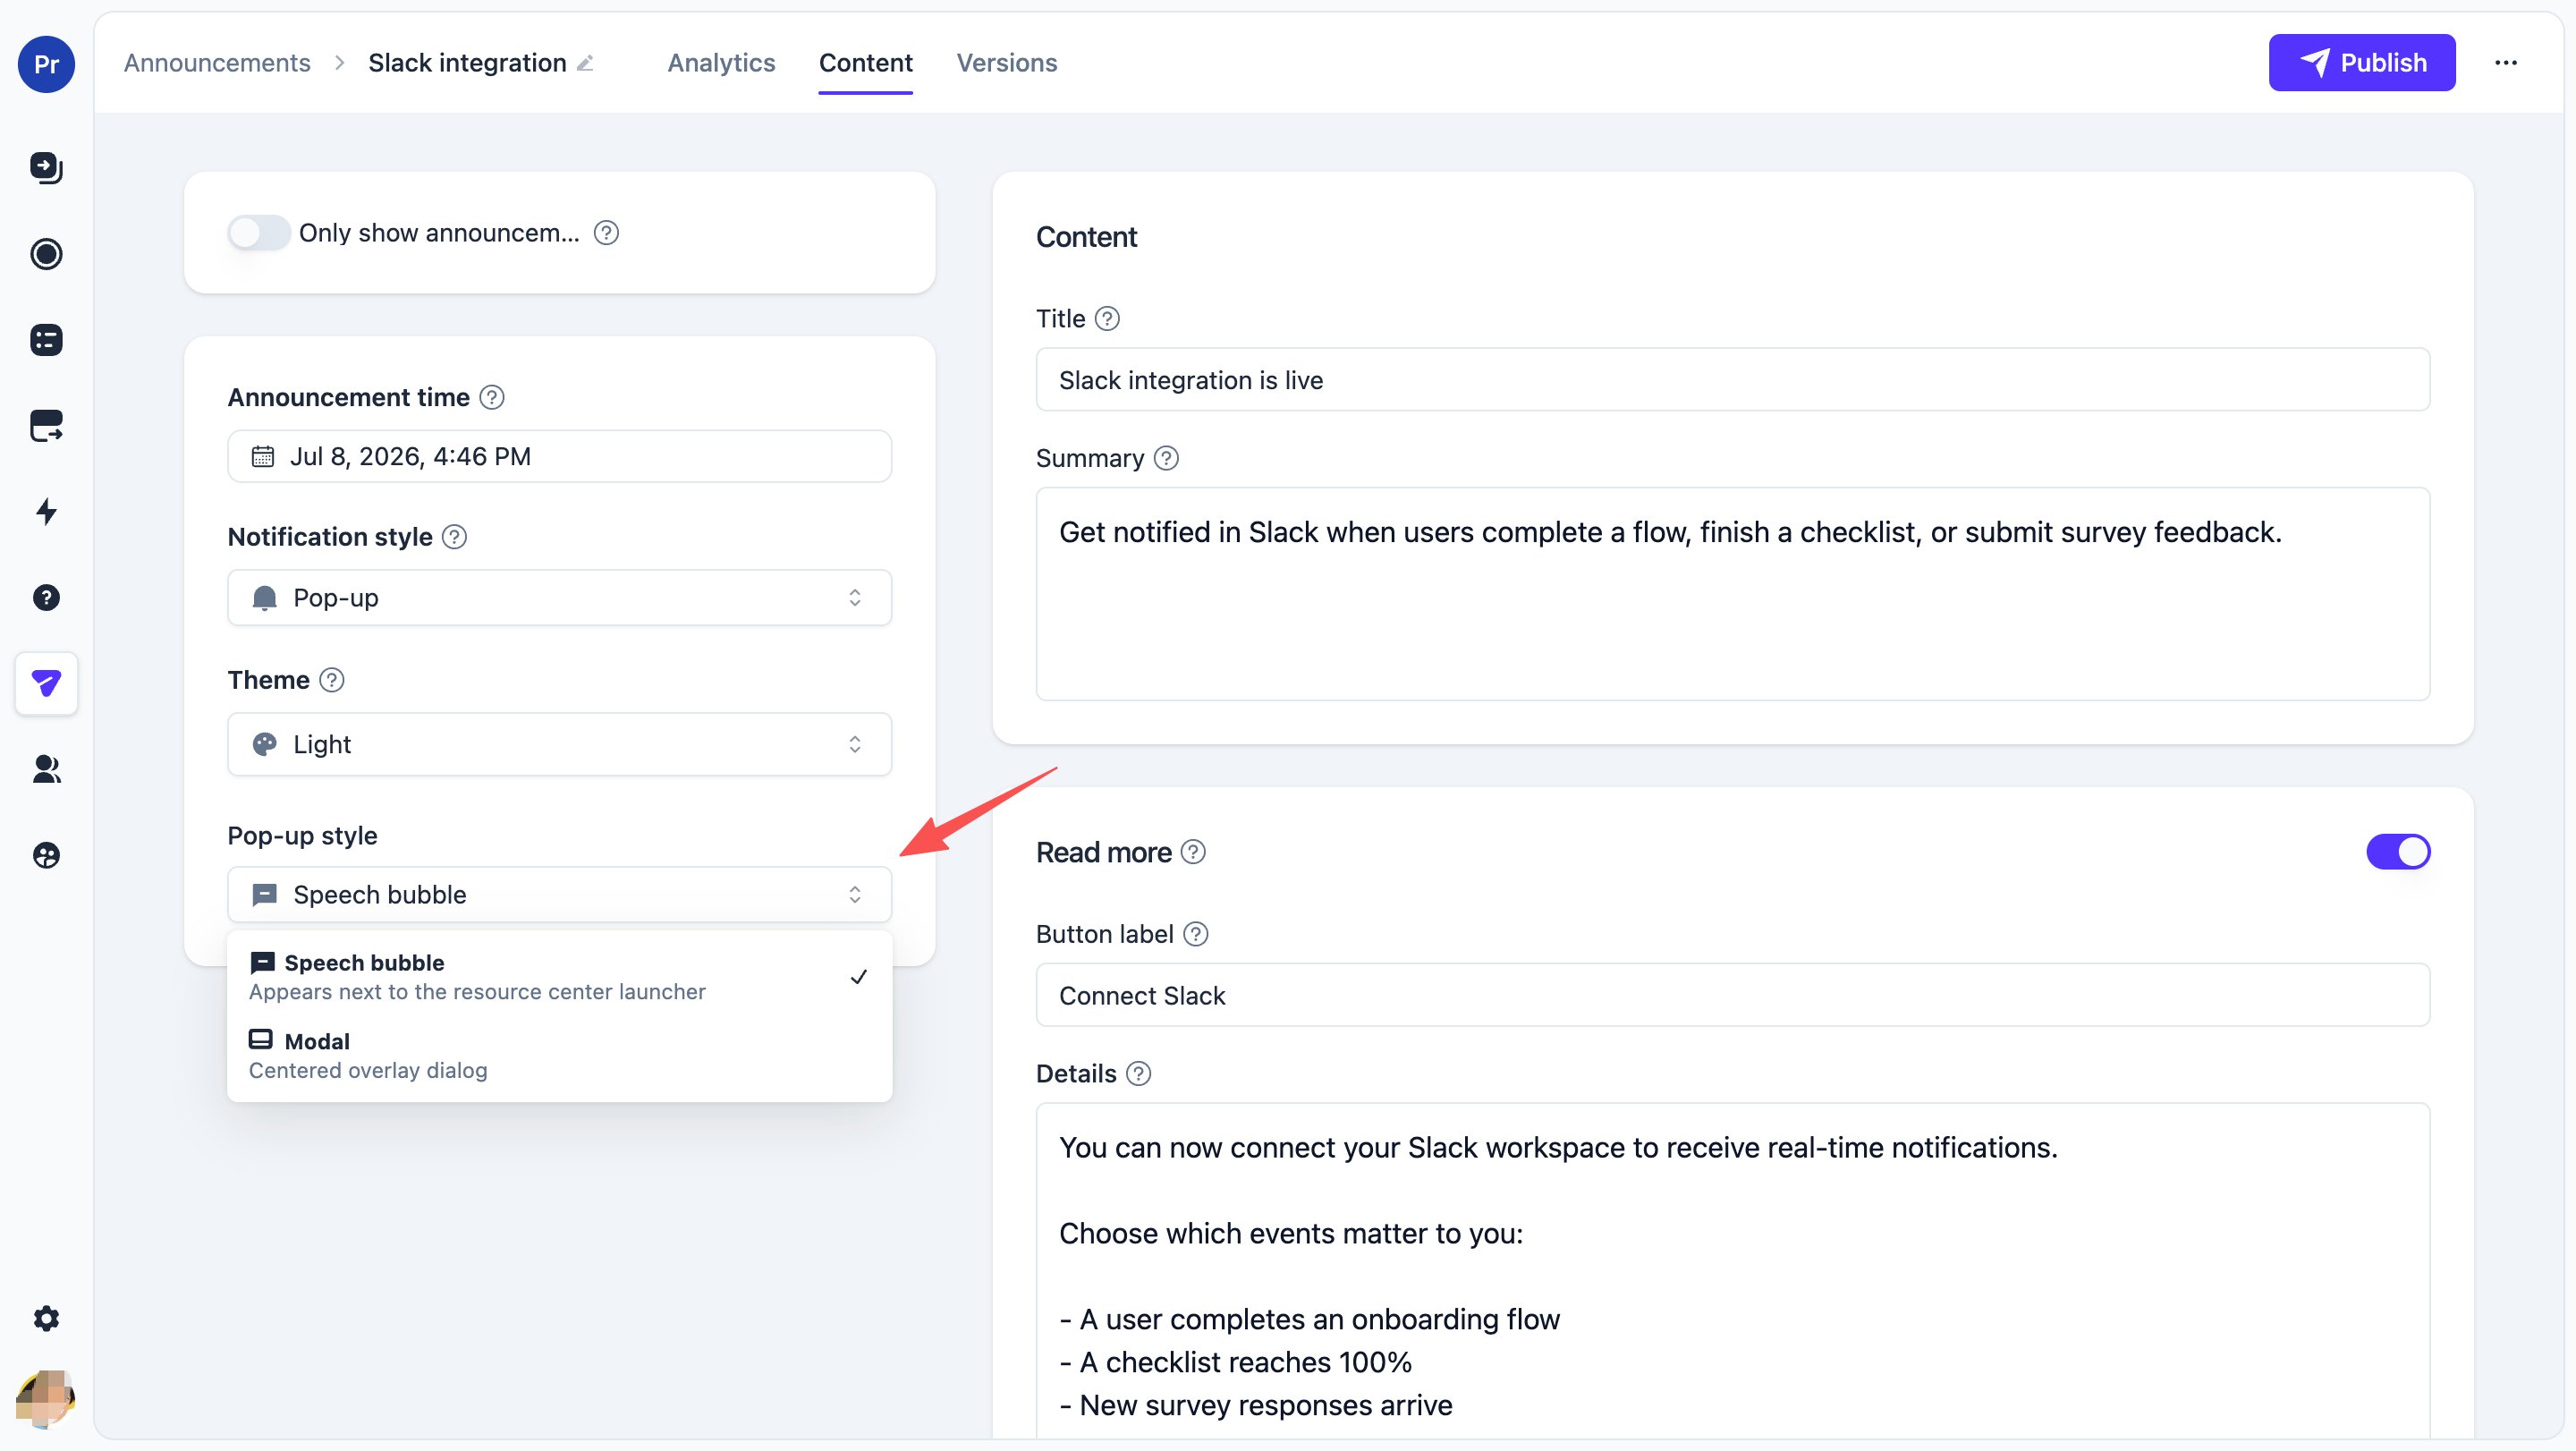
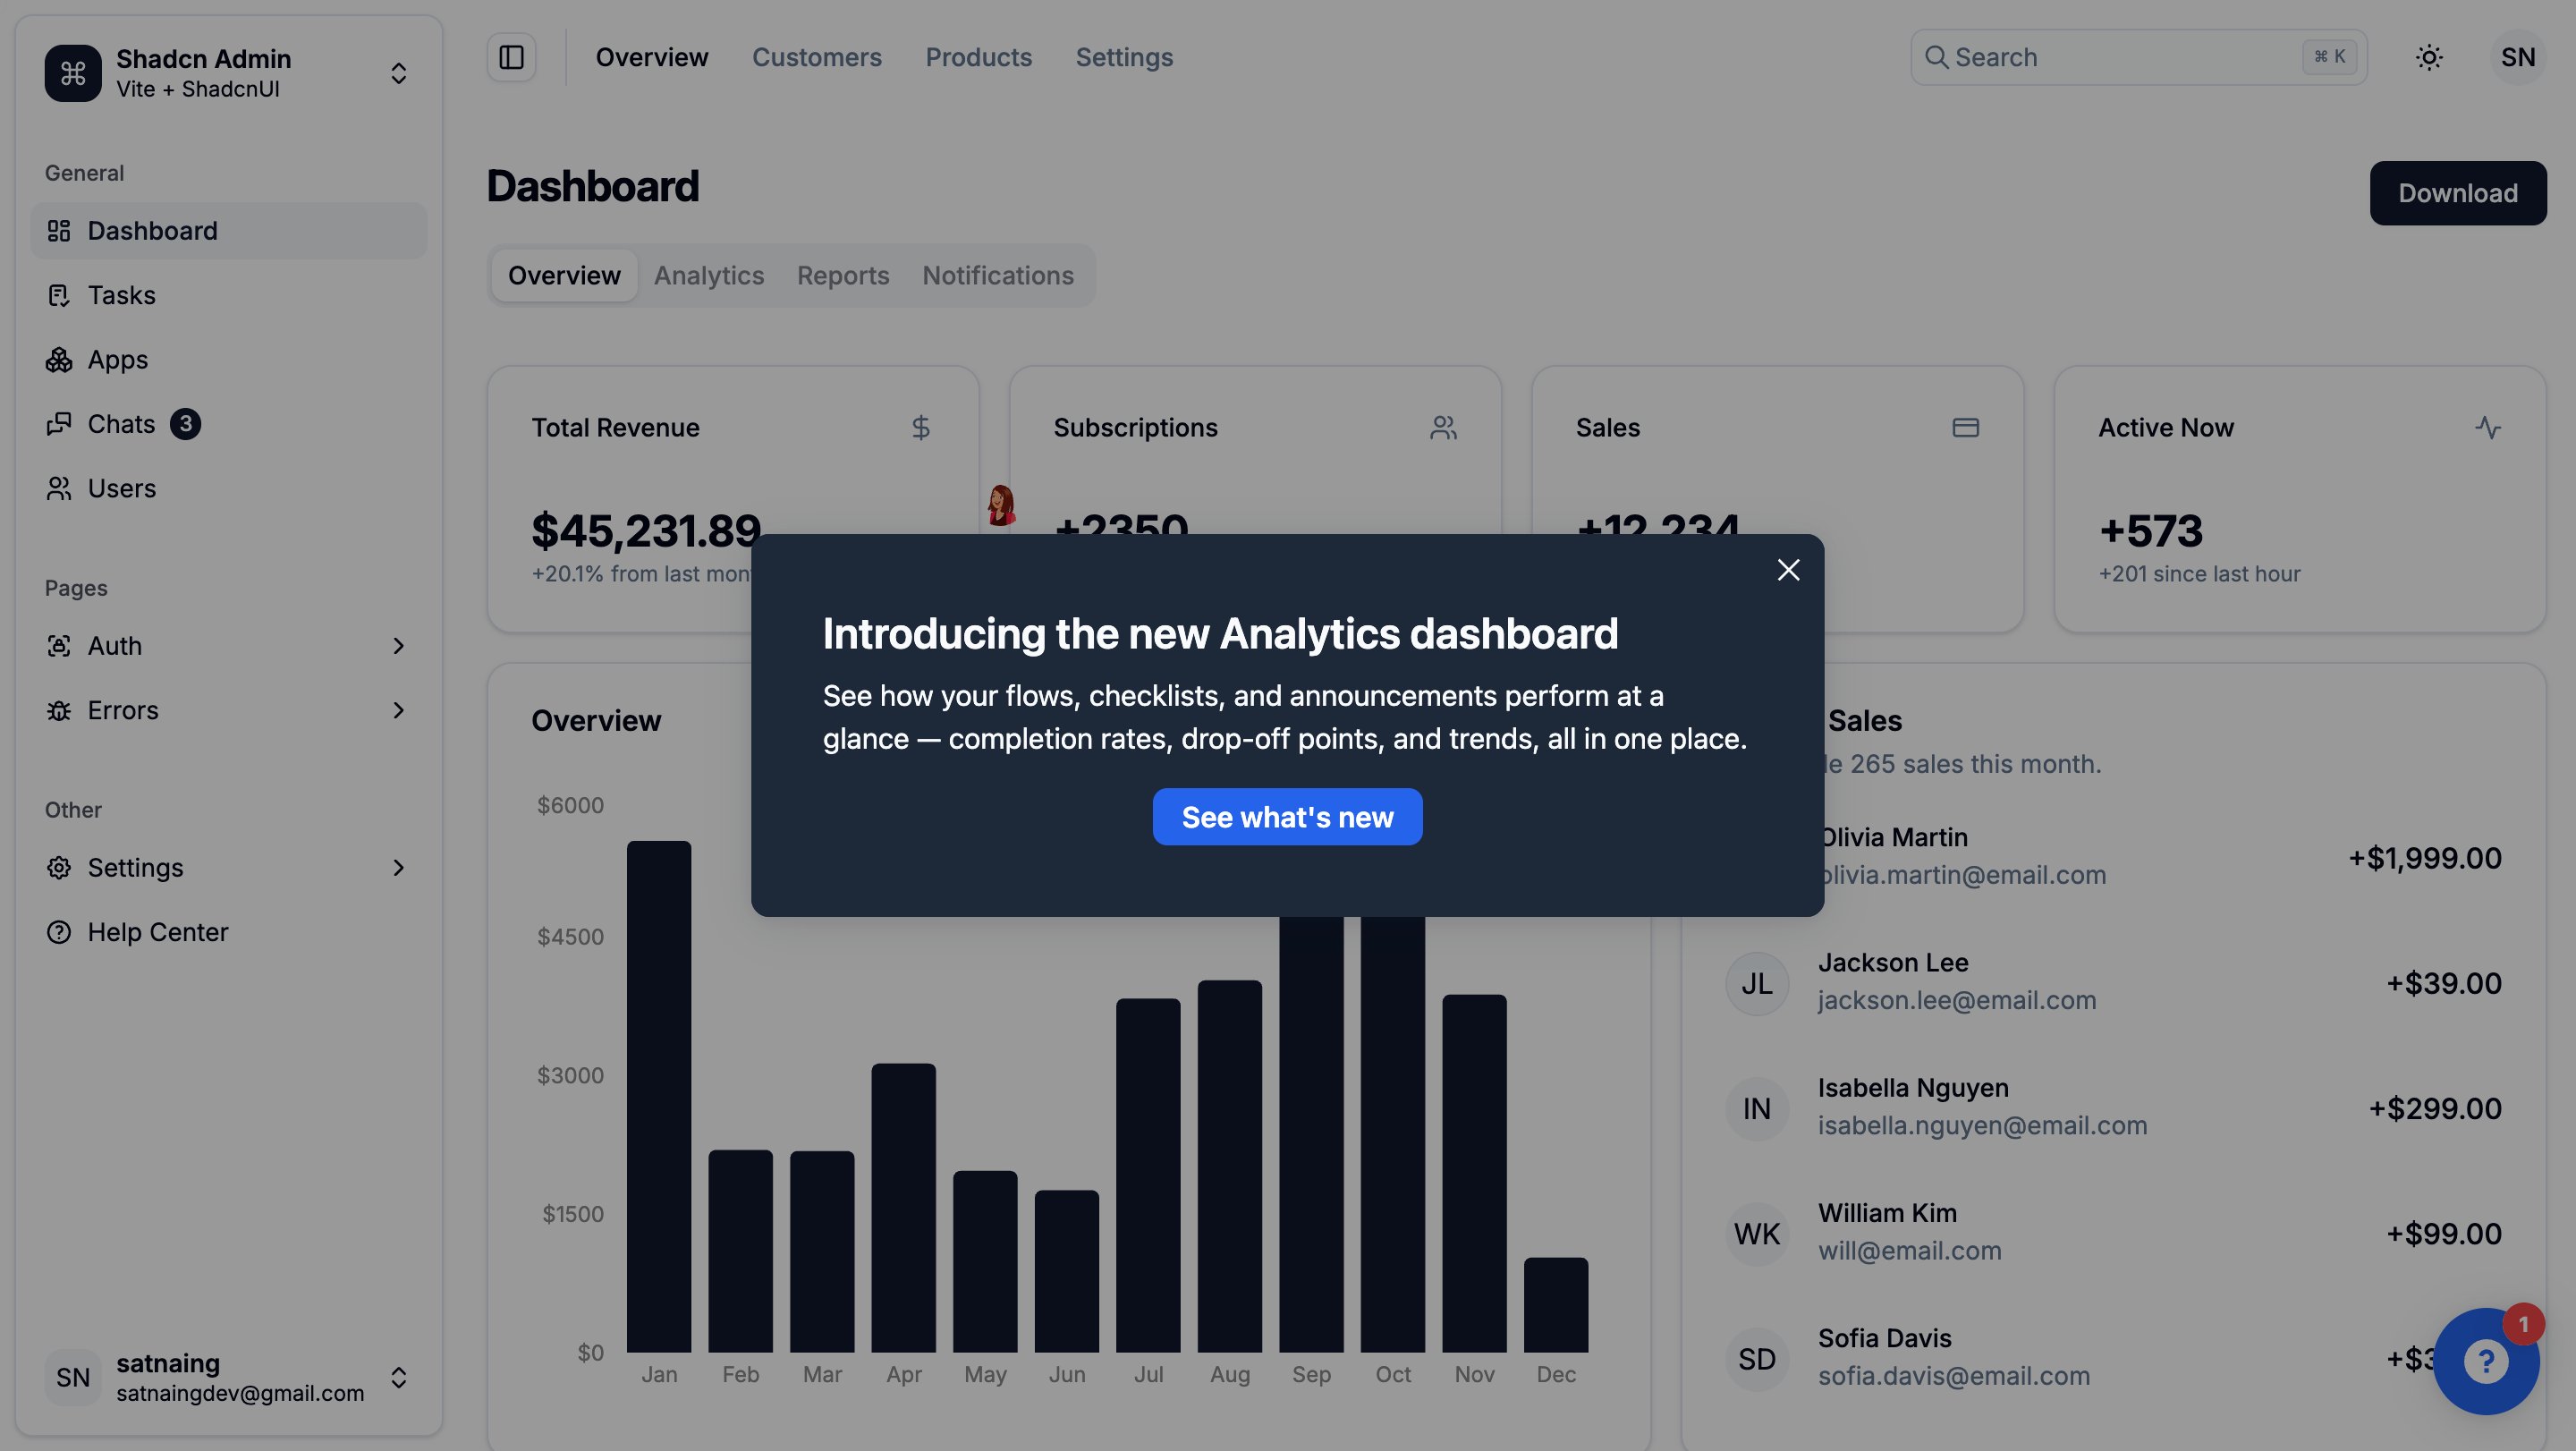
- Modal — a centered overlay dialog, with the title, summary, and a primary “Read more” button
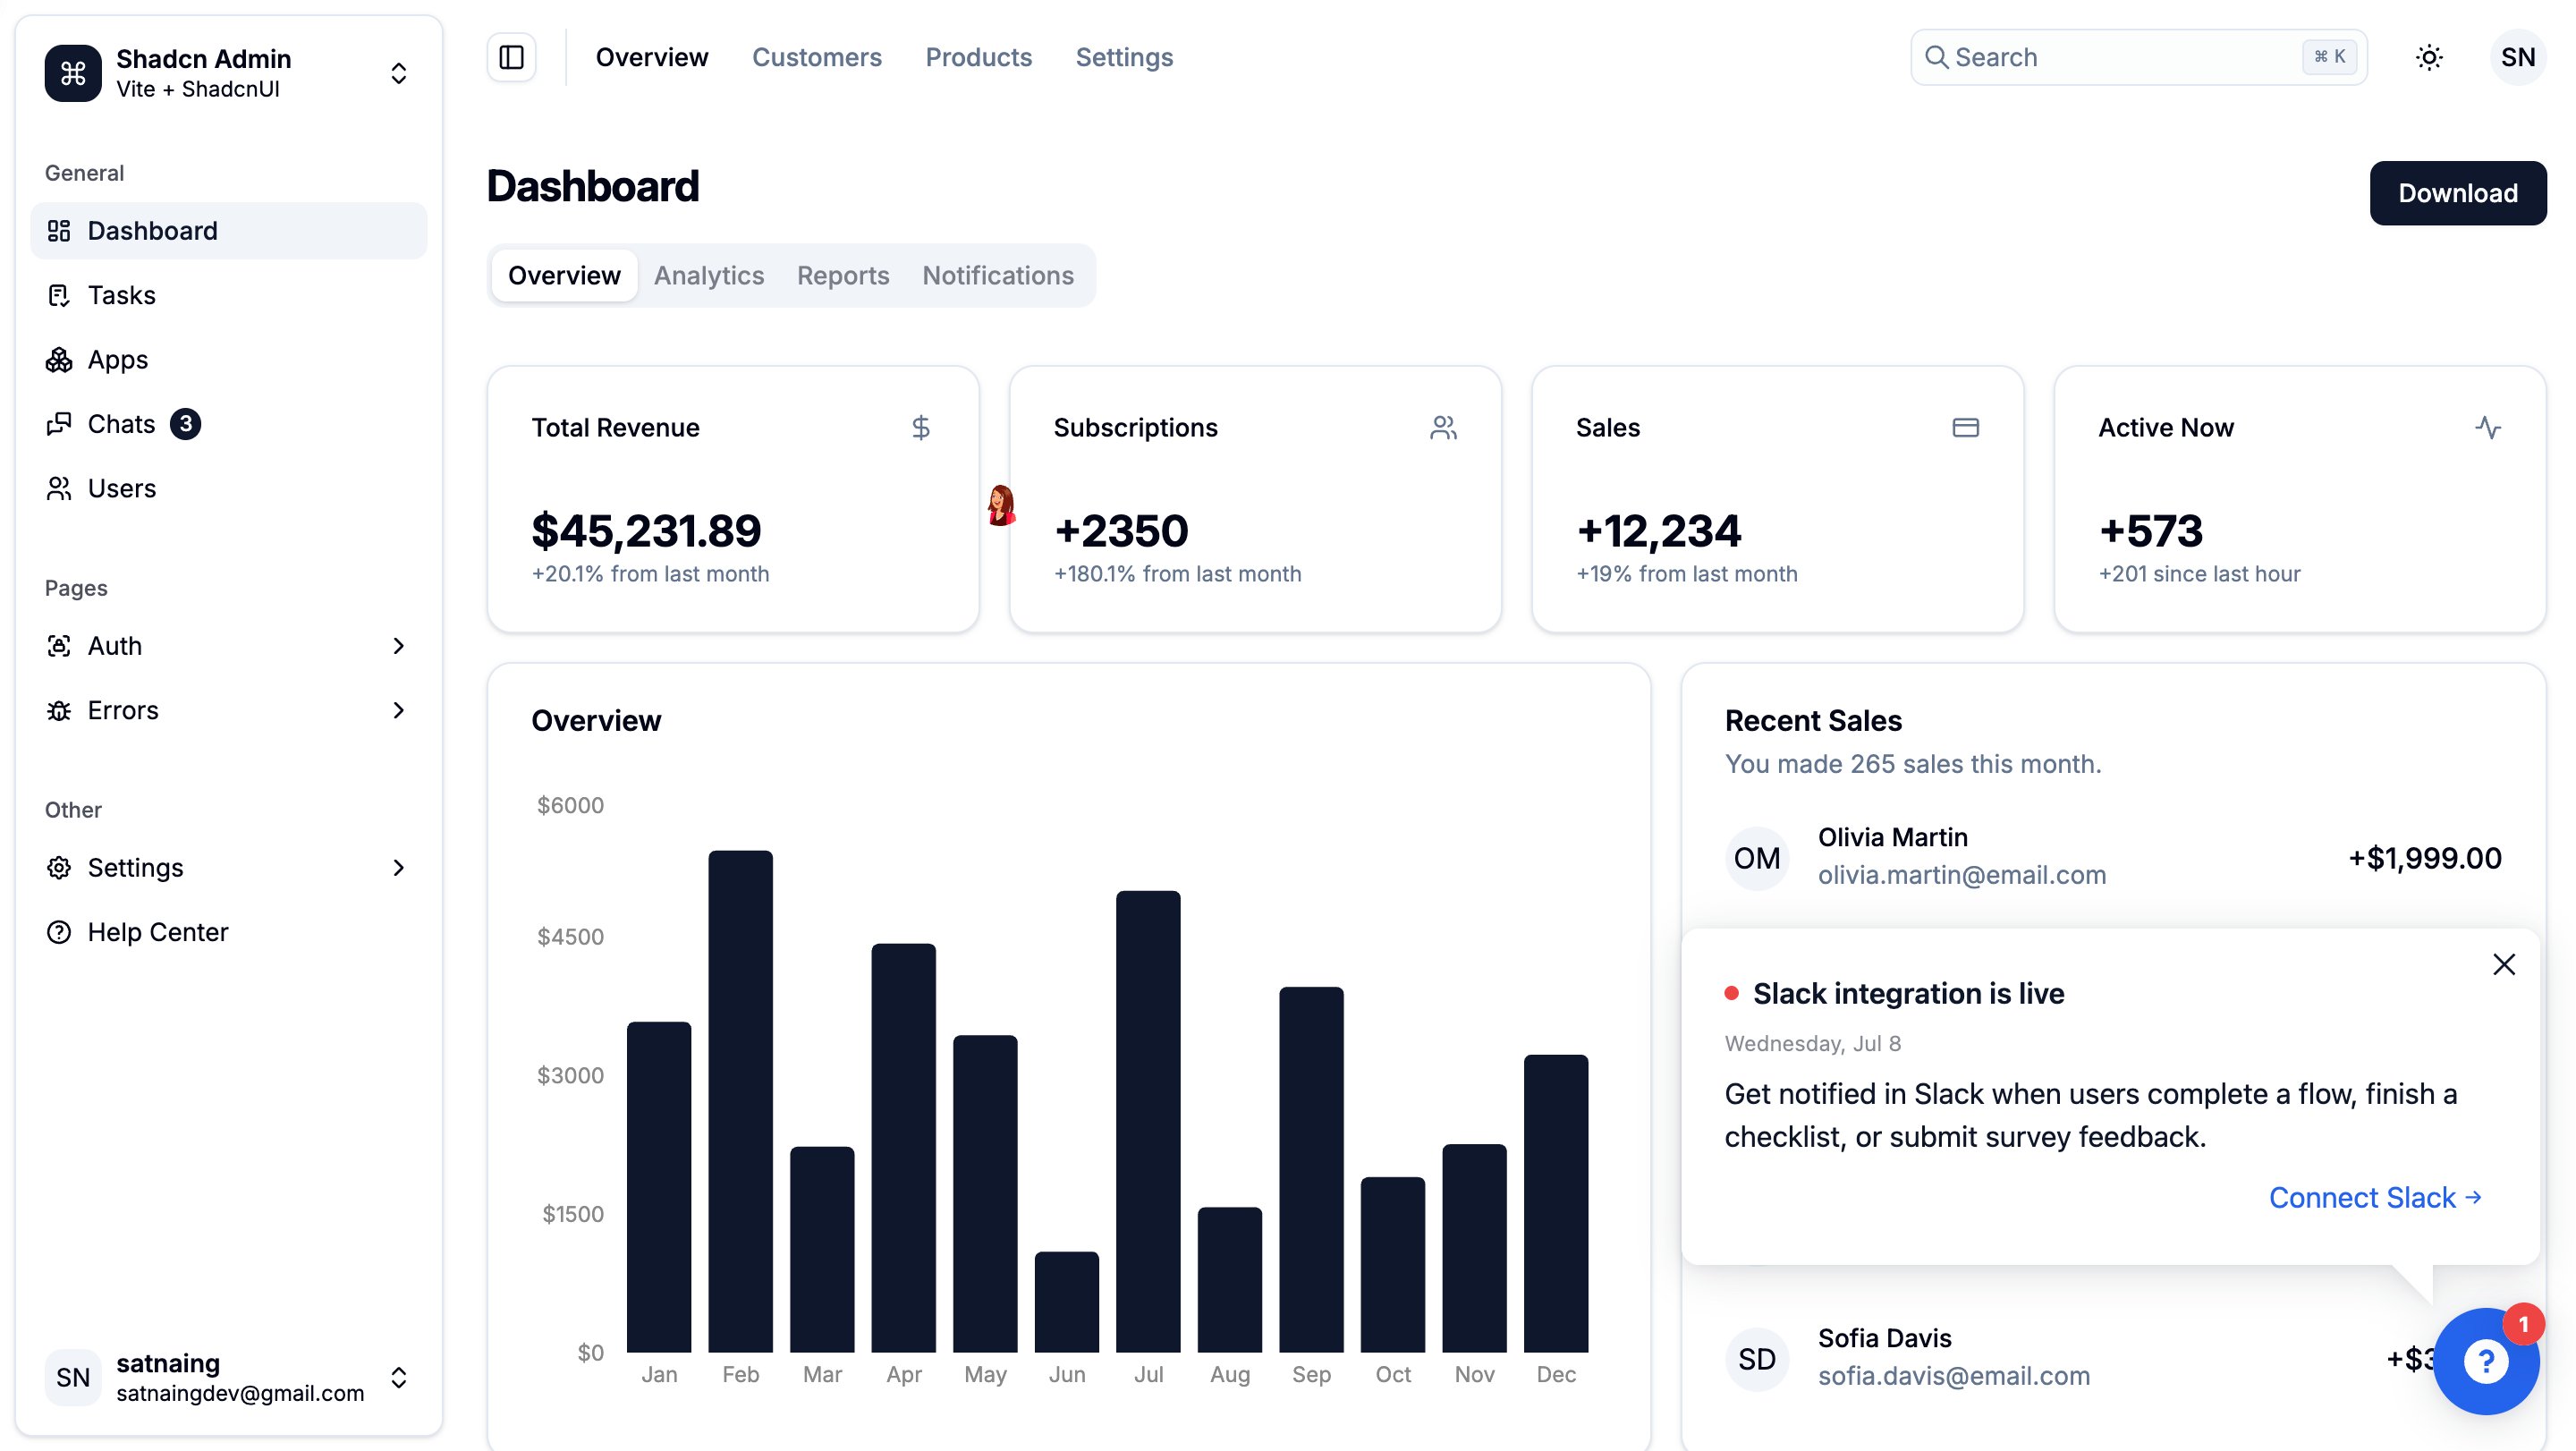
- Speech bubble — a bubble anchored next to the Resource Center launcher, following whichever corner the launcher is placed in
Targeting and scheduling
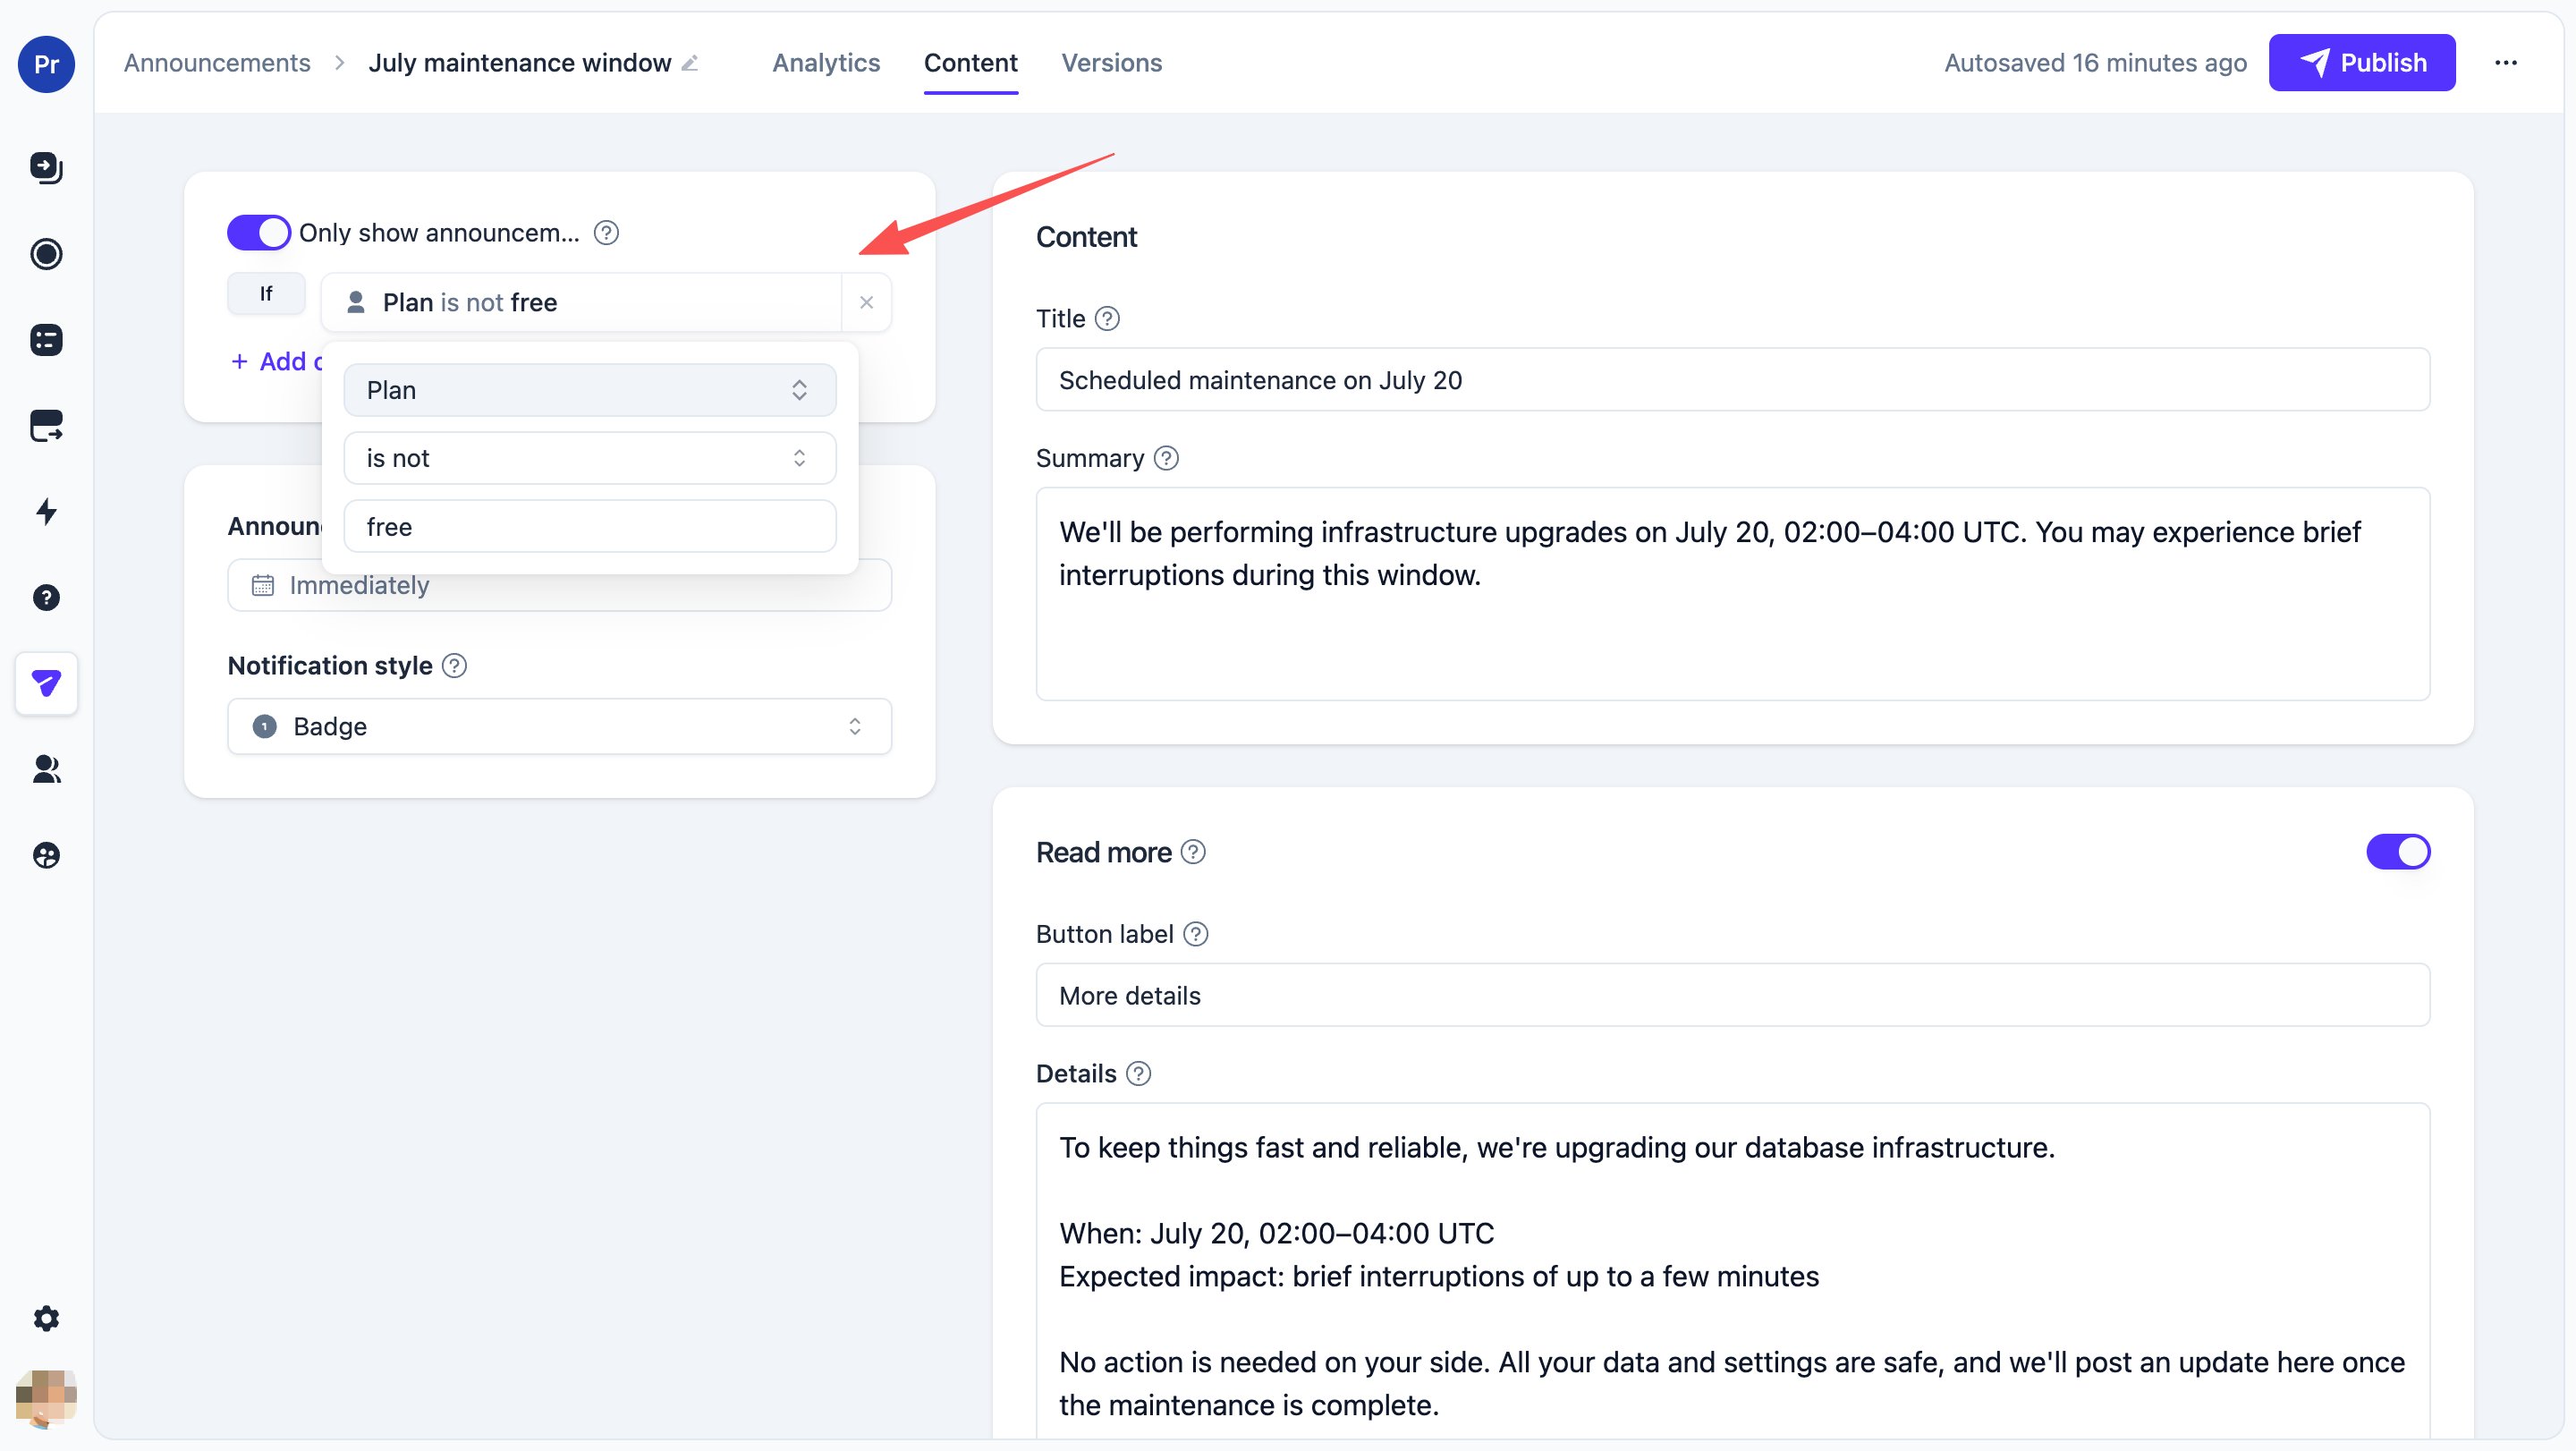
Two settings control who sees an announcement and when:- Only show announcement if… — condition rules evaluated per user, just like flow targeting. Leave it off to show the announcement to everyone. Targeting applies consistently everywhere: the feed, the badge count, and the pop-up all agree on who sees what
- Announcement time — leave it on Immediately and publishing stamps the current time; or set a future time and the announcement stays hidden everywhere until that moment, then slots into the feed under the right date. Handy for preparing release notes ahead of a launch
Publishing
Announcements publish per environment like any other content: click Publish on the detail page. Editing a published announcement creates a draft version; your changes go live when you publish again. Unpublishing removes the announcement from the feed.What users see
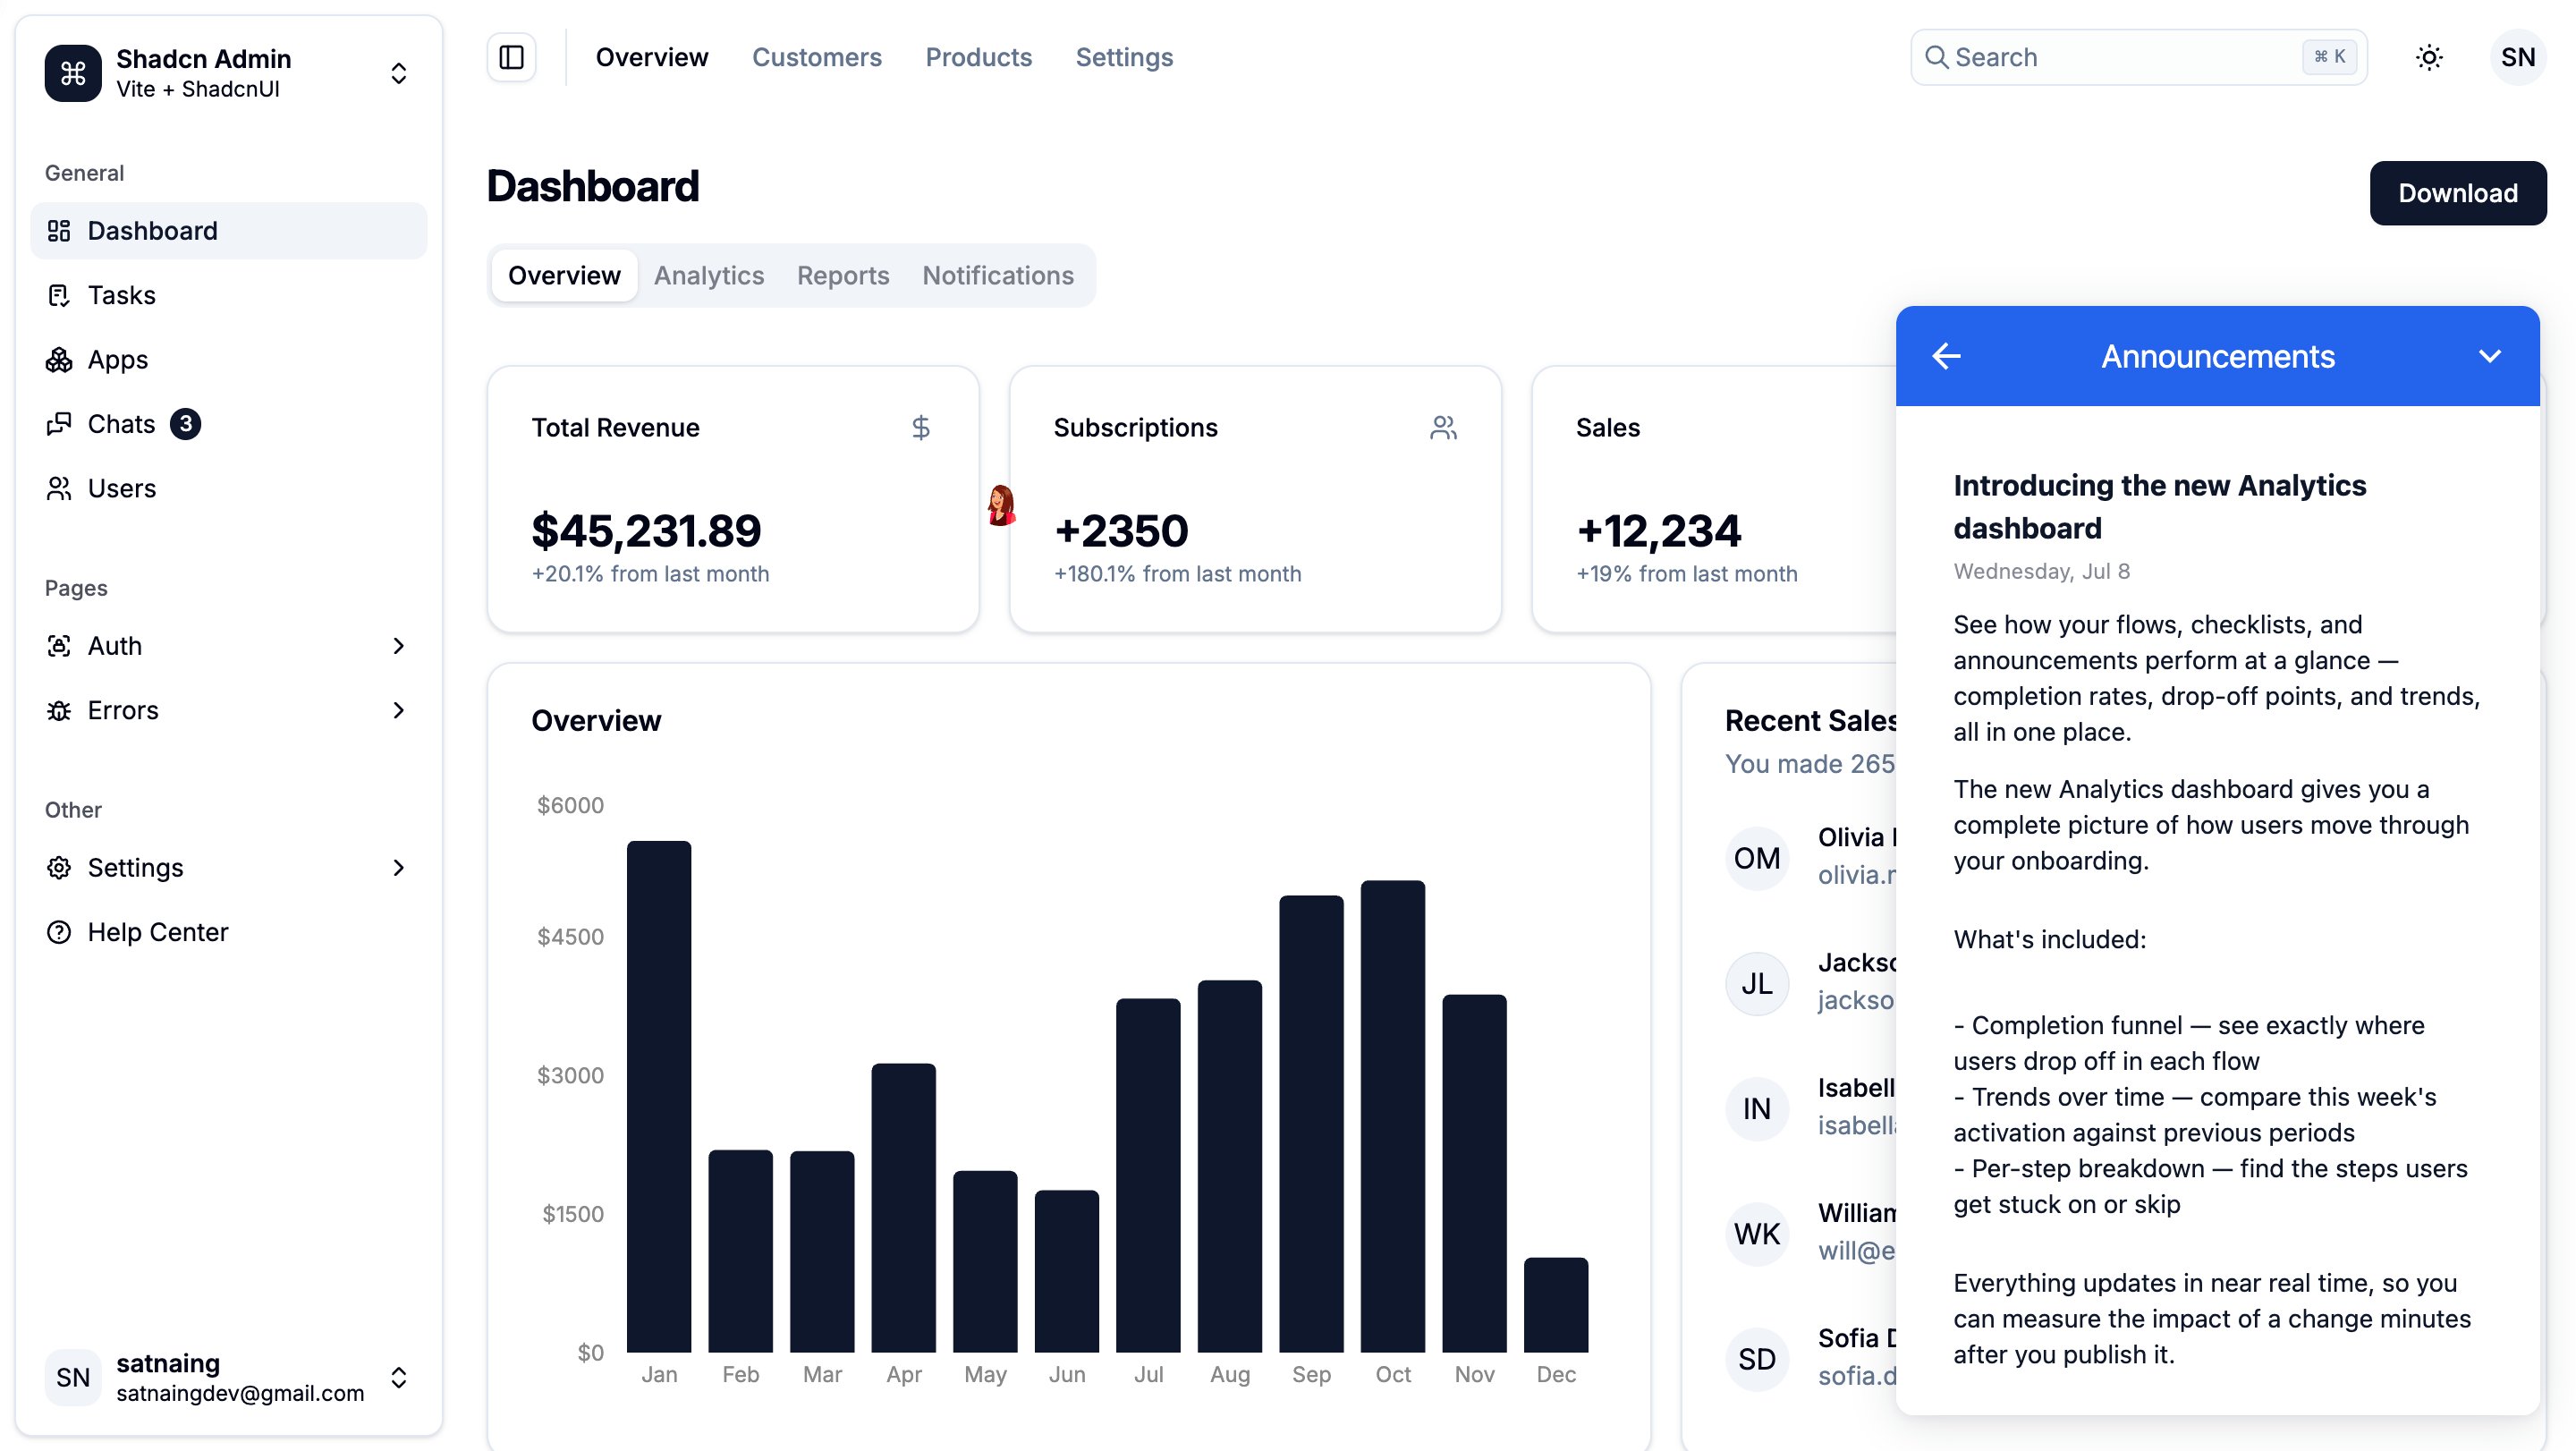
- The feed lists published announcements newest first, grouped under date separators, with an unread indicator on entries the user hasn’t seen
- Opening the feed marks its announcements as seen and clears the launcher and tab badges immediately
- “Read more” opens the detail page inside the panel; navigating back returns to the feed exactly where the user left it
- A pop-up announcement is shown at most once per user — dismissing it or reading it settles it for good
Analytics
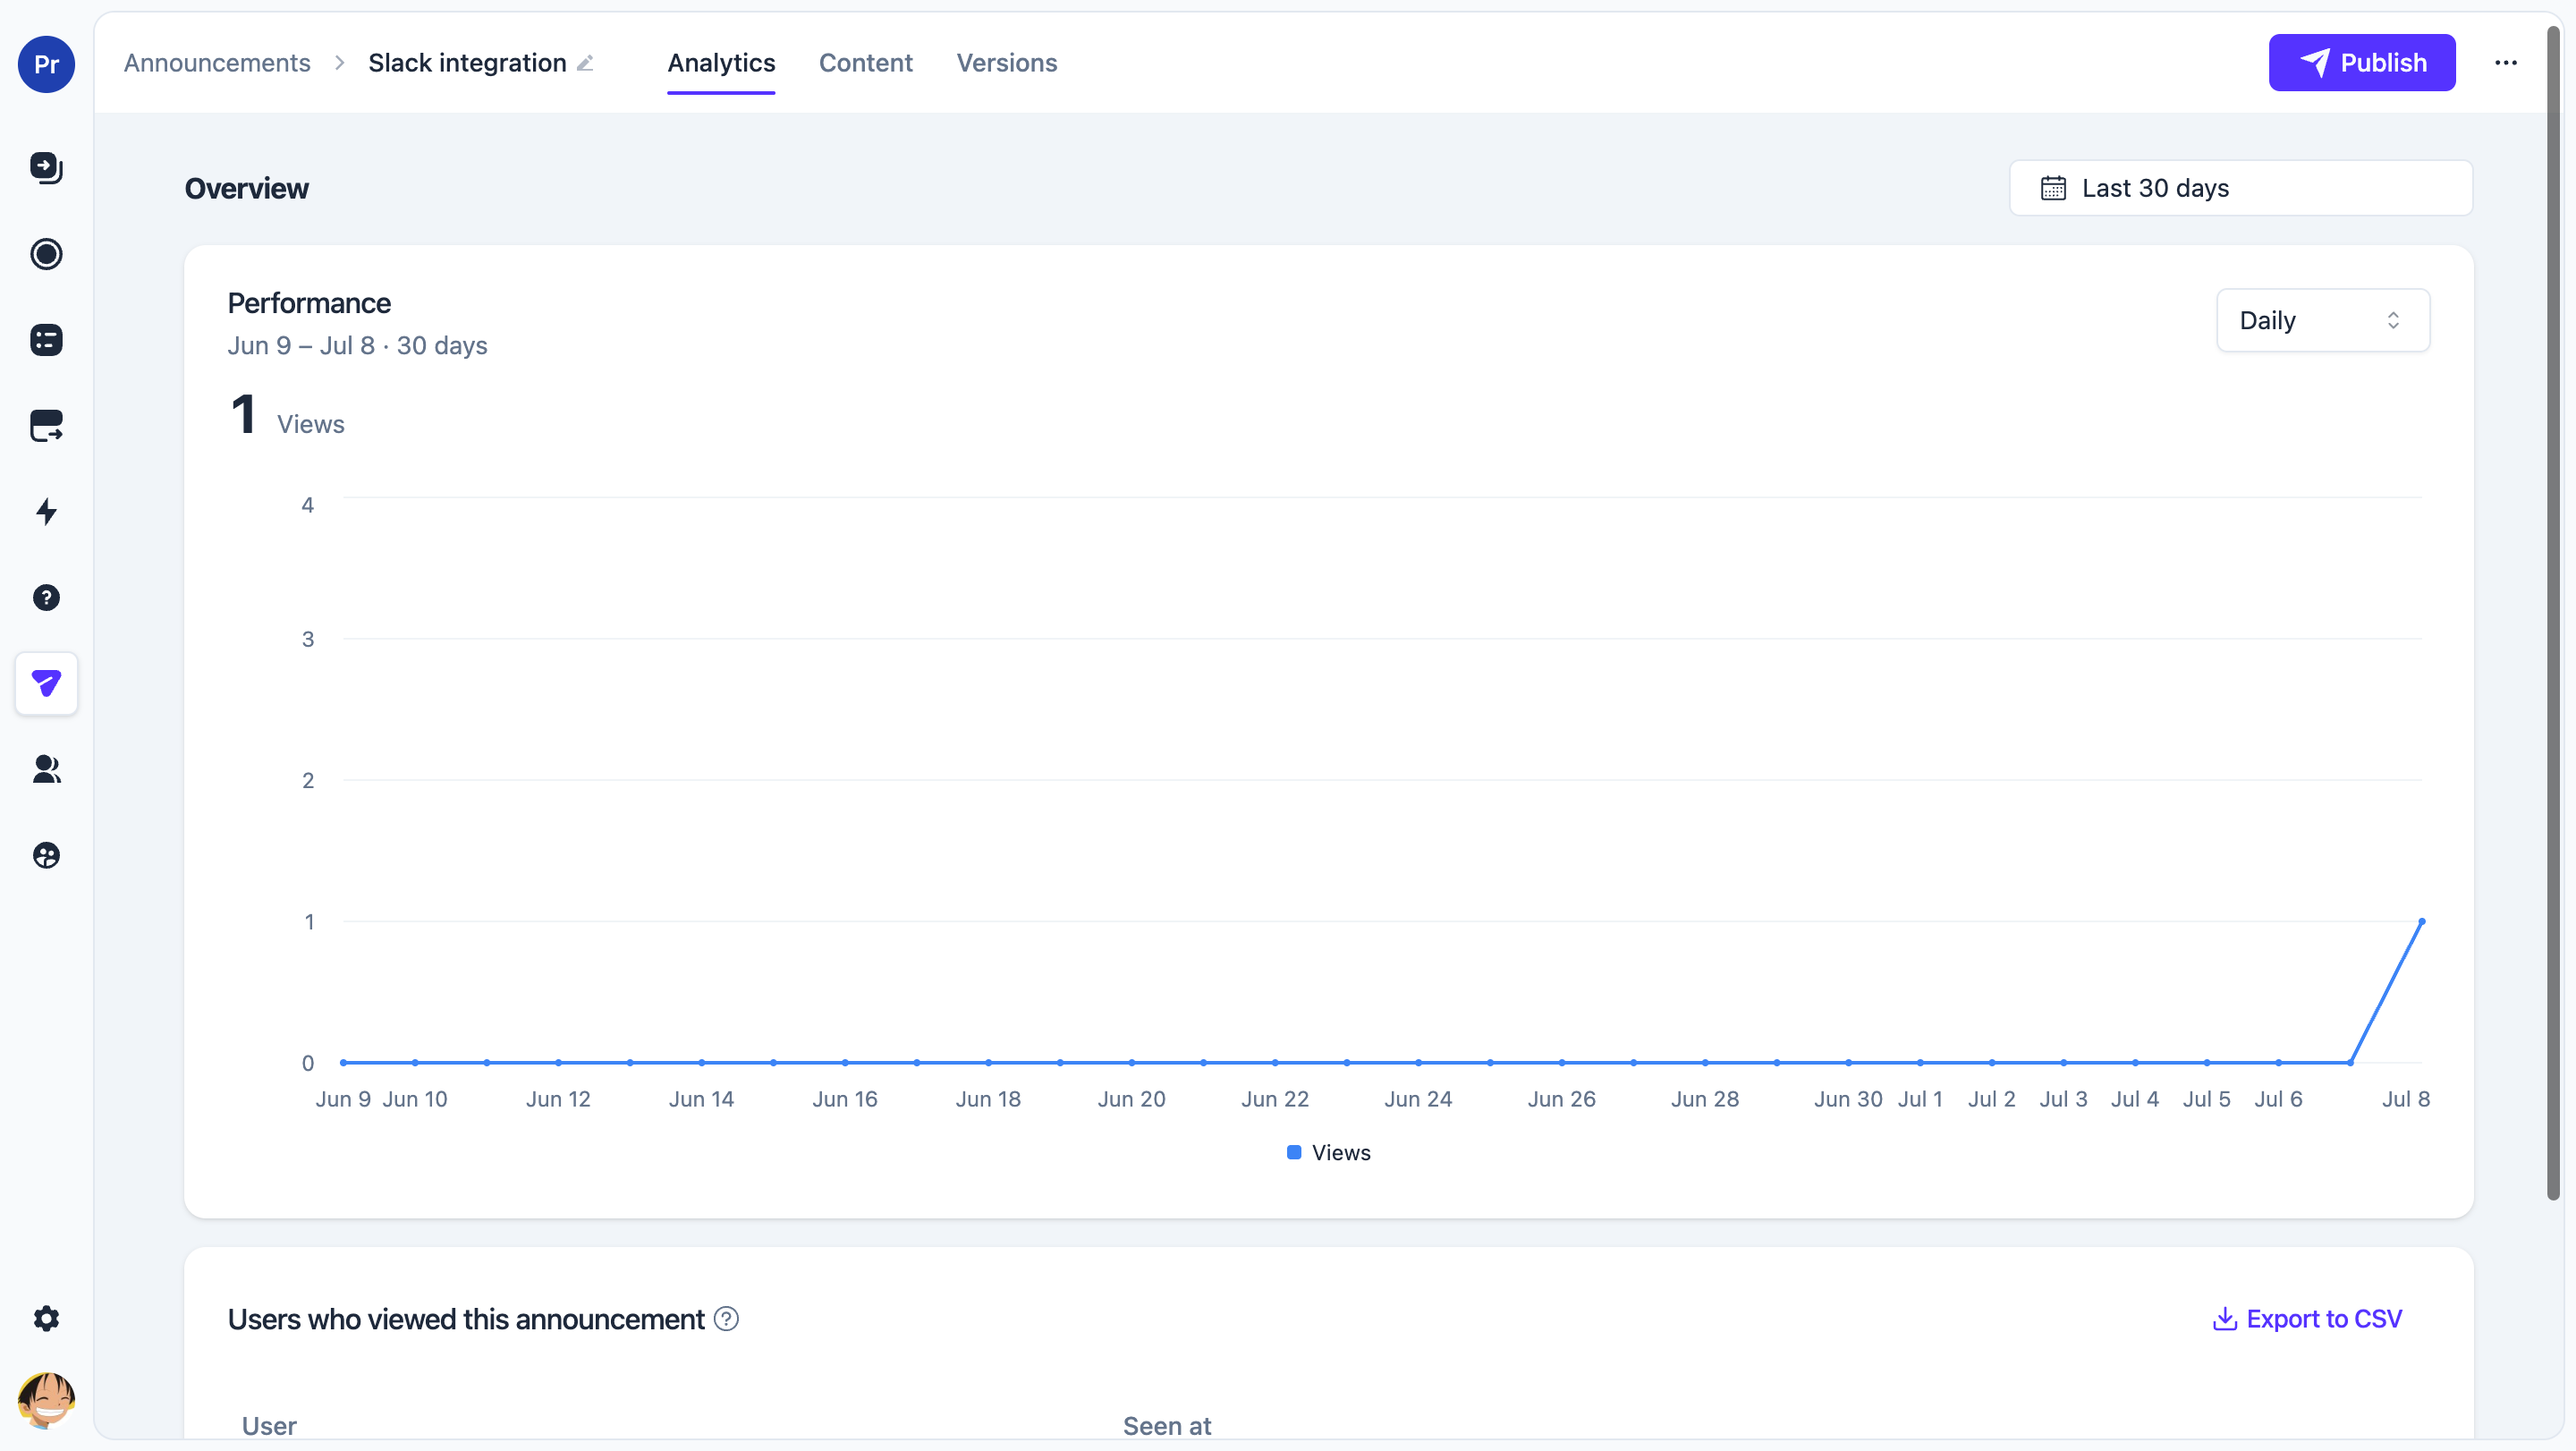
The Analytics tab on the announcement detail page shows its reach:- Views — how many users have seen the announcement
- Users who viewed this announcement — the individual viewers, with Seen at marking when each first viewed it
Best practices
- Write the summary for skimmers — the feed row is what most users read. Lead with the change, not the preamble
- Use Read more for depth — keep the feed light and put screenshots, details, and instructions on the detail page
- Reserve Pop-up for the few big ones — if every announcement pops up, none of them feels important. Silent and Badge cover routine updates well
- Pair announcements with flows — add a “Show me” button that starts a flow, so users can go from reading about a feature to trying it in one click
- Schedule instead of rushing — prepare the announcement ahead of time and set its announcement time to your launch moment
- Target by relevance — release notes for an enterprise feature don’t need to badge every free-plan user