SSO is configured per project by a project Owner, under Settings → SSO. It requires a Business plan (cloud) or an active license (self-hosted). Without it, the SSO settings page shows an upgrade prompt.
How it works
- You register Usertour as an OIDC application in your IdP.
- Usertour auto-discovers the IdP’s endpoints from a single Issuer URL — you never enter authorization, token, or userinfo URLs by hand.
- Every provider shares one fixed Redirect URI:
https://<your-usertour-api>/api/auth/sso/callback. The exact value is shown in the New Provider dialog — always copy it from there. - Your team signs in at a per-project link, shown on the SSO settings page:
https://<your-usertour>/auth/sso/<projectId>.
Step 1 — Copy your Redirect URI
Go to Settings → SSO → New provider. The dialog shows a read-only Redirect (callback) URL. Copy it — you’ll paste it into your IdP in the next step.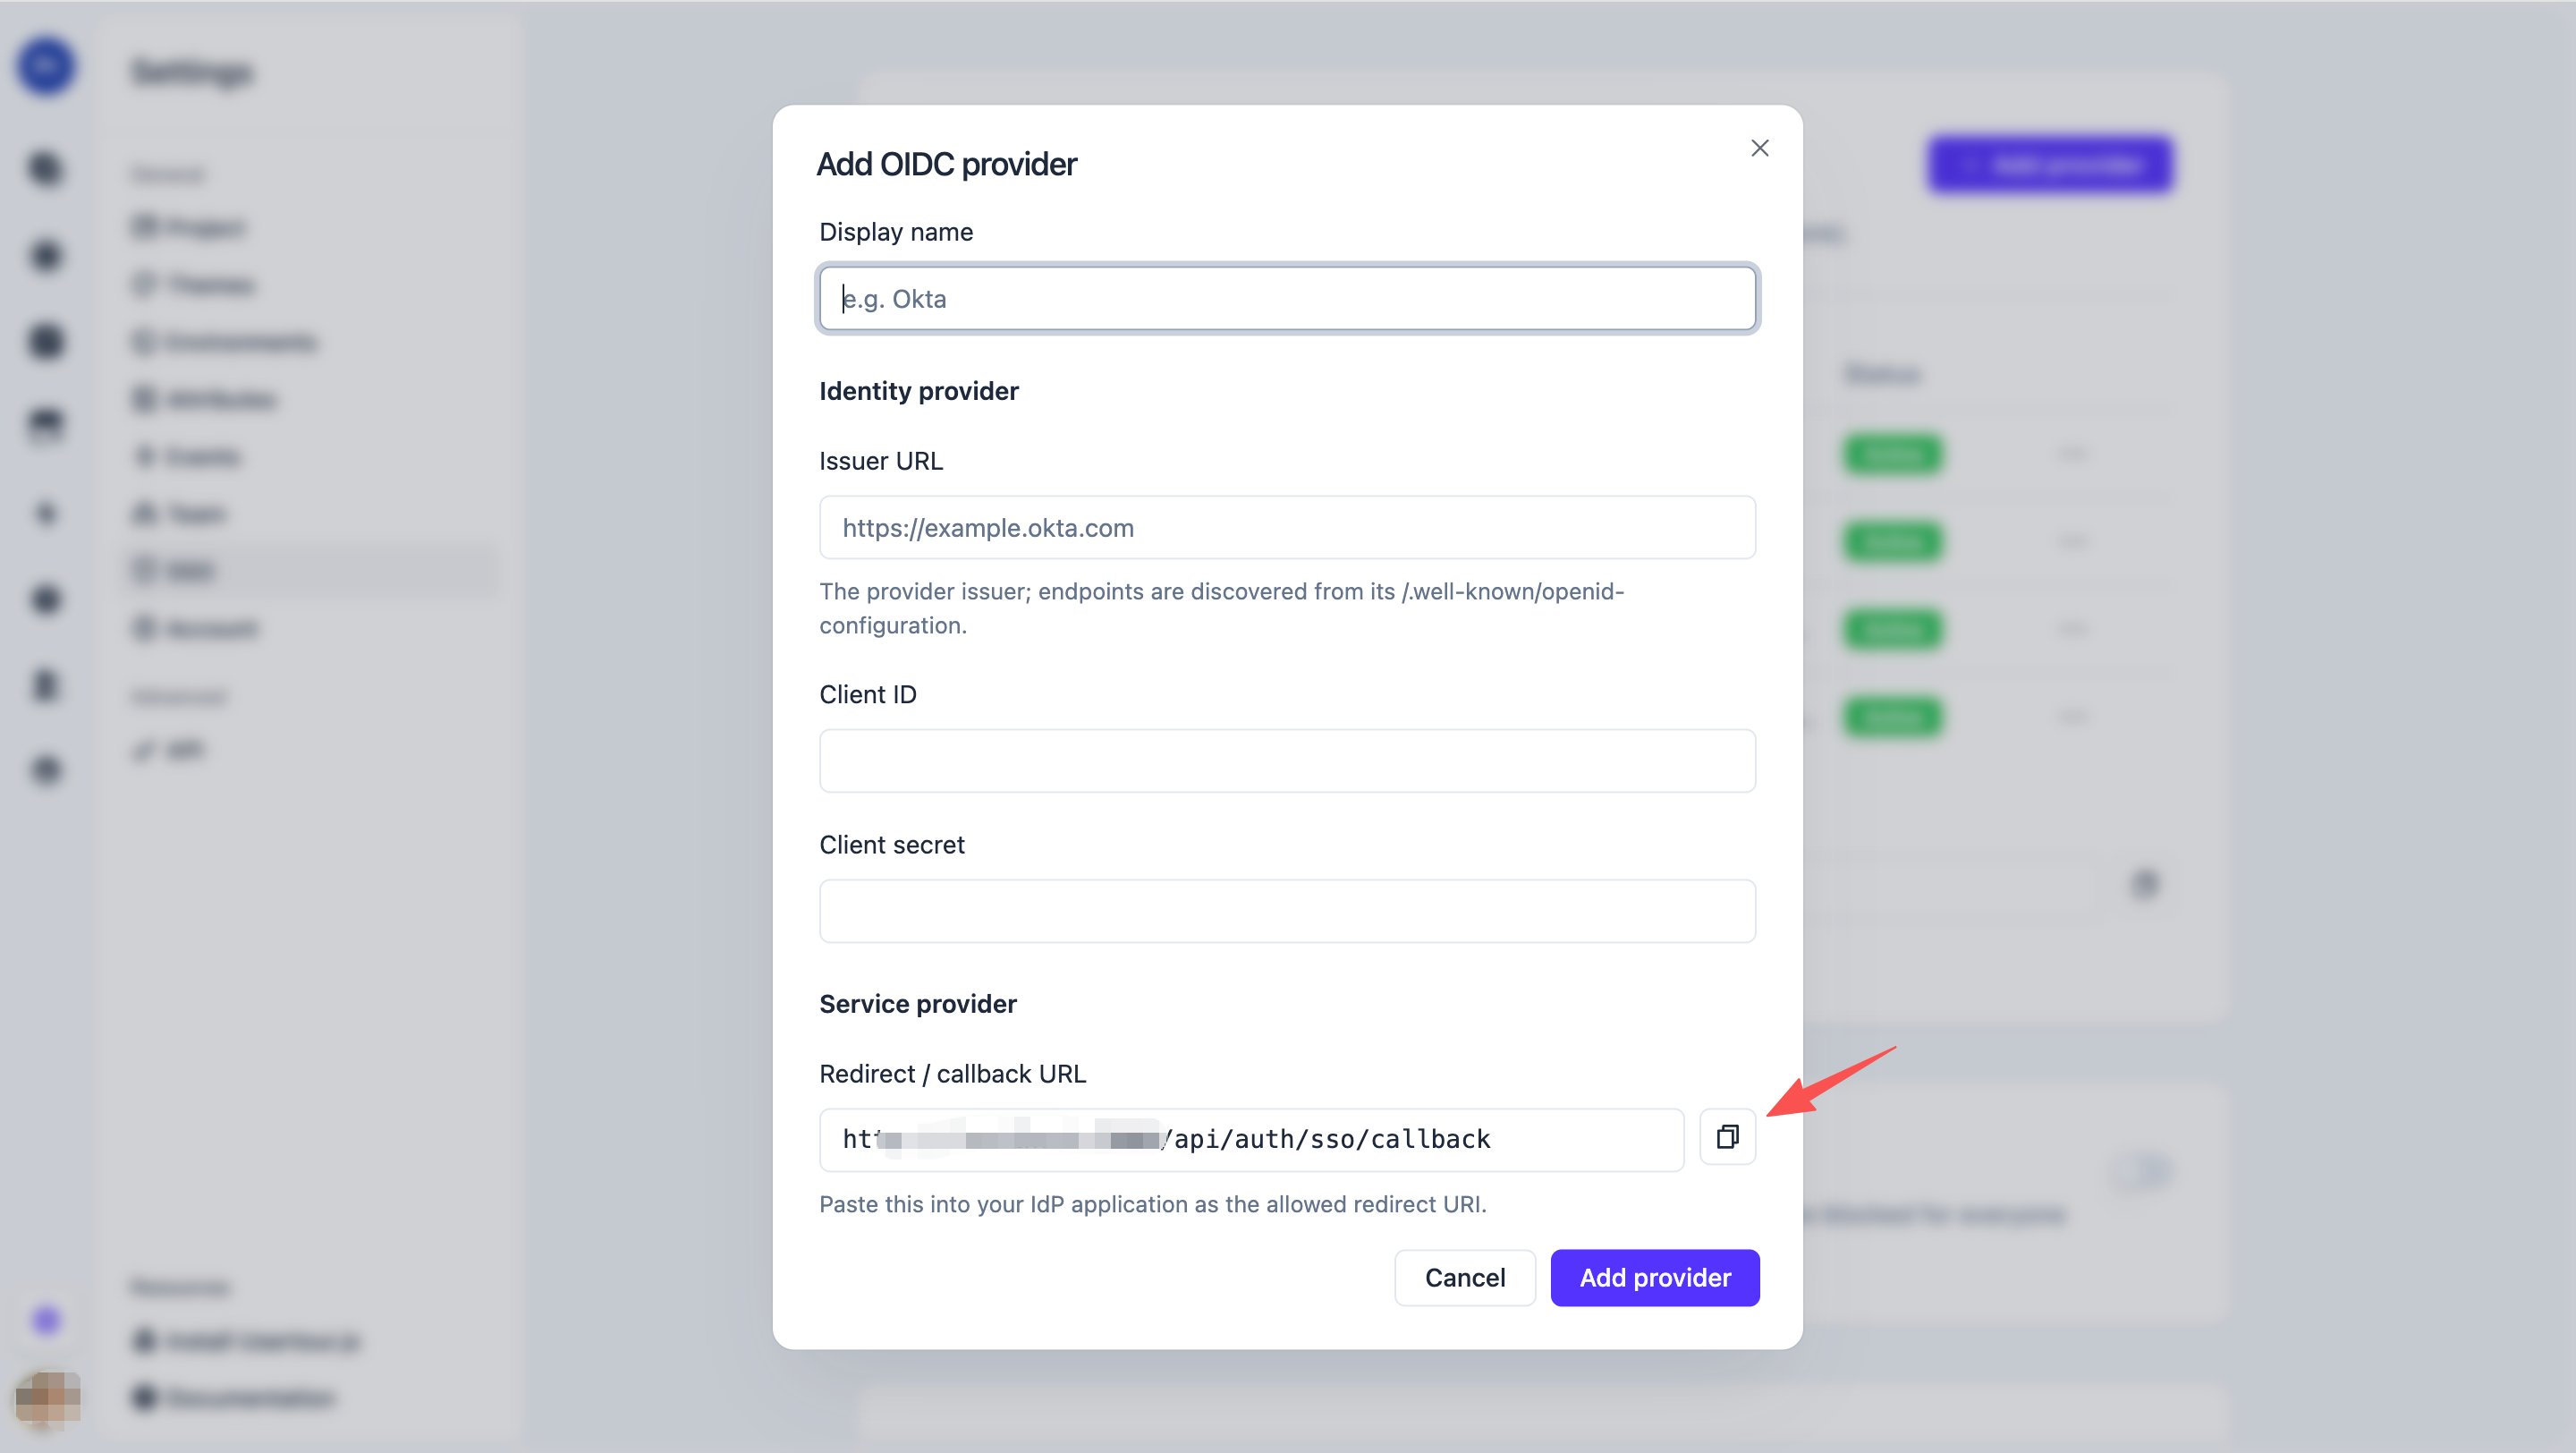
Step 2 — Register Usertour in your IdP
Create an OIDC Web application in your IdP and set its redirect/callback URI to the value you just copied. Then collect three values:| Value | What it is |
|---|---|
| Issuer URL | Your IdP’s OIDC issuer — Usertour discovers everything else from it |
| Client ID | The application’s client identifier |
| Client Secret | The application’s secret |
openid, email, and profile scopes — Usertour requests these.
See Provider setup below for Okta, Google Workspace, Microsoft Entra ID, and Keycloak.
Step 3 — Add the provider in Usertour
Back in Settings → SSO → New provider, fill in:- Name — a label for this connection (for example, “Okta”).
- Issuer URL, Client ID, Client Secret — from Step 2.
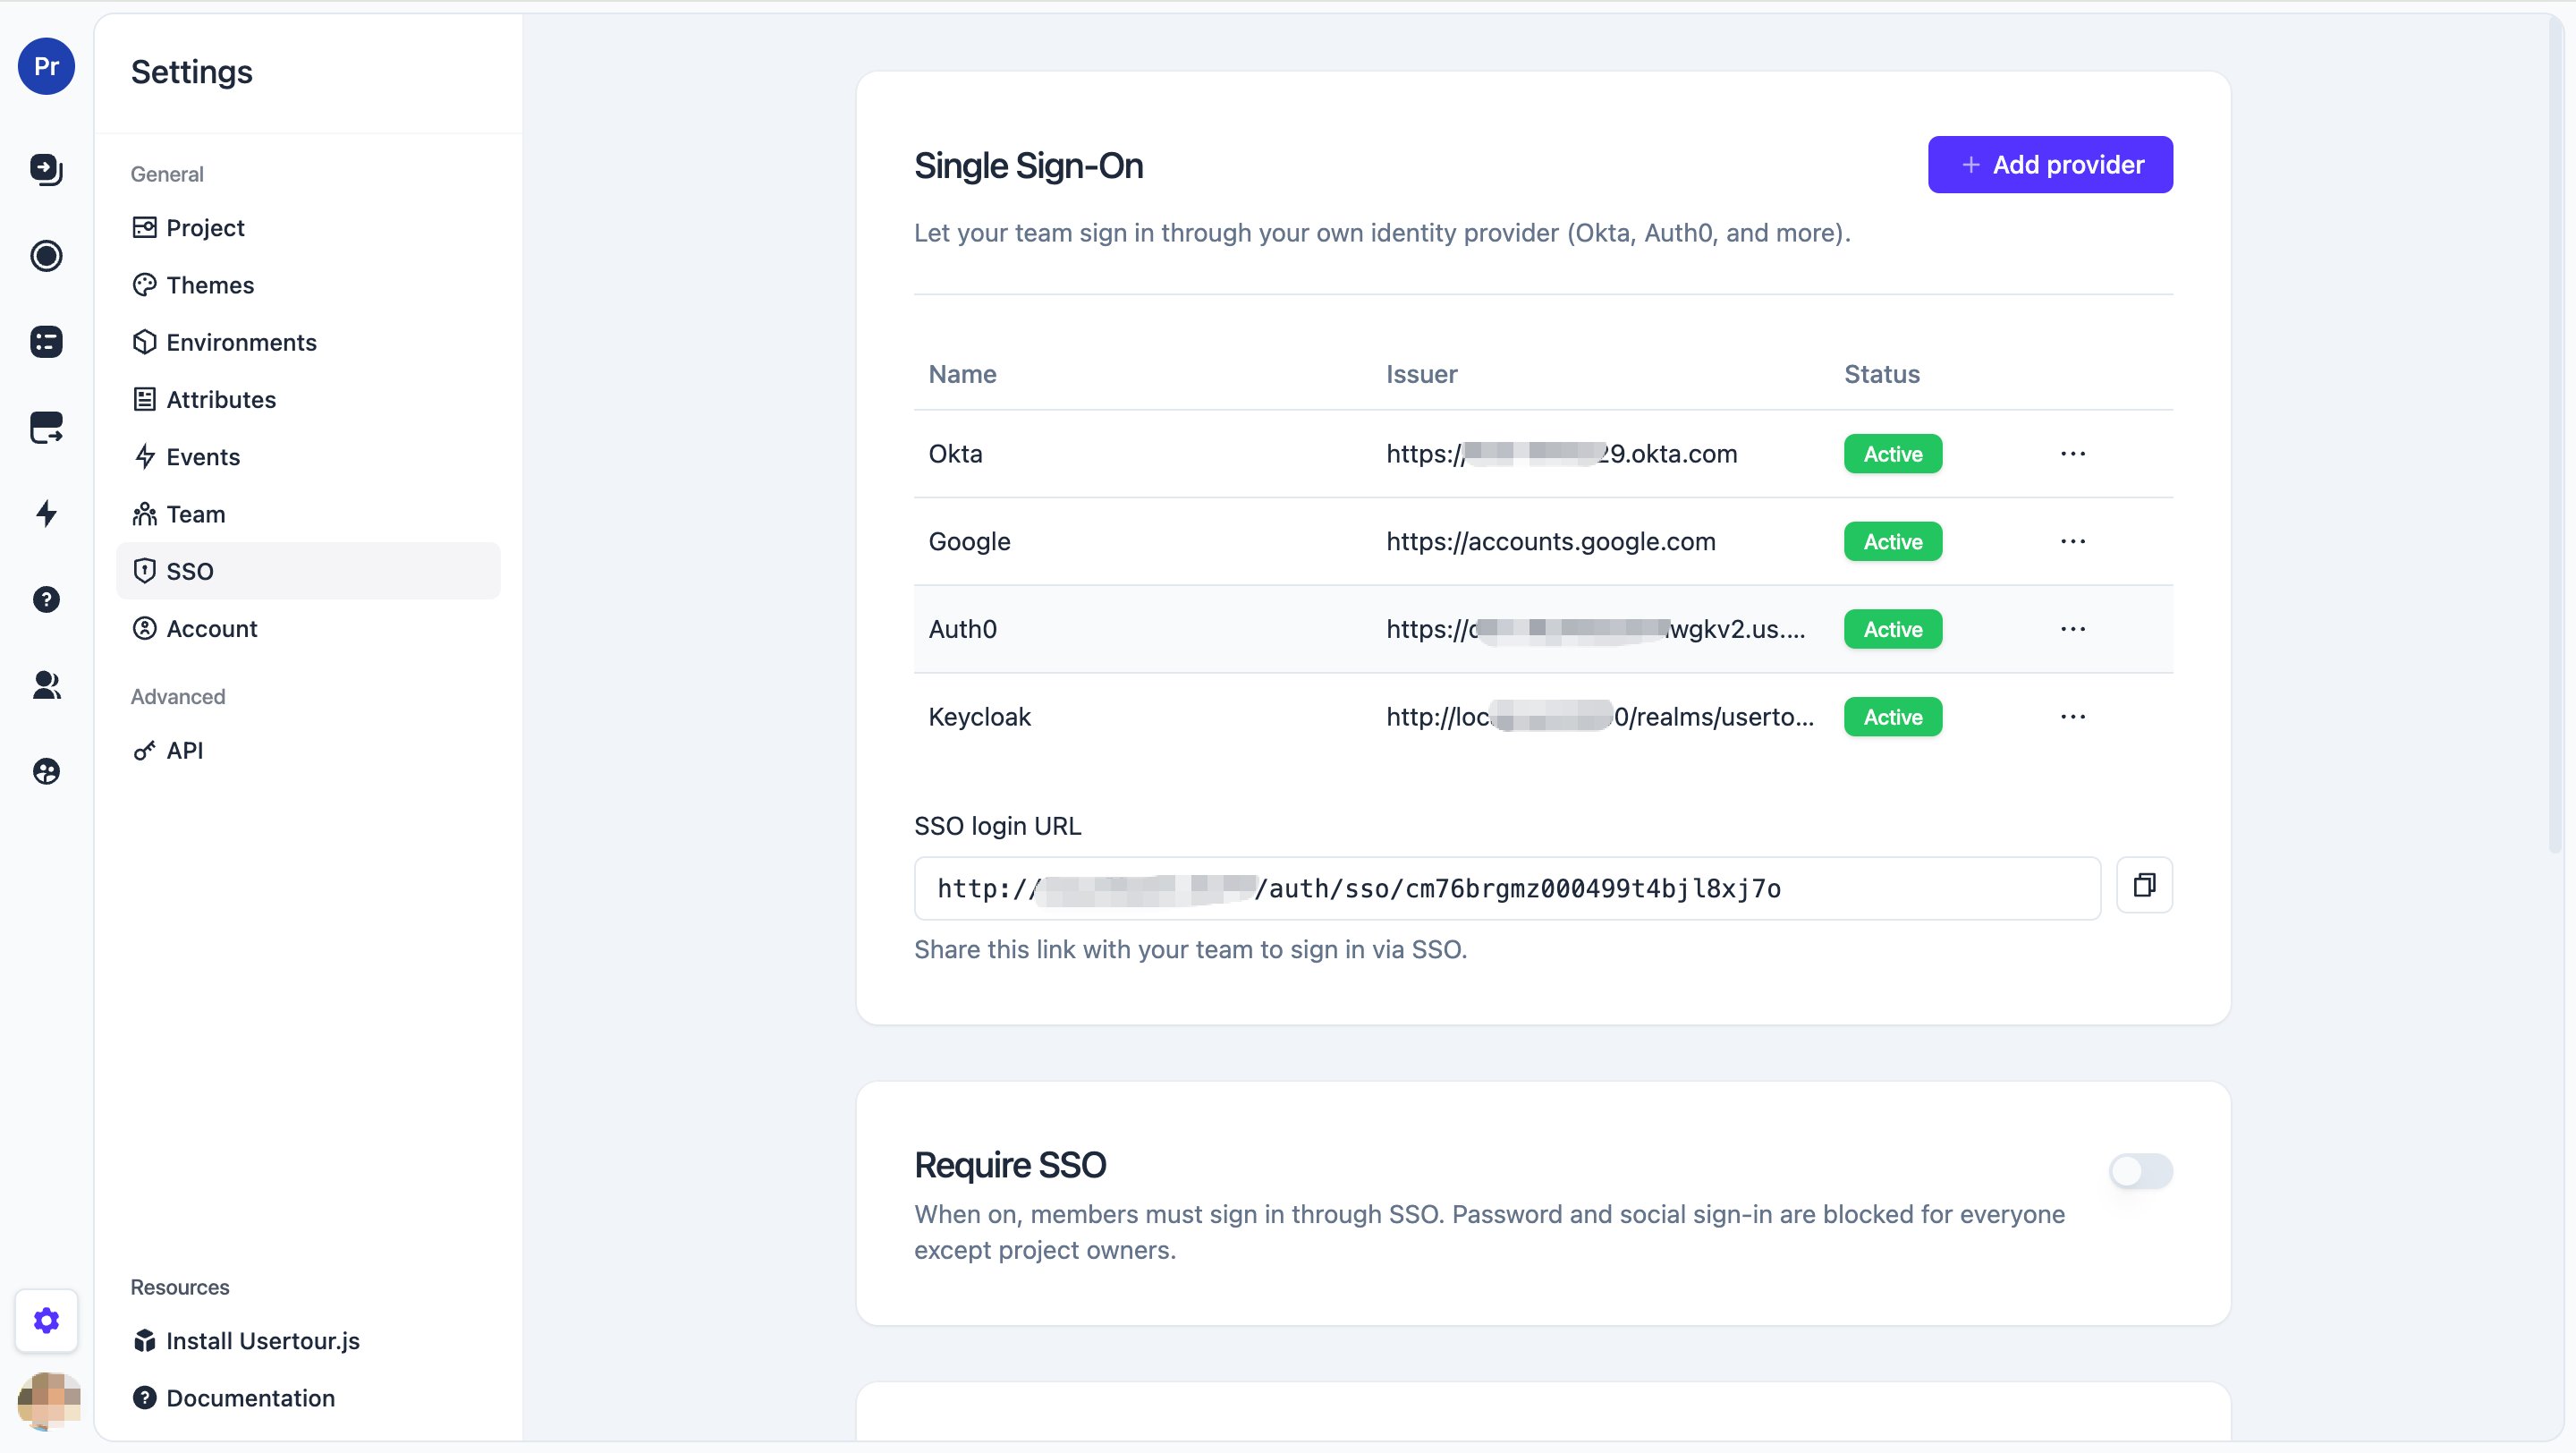
Step 4 — Share the sign-in link
Copy the per-project SSO login URL shown on the SSO page and share it with your team. That’s the one link they use to sign in via SSO.Step 5 — Enforce SSO and control new-user access (optional)
- Require SSO — once on, members can only sign in through SSO; password and social sign-in stop working for them. Project Owners keep password access as a fallback.
-
New user access — invite-required by default: a new person must be invited before they can join, even through SSO. Turn on Automatically add new users to provision anyone who authenticates, optionally restricted to specific email domains and assigned a default role.
If you enable Automatically add new users without setting an allowed email domain, anyone who can authenticate through your IdP can join the project. Set an allowed domain to scope this down.
Provider setup
Okta
Okta’s own guide: Create an OIDC app integration.- Okta Admin Console → Applications → Create App Integration → OIDC - OpenID Connect, application type Web Application.
- Sign-in redirect URIs → paste your Usertour Redirect URI.
- Assign the app to the users or groups who should have access.
- From the app’s General tab, copy the Client ID and Client secret.
- Issuer URL = your Okta org URL, for example
https://your-org.okta.com.
Google Workspace
Google’s docs: OpenID Connect.- Google Cloud Console → APIs & Services → Credentials → Create Credentials → OAuth client ID, application type Web application.
- Authorized redirect URIs → paste your Usertour Redirect URI.
- Copy the Client ID and Client secret.
- Issuer URL =
https://accounts.google.com.
Microsoft Entra ID (Azure AD)
Microsoft’s docs: Microsoft identity platform and the OpenID Connect protocol.- Azure Portal → Microsoft Entra ID → App registrations → New registration. Name it, set the Redirect URI platform to Web, and paste your Usertour Redirect URI.
- Certificates & secrets → New client secret → copy the secret Value immediately.
- API permissions → Microsoft Graph (delegated): make sure
openid,profile, andemailare present. - On the app Overview page: Application (client) ID is your Client ID; note the Directory (tenant) ID.
- Issuer URL =
https://login.microsoftonline.com/<tenant-id>/v2.0.
Entra ID often omits
email from the ID token. Usertour handles this automatically — it falls back to the userinfo endpoint and to the upn / preferred_username claim — so no extra claim configuration is needed.Auth0
Auth0’s docs: Register Regular Web Applications.- Auth0 Dashboard → Applications → Create Application, select Regular Web Applications.
- On the Settings tab → Application URIs → Allowed Callback URLs → paste your Usertour Redirect URI.
- Still on Settings, copy the Domain, Client ID, and Client Secret.
- Issuer URL = your Auth0 domain, for example
https://your-tenant.us.auth0.com.
Keycloak
Keycloak’s docs: Managing OIDC clients.- Keycloak Admin Console → your realm → Clients → Create client → type OpenID Connect. Enable Client authentication (a confidential client).
- In the client’s Settings, add your Usertour Redirect URI under Valid redirect URIs.
- Credentials tab → copy the Client secret. The Client ID is the name you gave the client.
- Issuer URL =
https://<your-keycloak-host>/realms/<realm-name>(Keycloak 17+). Older WildFly-based versions usehttps://<host>/auth/realms/<realm-name>.
If your Keycloak runs on an internal network or
localhost, a self-hosted Usertour refuses to reach it until you set ALLOW_PRIVATE_NETWORK_EGRESS=true — by default Usertour makes outbound SSO requests to public HTTPS addresses only (an SSRF safeguard). See Environment Variables.Troubleshooting
“Invalid parameter: redirect_uri” on the IdP’s page. The Redirect URI registered in your IdP must match the value Usertour shows exactly — scheme, host, port, and path. Re-copy it from the New Provider dialog and add it to the IdP’s allowed redirect URIs. “You don’t have access to this project” after a successful IdP login. The person isn’t a project member and Automatically add new users is off (invite-required). Invite them first, or enable auto-provisioning (optionally with an allowed domain). The login fails with an “email not verified” error. Usertour rejects a sign-in when the IdP explicitly marks the email as unverified. In your IdP, mark the user’s email as verified (in Keycloak: Users → the user → Email verified → On), then try again. A self-hosted IdP onlocalhost or an internal hostname. Supported, but the server only makes outbound SSO requests to public HTTPS addresses by default (an SSRF safeguard), so an internal issuer is refused until you set ALLOW_PRIVATE_NETWORK_EGRESS=true (see Environment Variables). With that set, use the issuer exactly as it appears in the IdP’s /.well-known/openid-configuration.
A teammate can’t sign in after you turned on Require SSO. They likely joined with an email that isn’t in your IdP. Add them in the IdP, or have them use their IdP identity.
The SSO page shows an upgrade / license prompt. SSO is a paid feature — upgrade to a Business plan (cloud) or activate a license (self-hosted). See Two-factor authentication and Team for related account settings.