

- Properties in. HubSpot properties such as lifecycle stage, plan, or industry become Usertour attributes you can target content with, kept current as they change in HubSpot.
- Properties out. Usertour attributes — onboarding progress, last seen, anything your app sets — are written back to a dedicated Usertour property group in HubSpot, where sales and success teams see them on the record.
How records are matched
Usertour never creates a HubSpot record, and HubSpot never creates a Usertour user or company. Records are linked only when both exist, matched by one of:- Email address (contacts only) — the contact’s email equals the user’s
emailattribute. - A HubSpot property holding the Usertour ID — a contact or company
property that contains the same ID your app passes to
usertour.identify()(users) orusertour.group()(companies). Use this when emails differ between the two systems, or for companies, which have no email.
Connect
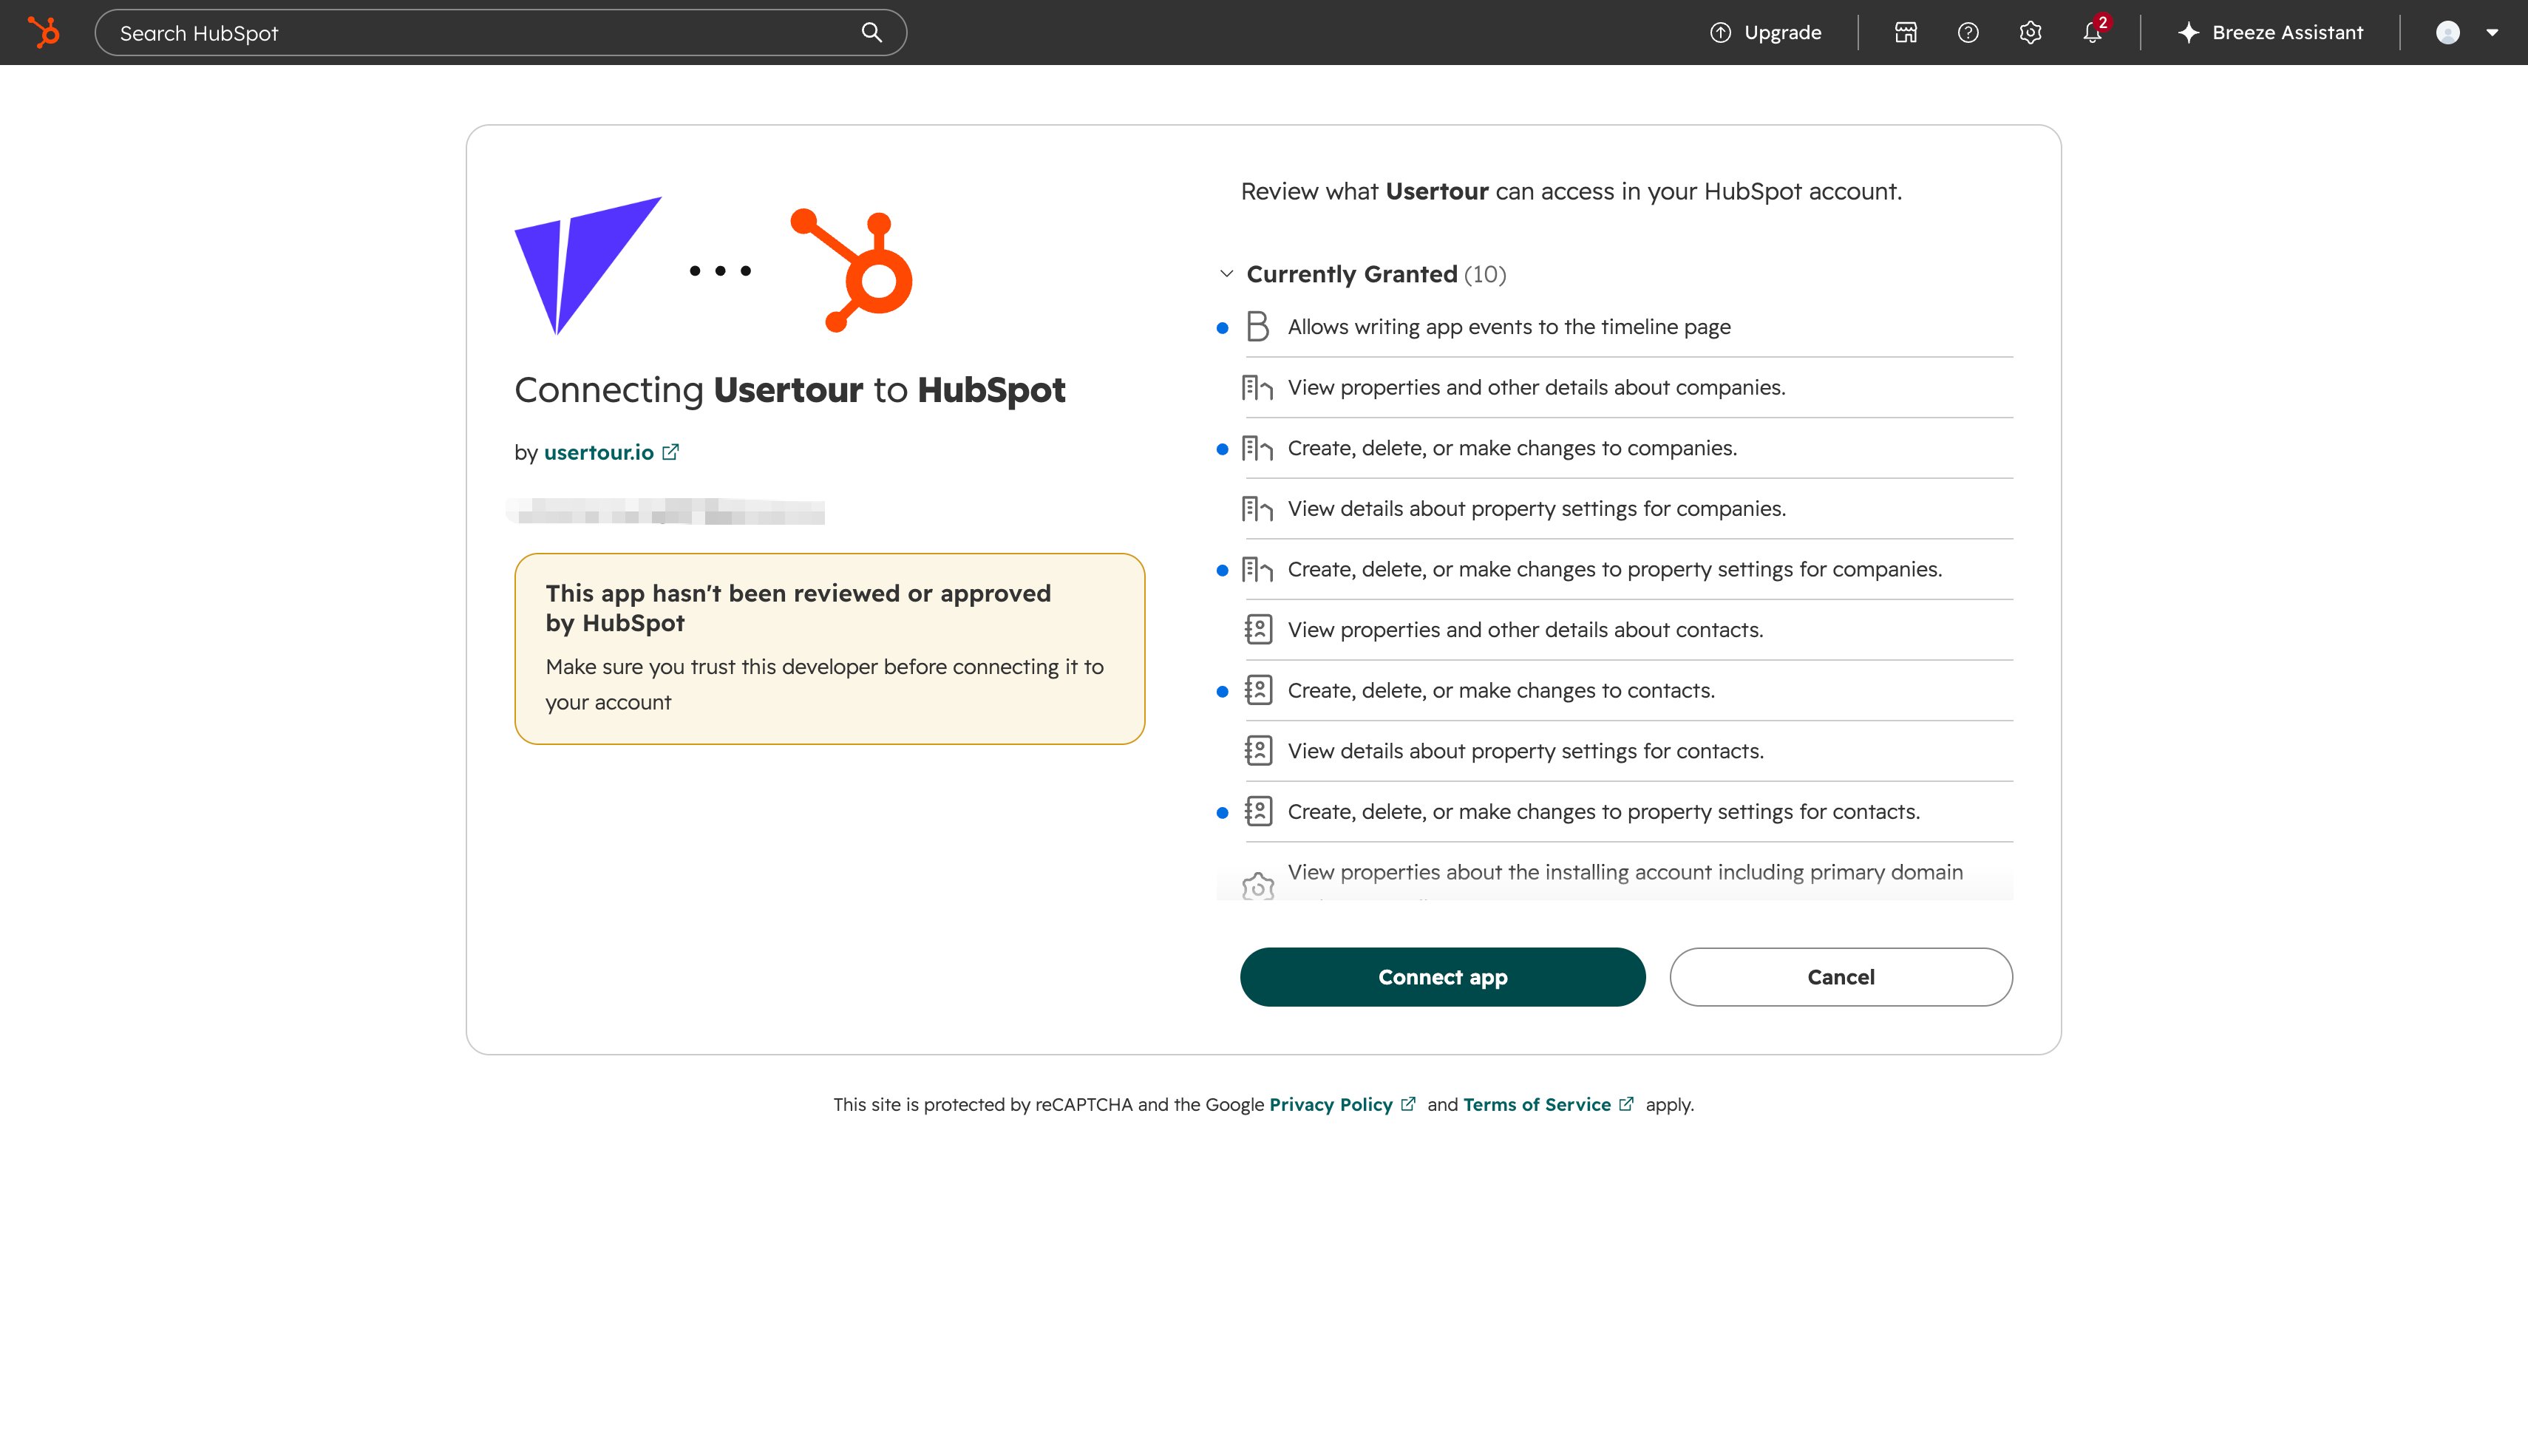
Go to Settings → Integrations → HubSpot (pick the environment first — one HubSpot account connects to one Usertour environment) and click Connect with HubSpot. HubSpot asks you to choose an account and approve the permissions, then returns you to Usertour.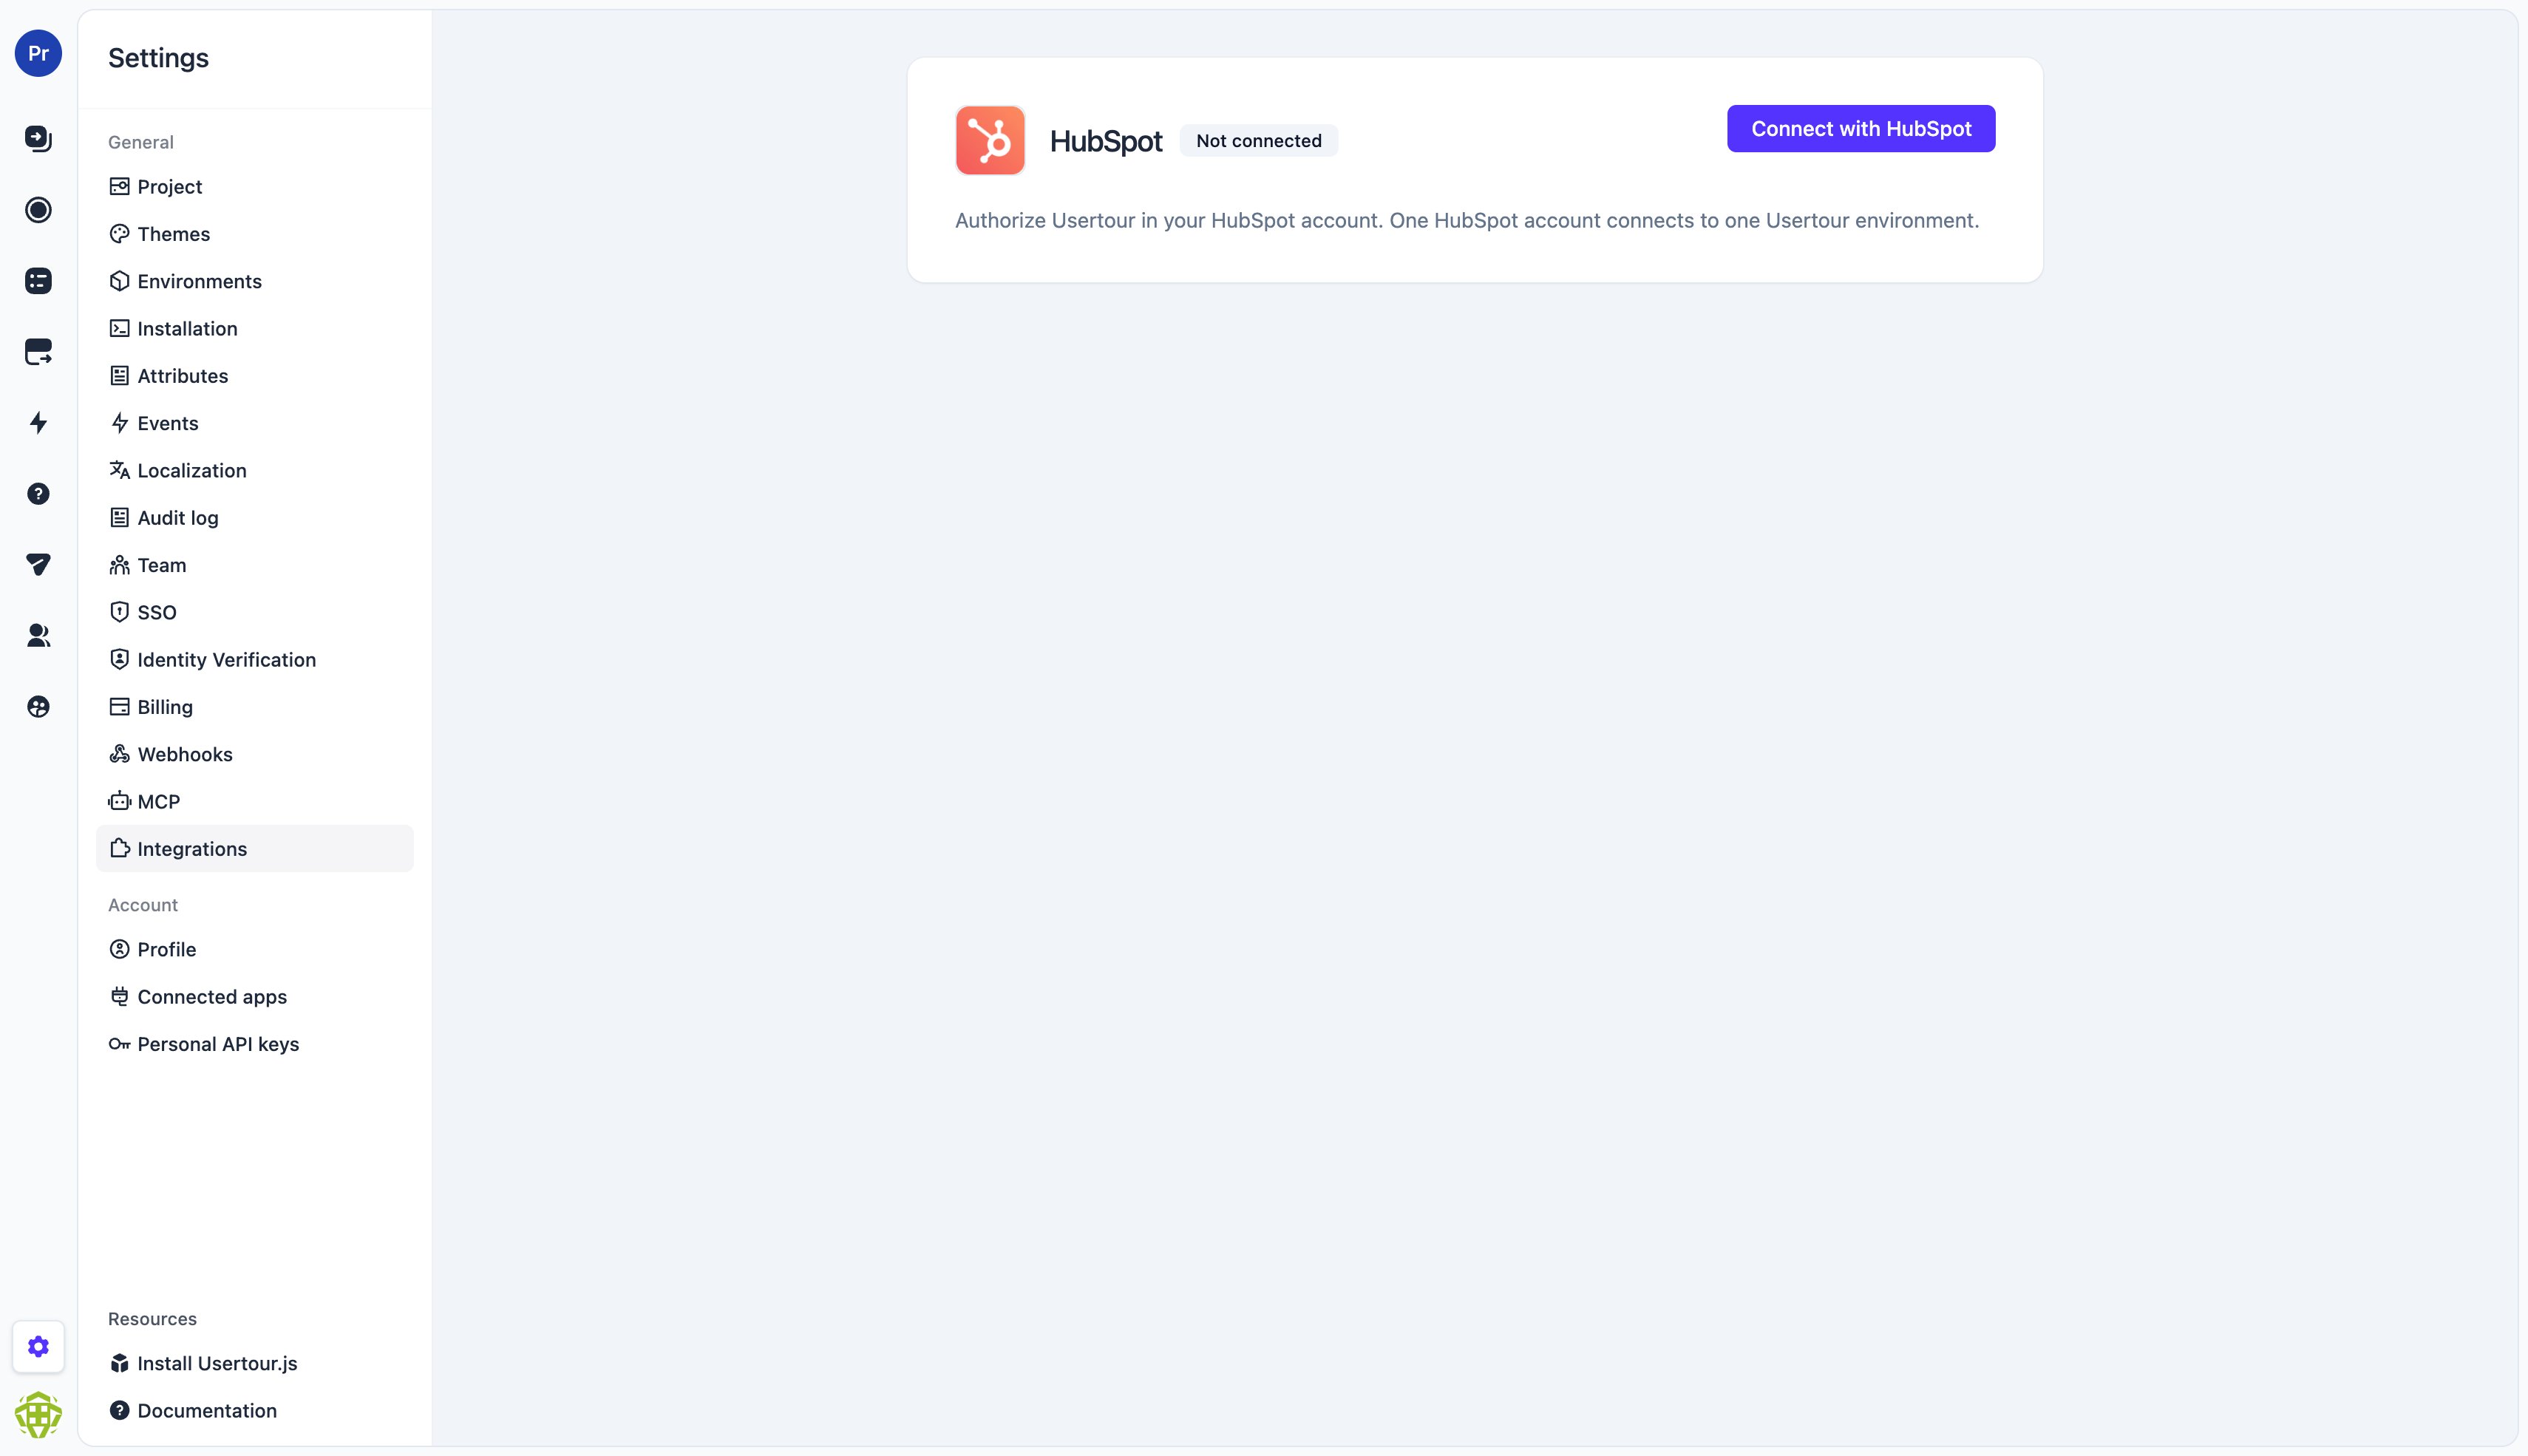
Set up a mapping
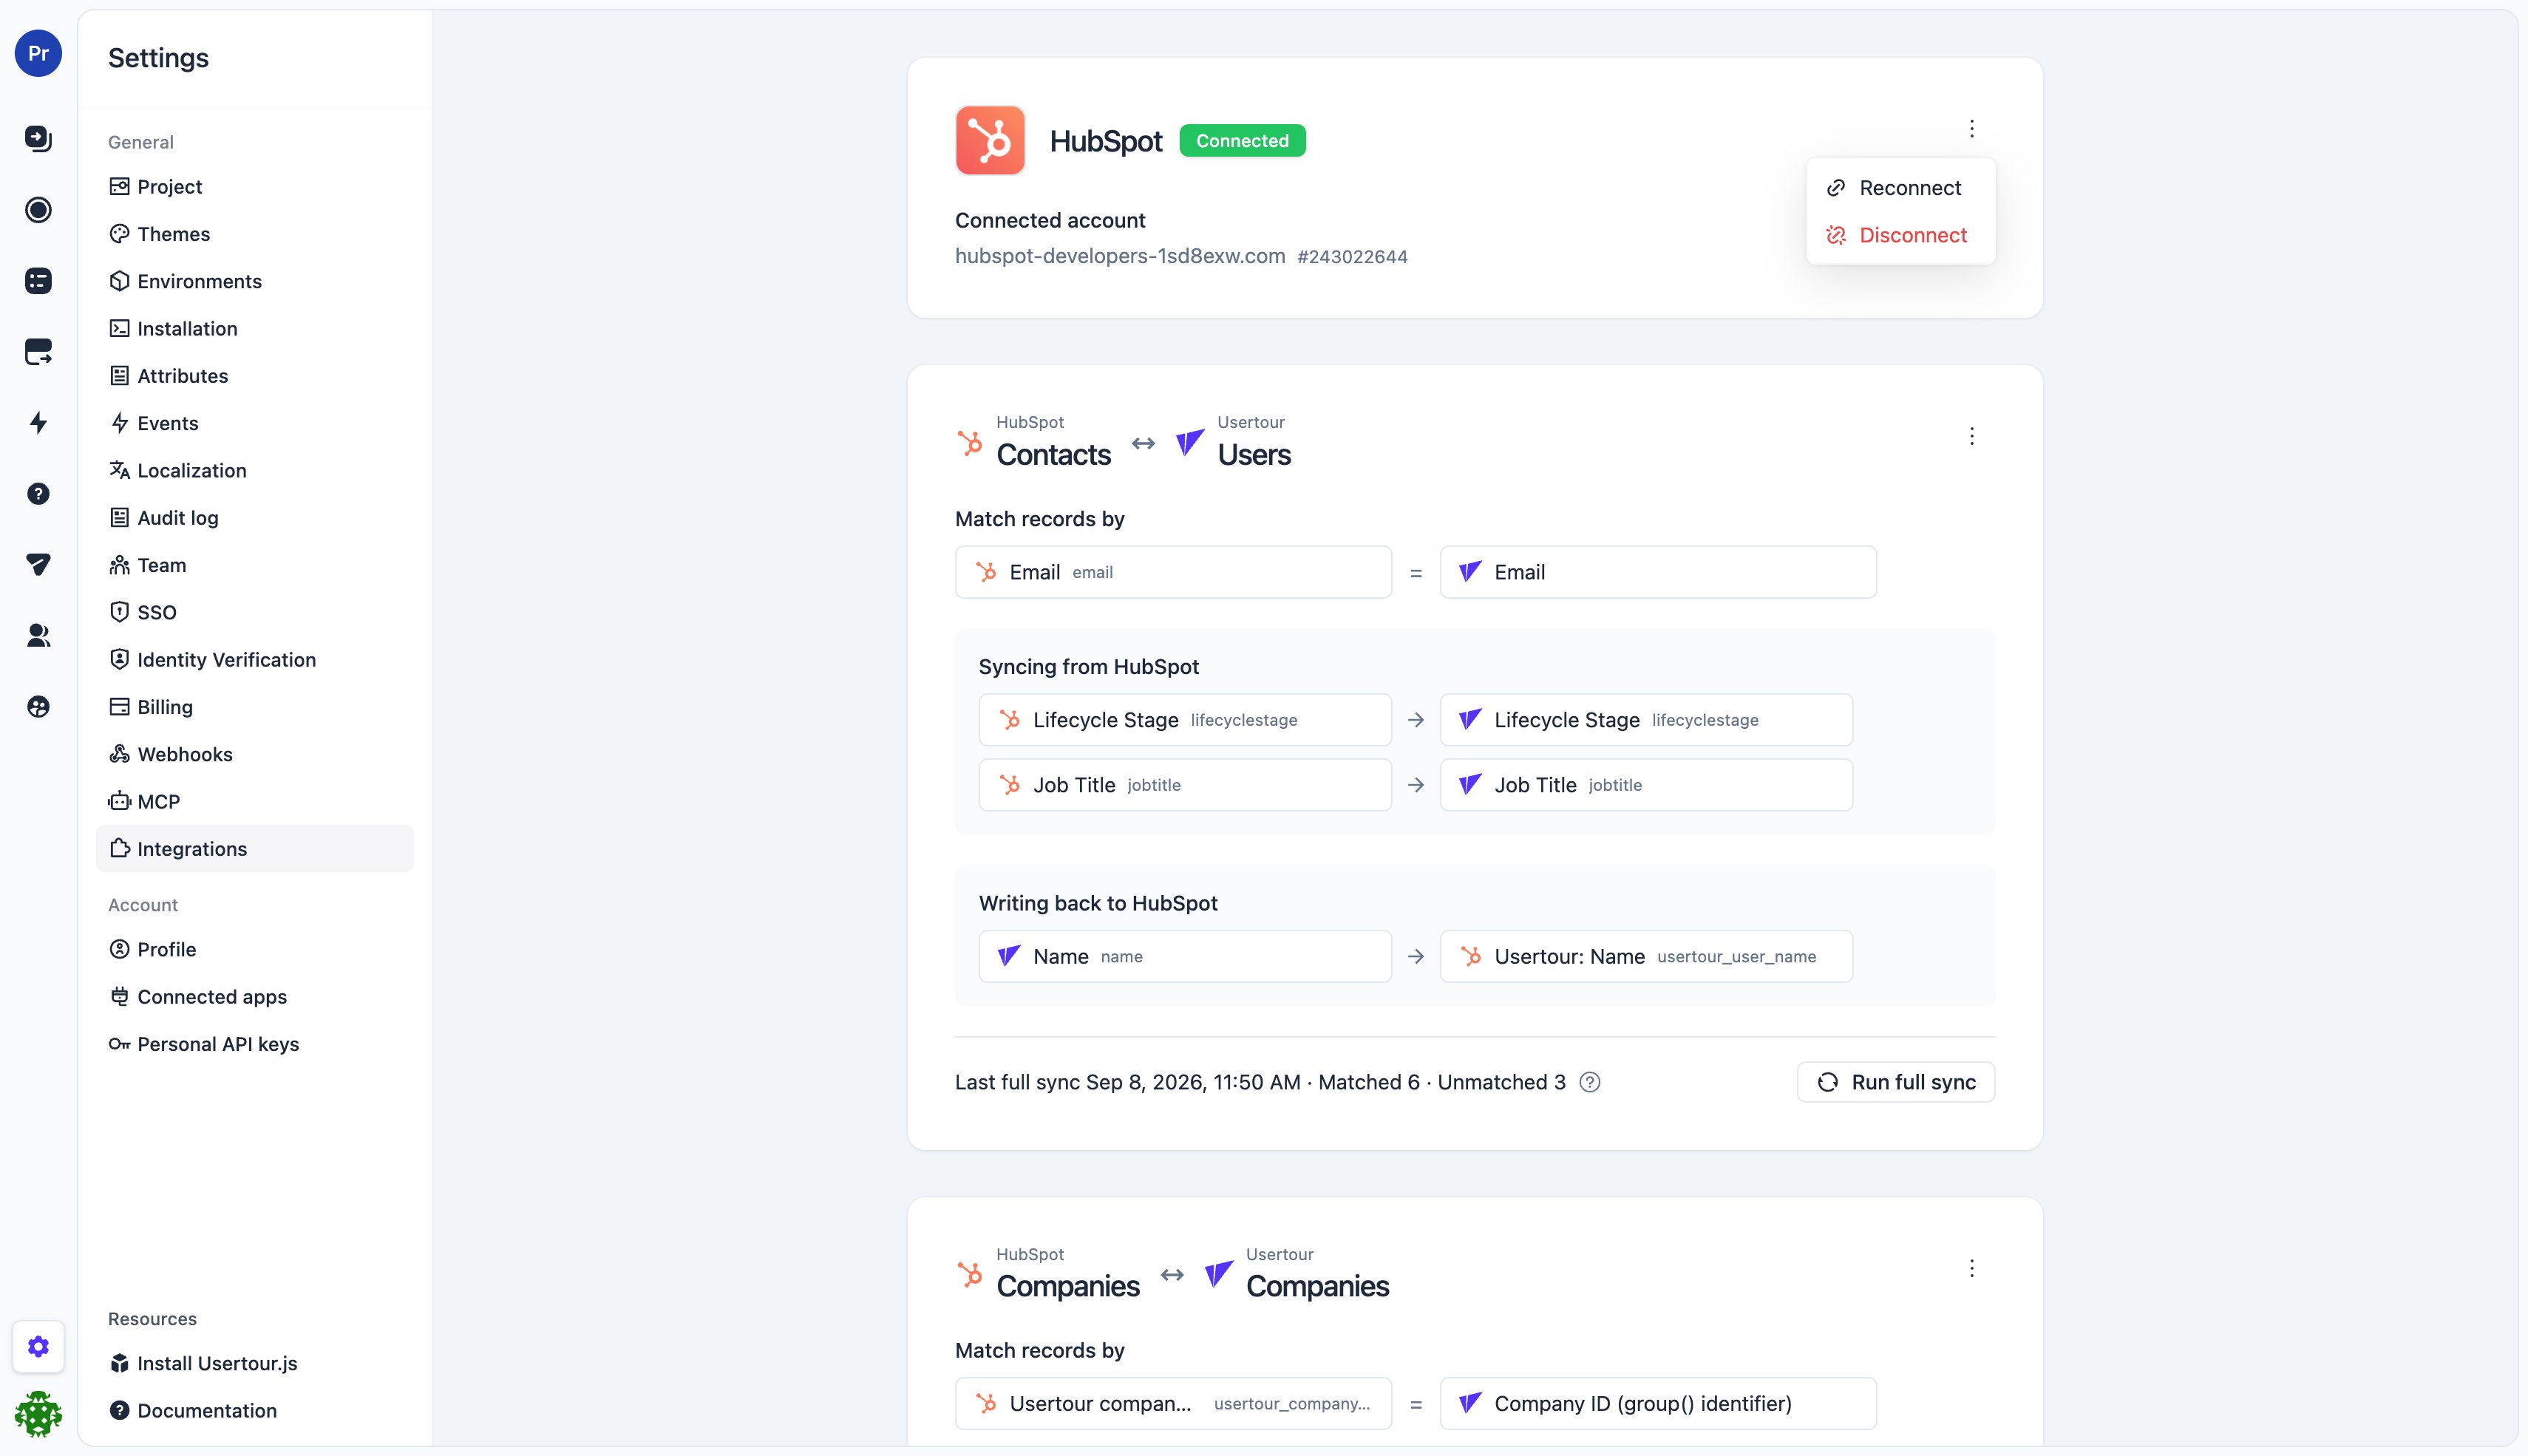
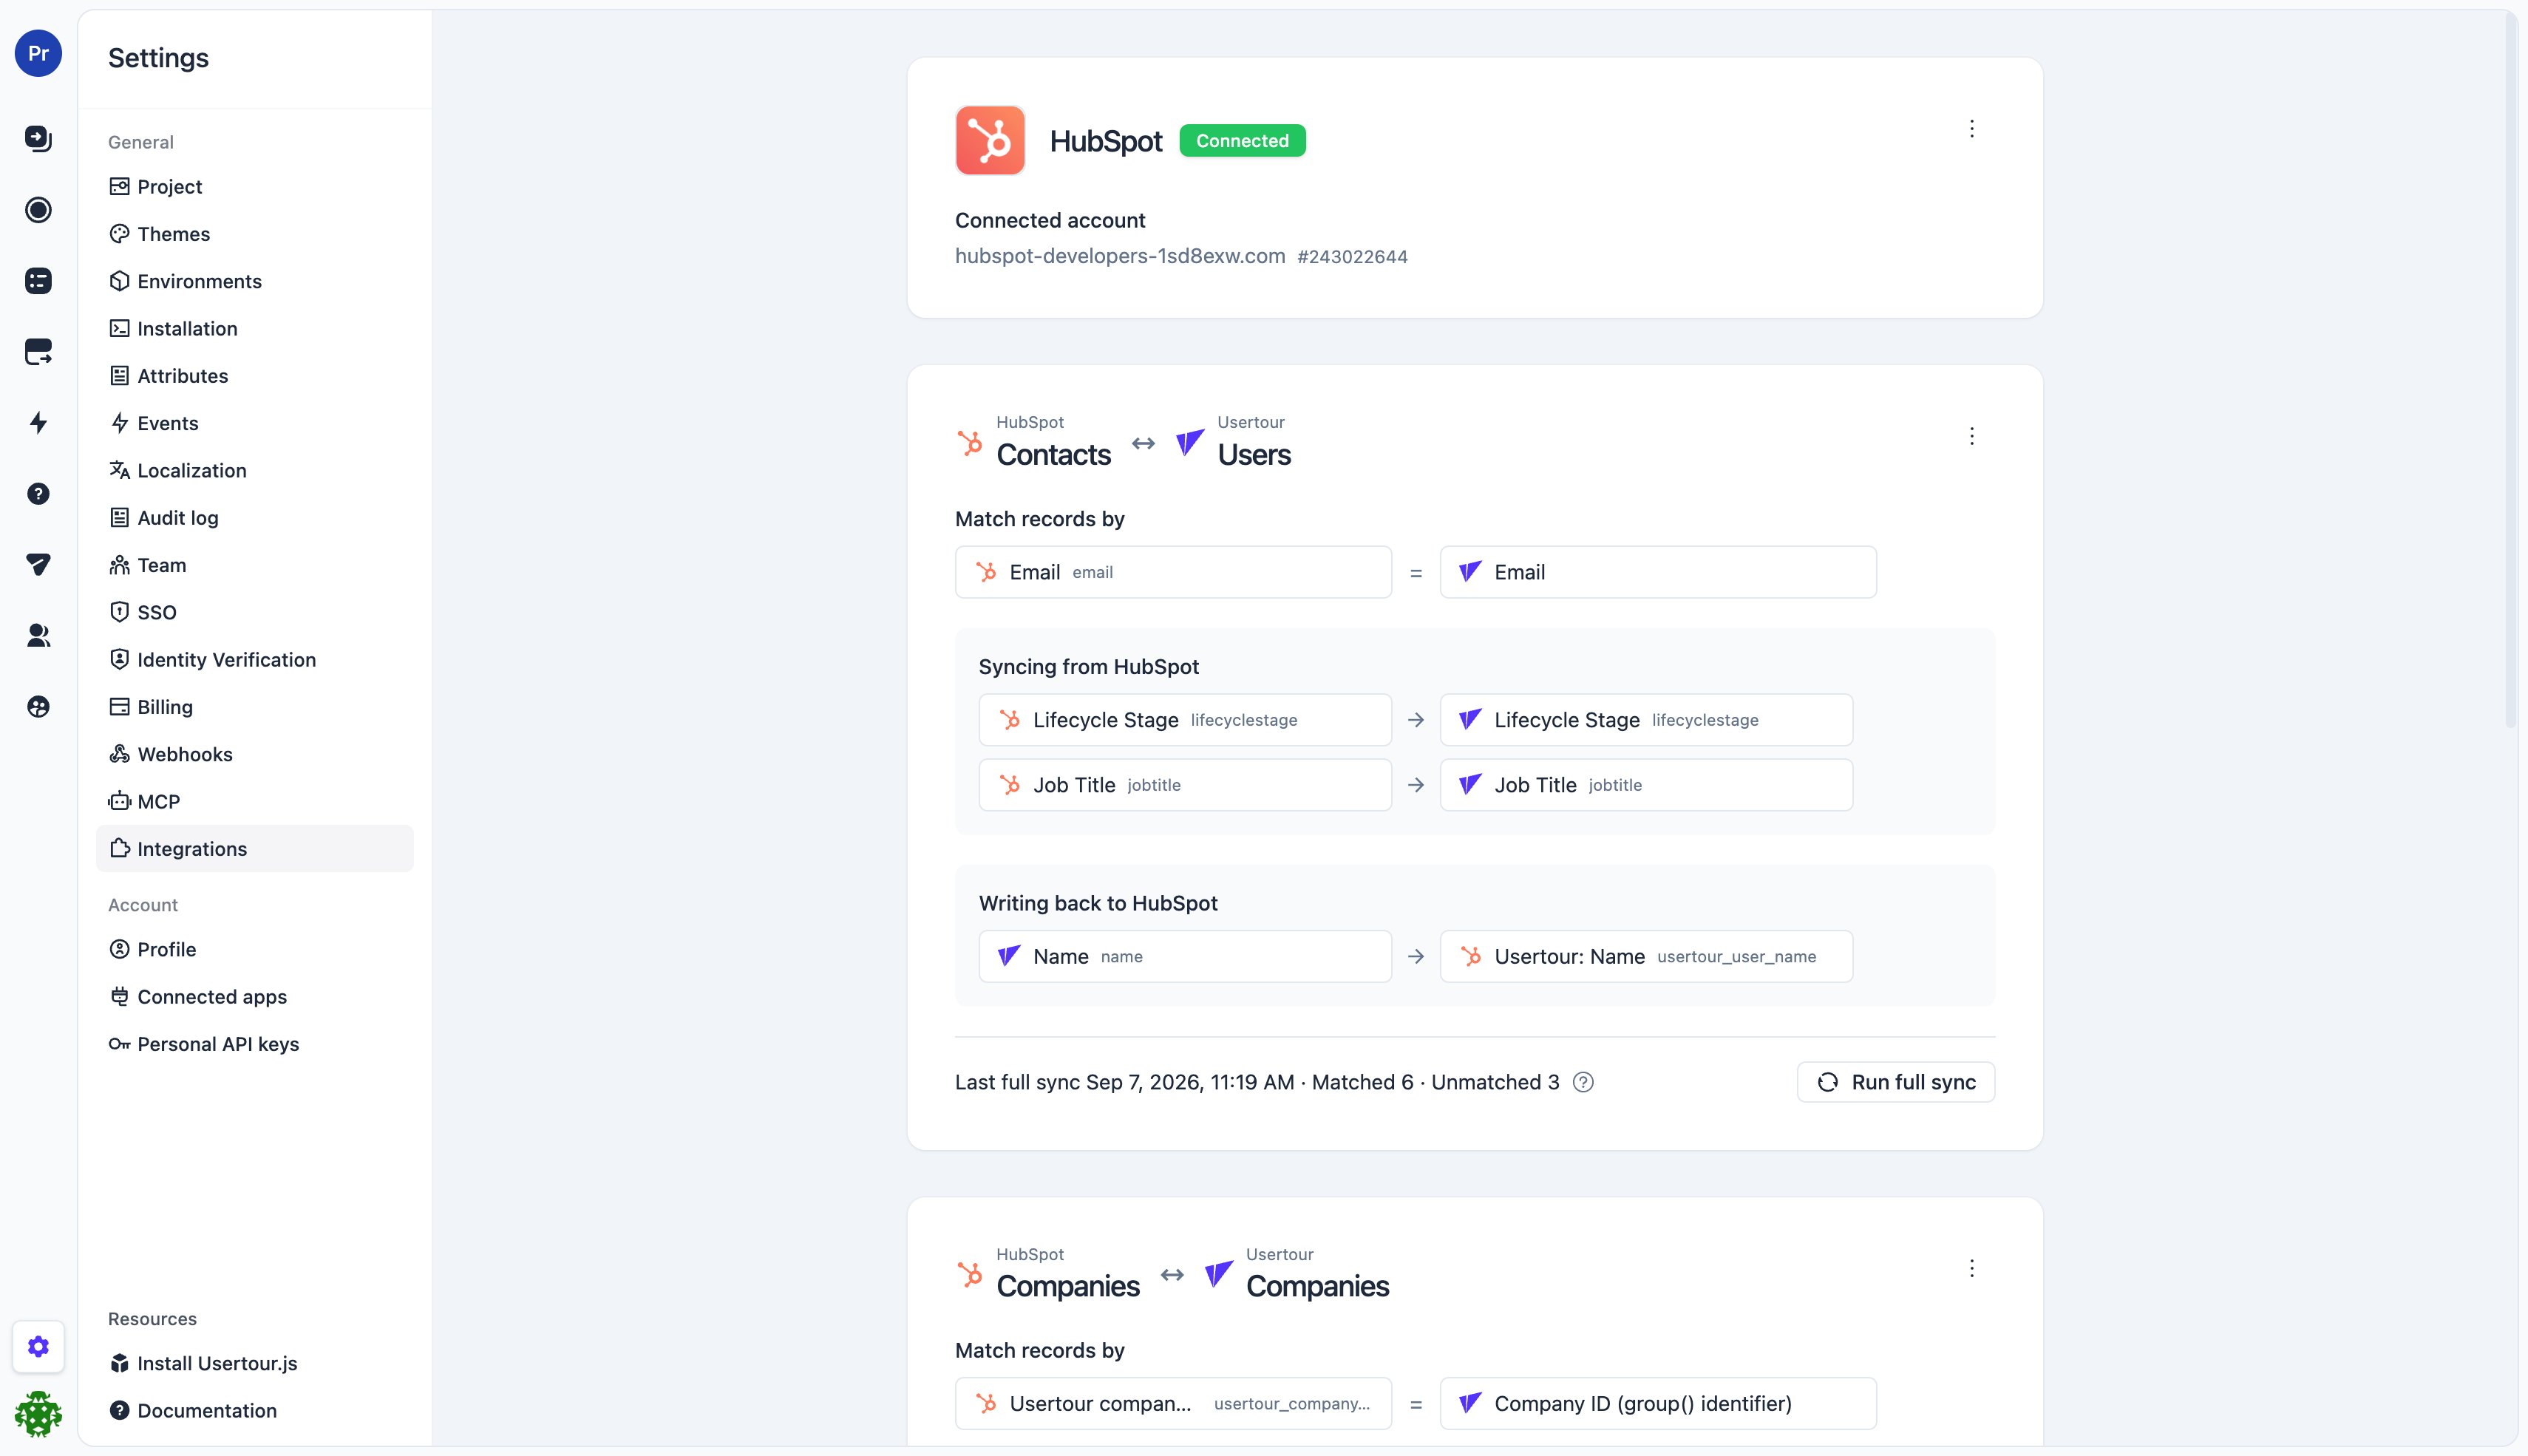
Below the connection are two mapping cards: Contacts ↔ Users and Companies ↔ Companies. Each one is optional and configured on its own. Click Set up mapping to open the editor.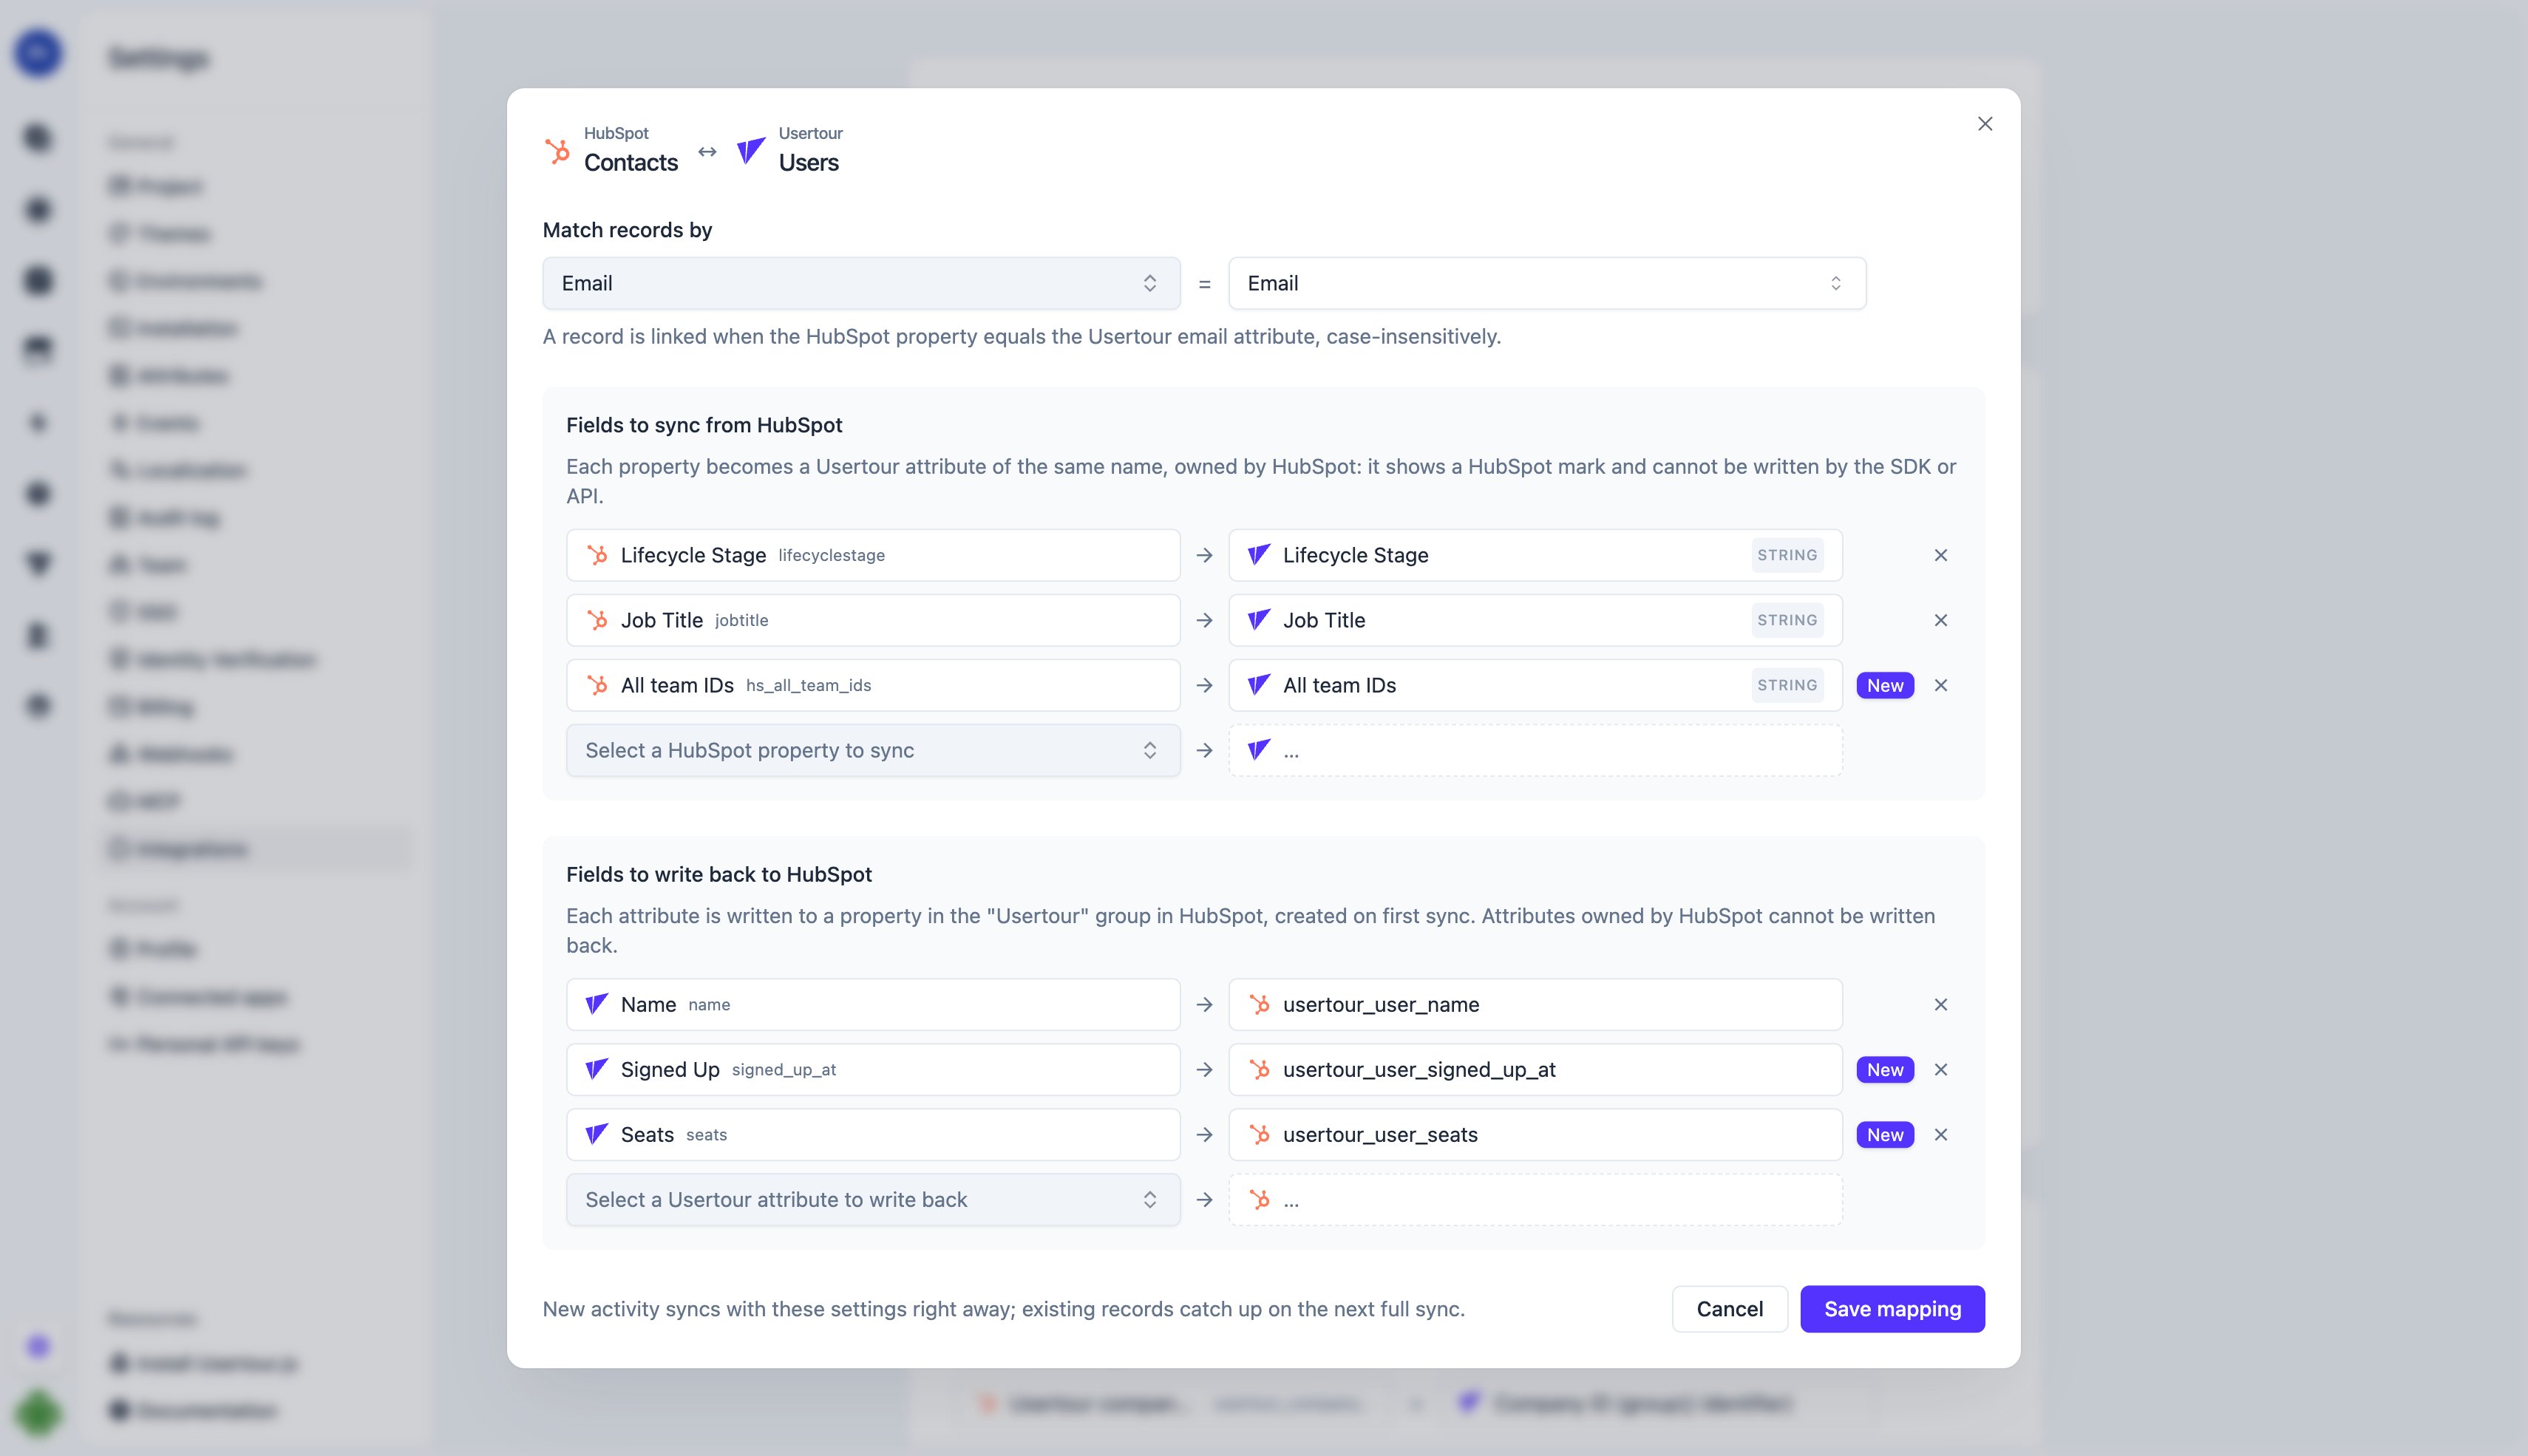
- Match records by — pick the HubSpot property on the left and what it
must equal on the right: the user’s Email, or the User ID your
app passes to
usertour.identify()(companies: the Company ID fromusertour.group()). - Fields to sync from HubSpot — pick a HubSpot property; the row shows the Usertour attribute it becomes, with the same name and a matching data type. That attribute is owned by HubSpot: it carries a HubSpot mark wherever attribute names appear, and the SDK and API can no longer write it — HubSpot is the source of truth. A New badge means the attribute is created on save; Existing means an attribute with that code name is already there and saving hands it over (you confirm first; the data type must match).
- Fields to write back to HubSpot — pick a Usertour attribute; the row
shows the HubSpot property it becomes,
usertour_user_<code_name>orusertour_company_<code_name>in a Usertour property group, created on first sync. Attributes owned by HubSpot cannot be written back, and a field never appears in both lists. - Save mapping. New activity syncs with these settings from now on. Existing records are linked when you click Run full sync on the card — do that once you are done configuring, since a full sync walks every record on both sides.
Property types
Read-only and calculated HubSpot properties can be synced in but not chosen
as write-back targets.
What syncs, and when
The owning side is authoritative: when a synced HubSpot property is cleared,
the Usertour attribute is cleared too, and a write-back attribute that
becomes empty clears the HubSpot property. Deleting a record in HubSpot
does not touch the Usertour record.
Sync activity, in the connection card’s menu, lists every full sync
and every batch of changes picked up from HubSpot, with the record counts
and, for a failed run, the reason — the place to look when a sync did not
do what you expected. Write-backs and timeline events run through the same
pipeline as other integrations, so they are retried on failure and appear
under Recent messages at the bottom of the page — see
delivery and reliability.
Send events to HubSpot
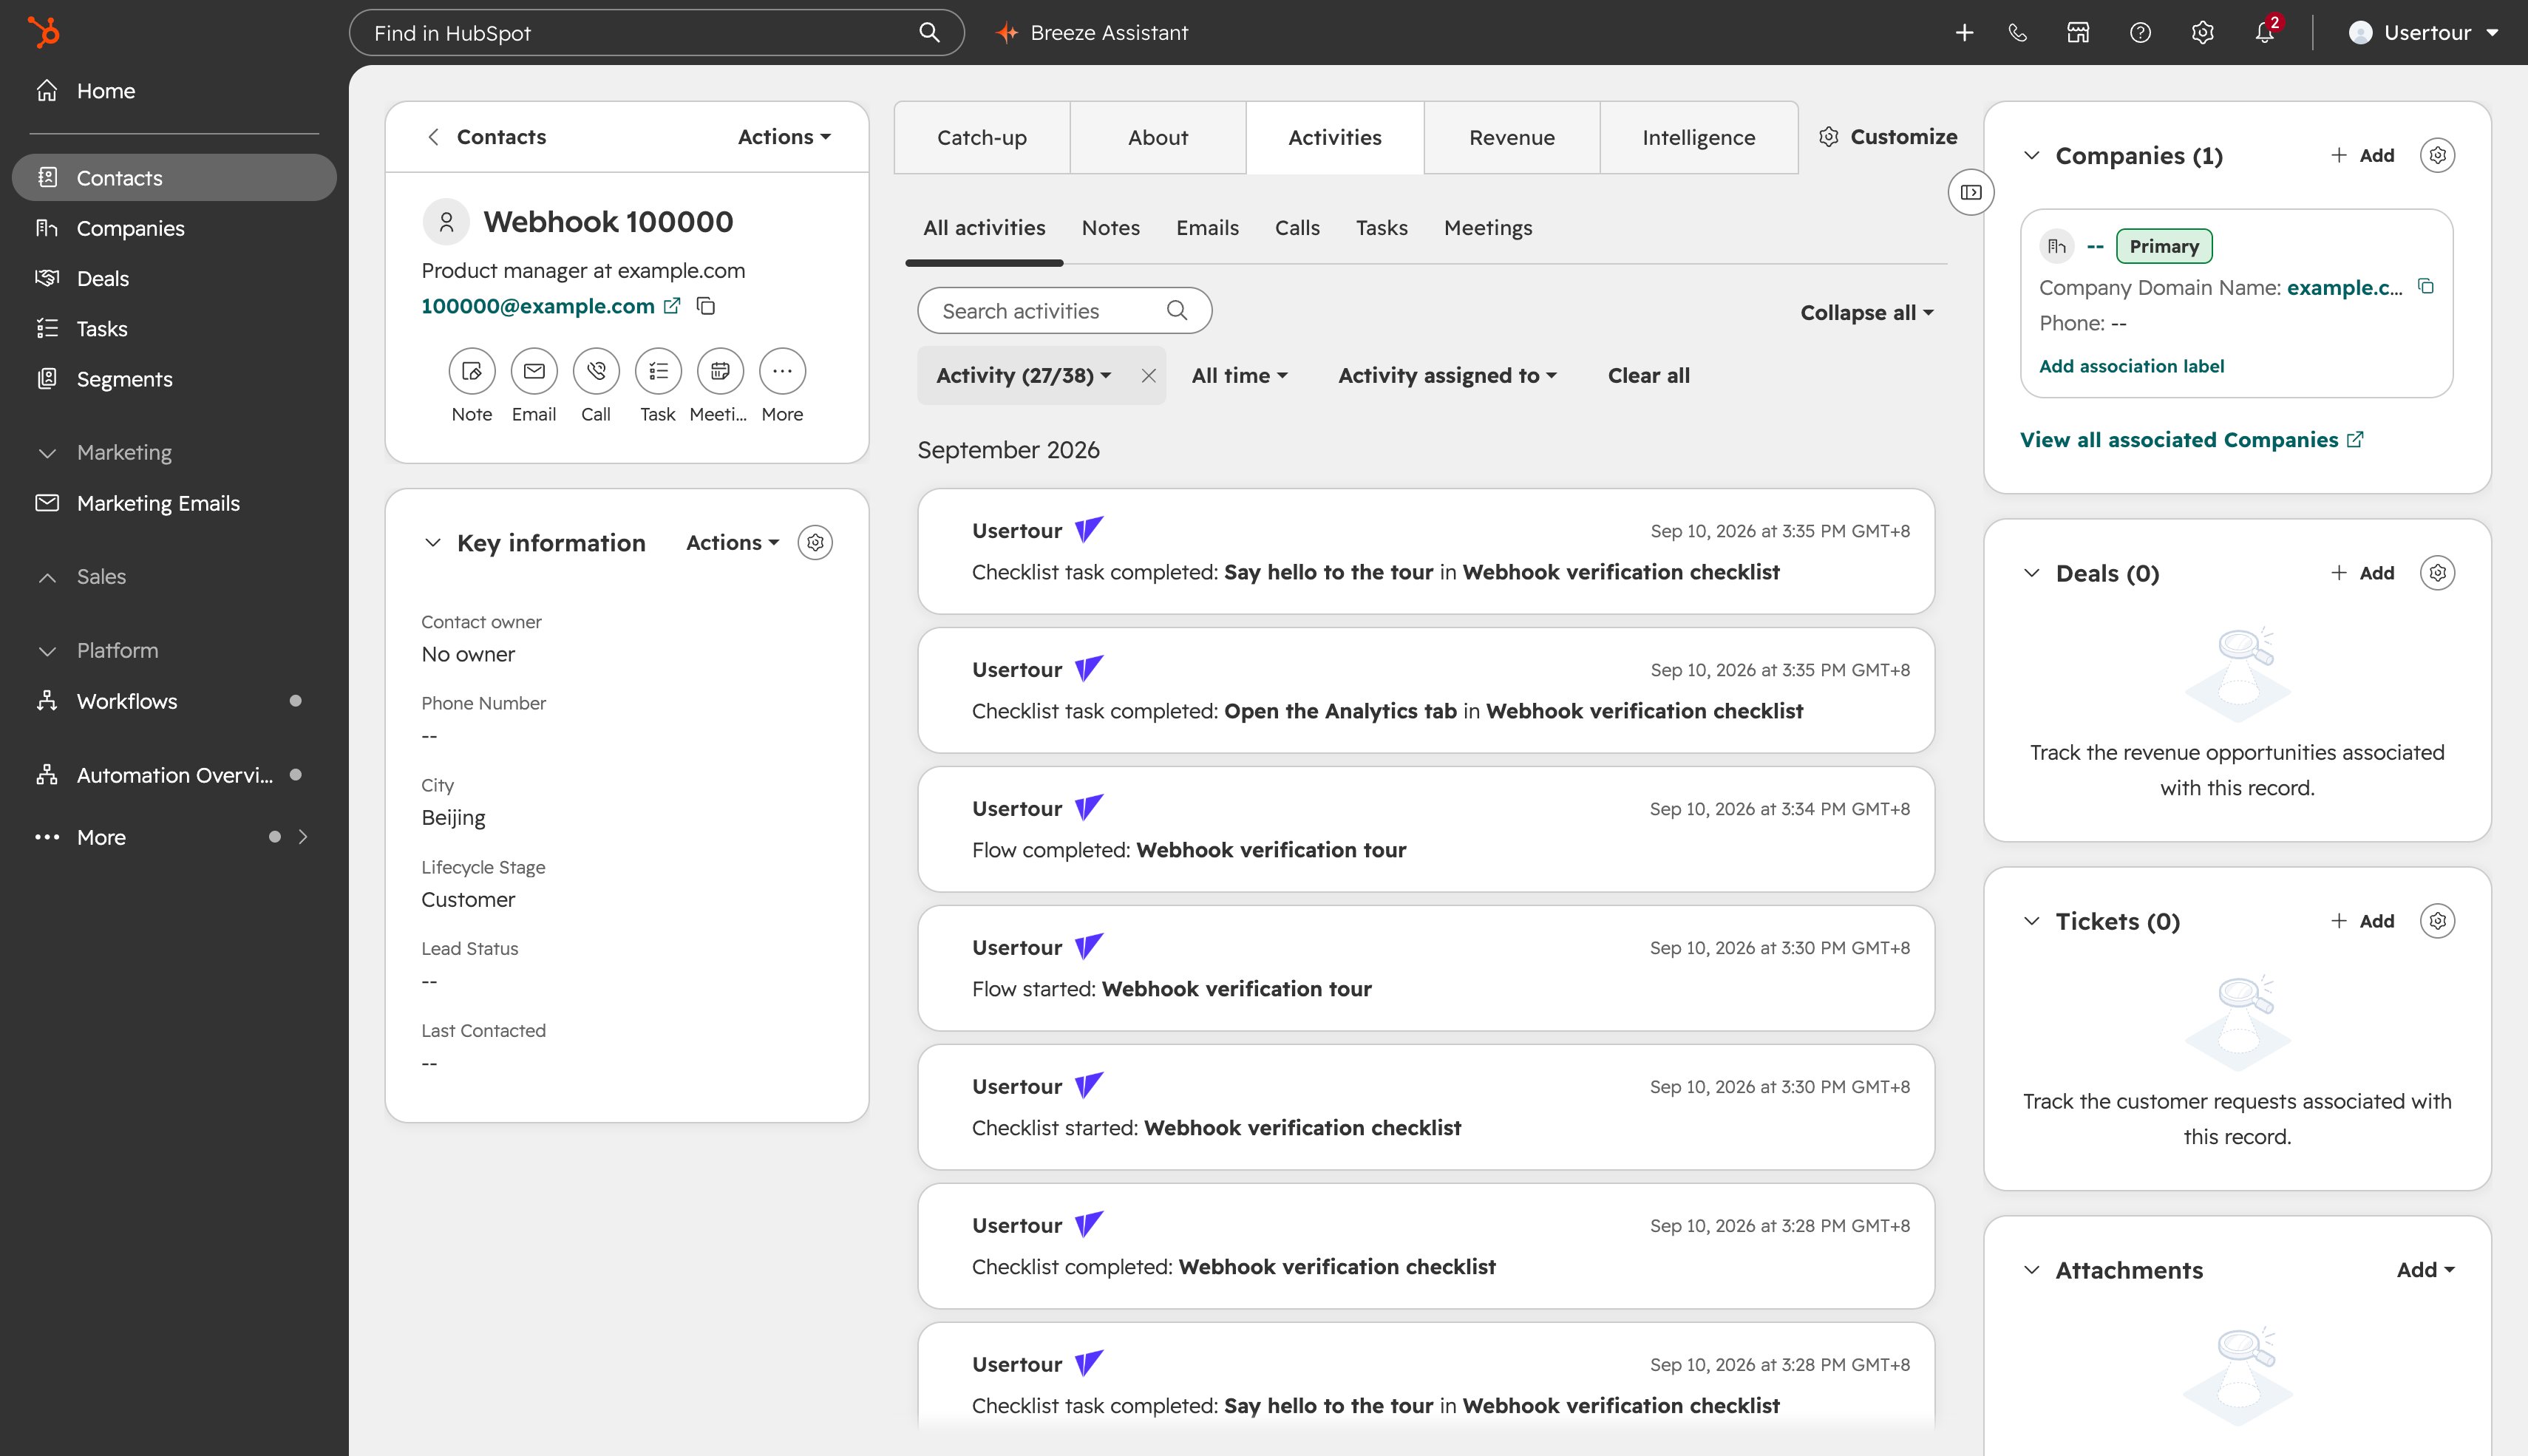
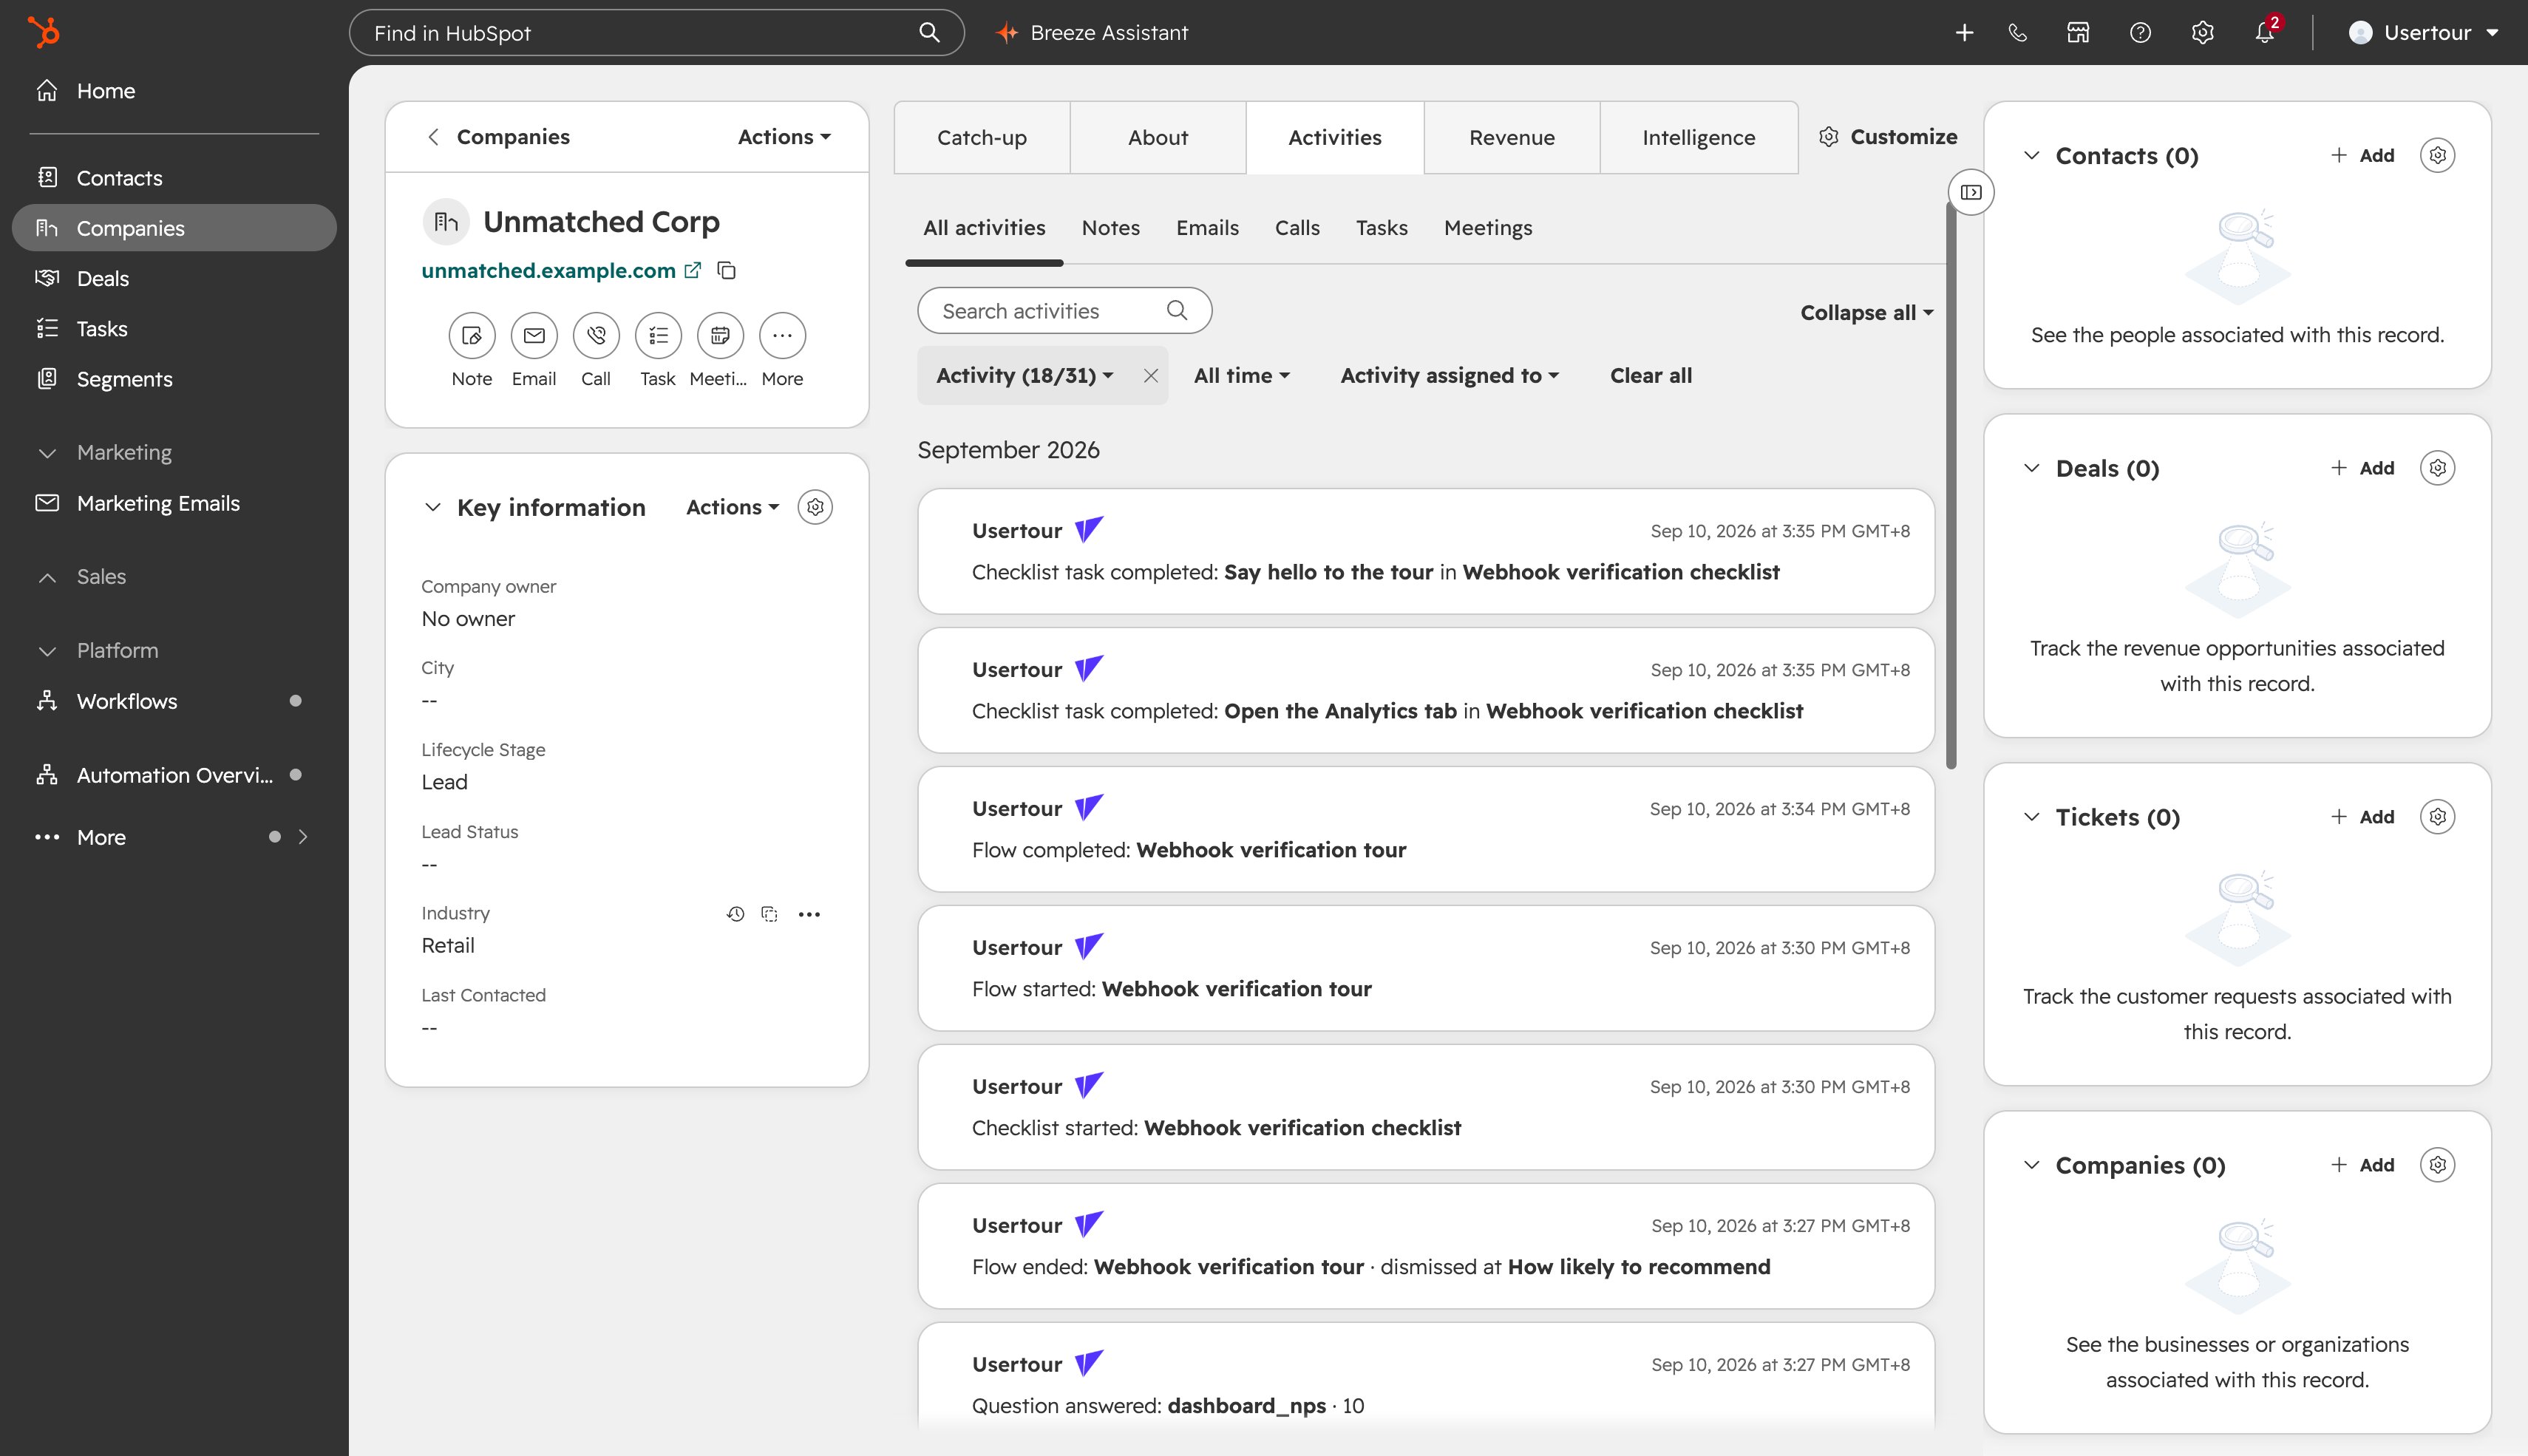
Usertour can write onboarding milestones to the timeline of the linked HubSpot contact — and of the linked company, when the Companies ↔ Companies mapping is set up. They show up as app events, which HubSpot lets you use as workflow triggers, list filters and report dimensions: enroll a contact in a sequence when they complete the onboarding checklist, or flag companies where nobody has started a flow in thirty days. Turn on Send events to HubSpot on the Timeline events card and pick the milestones you want. Events are written for linked users only, so set up the Contacts ↔ Users mapping first.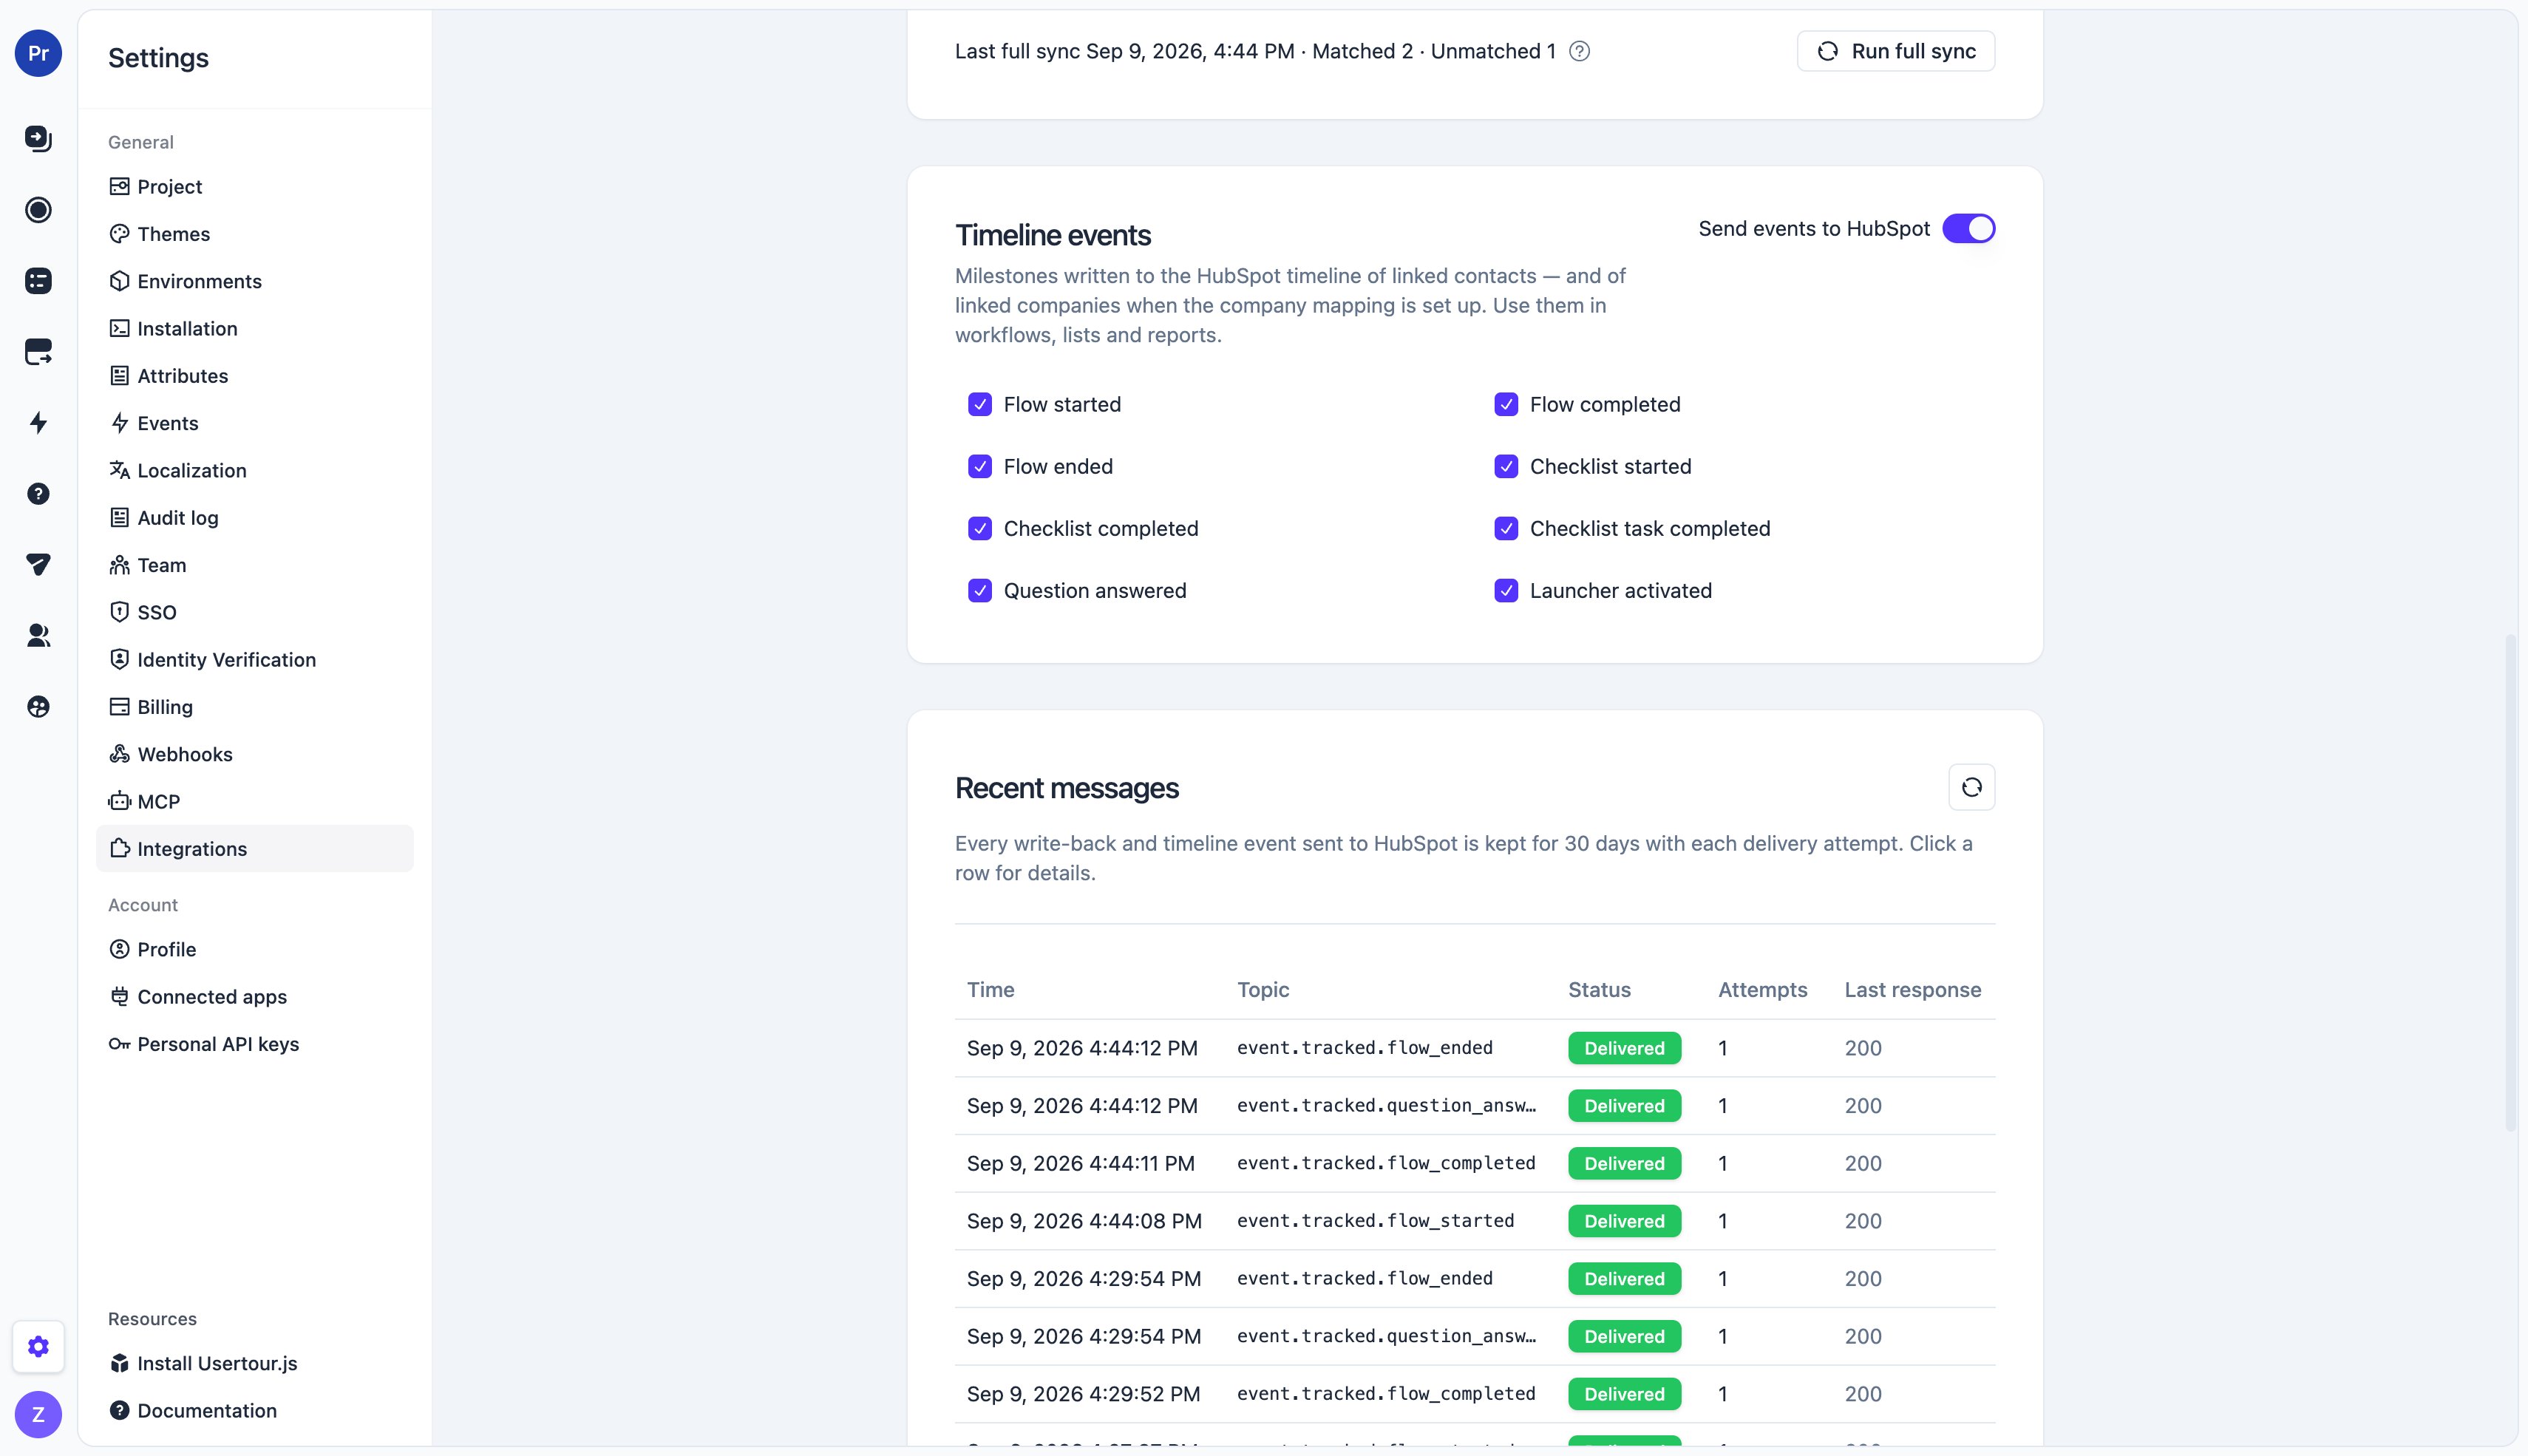
Every event also carries the Usertour user ID and the page URL. Page views
and step-level events are not sent — a CRM timeline is for milestones, not
for analytics. Custom events you track yourself are not sent either.
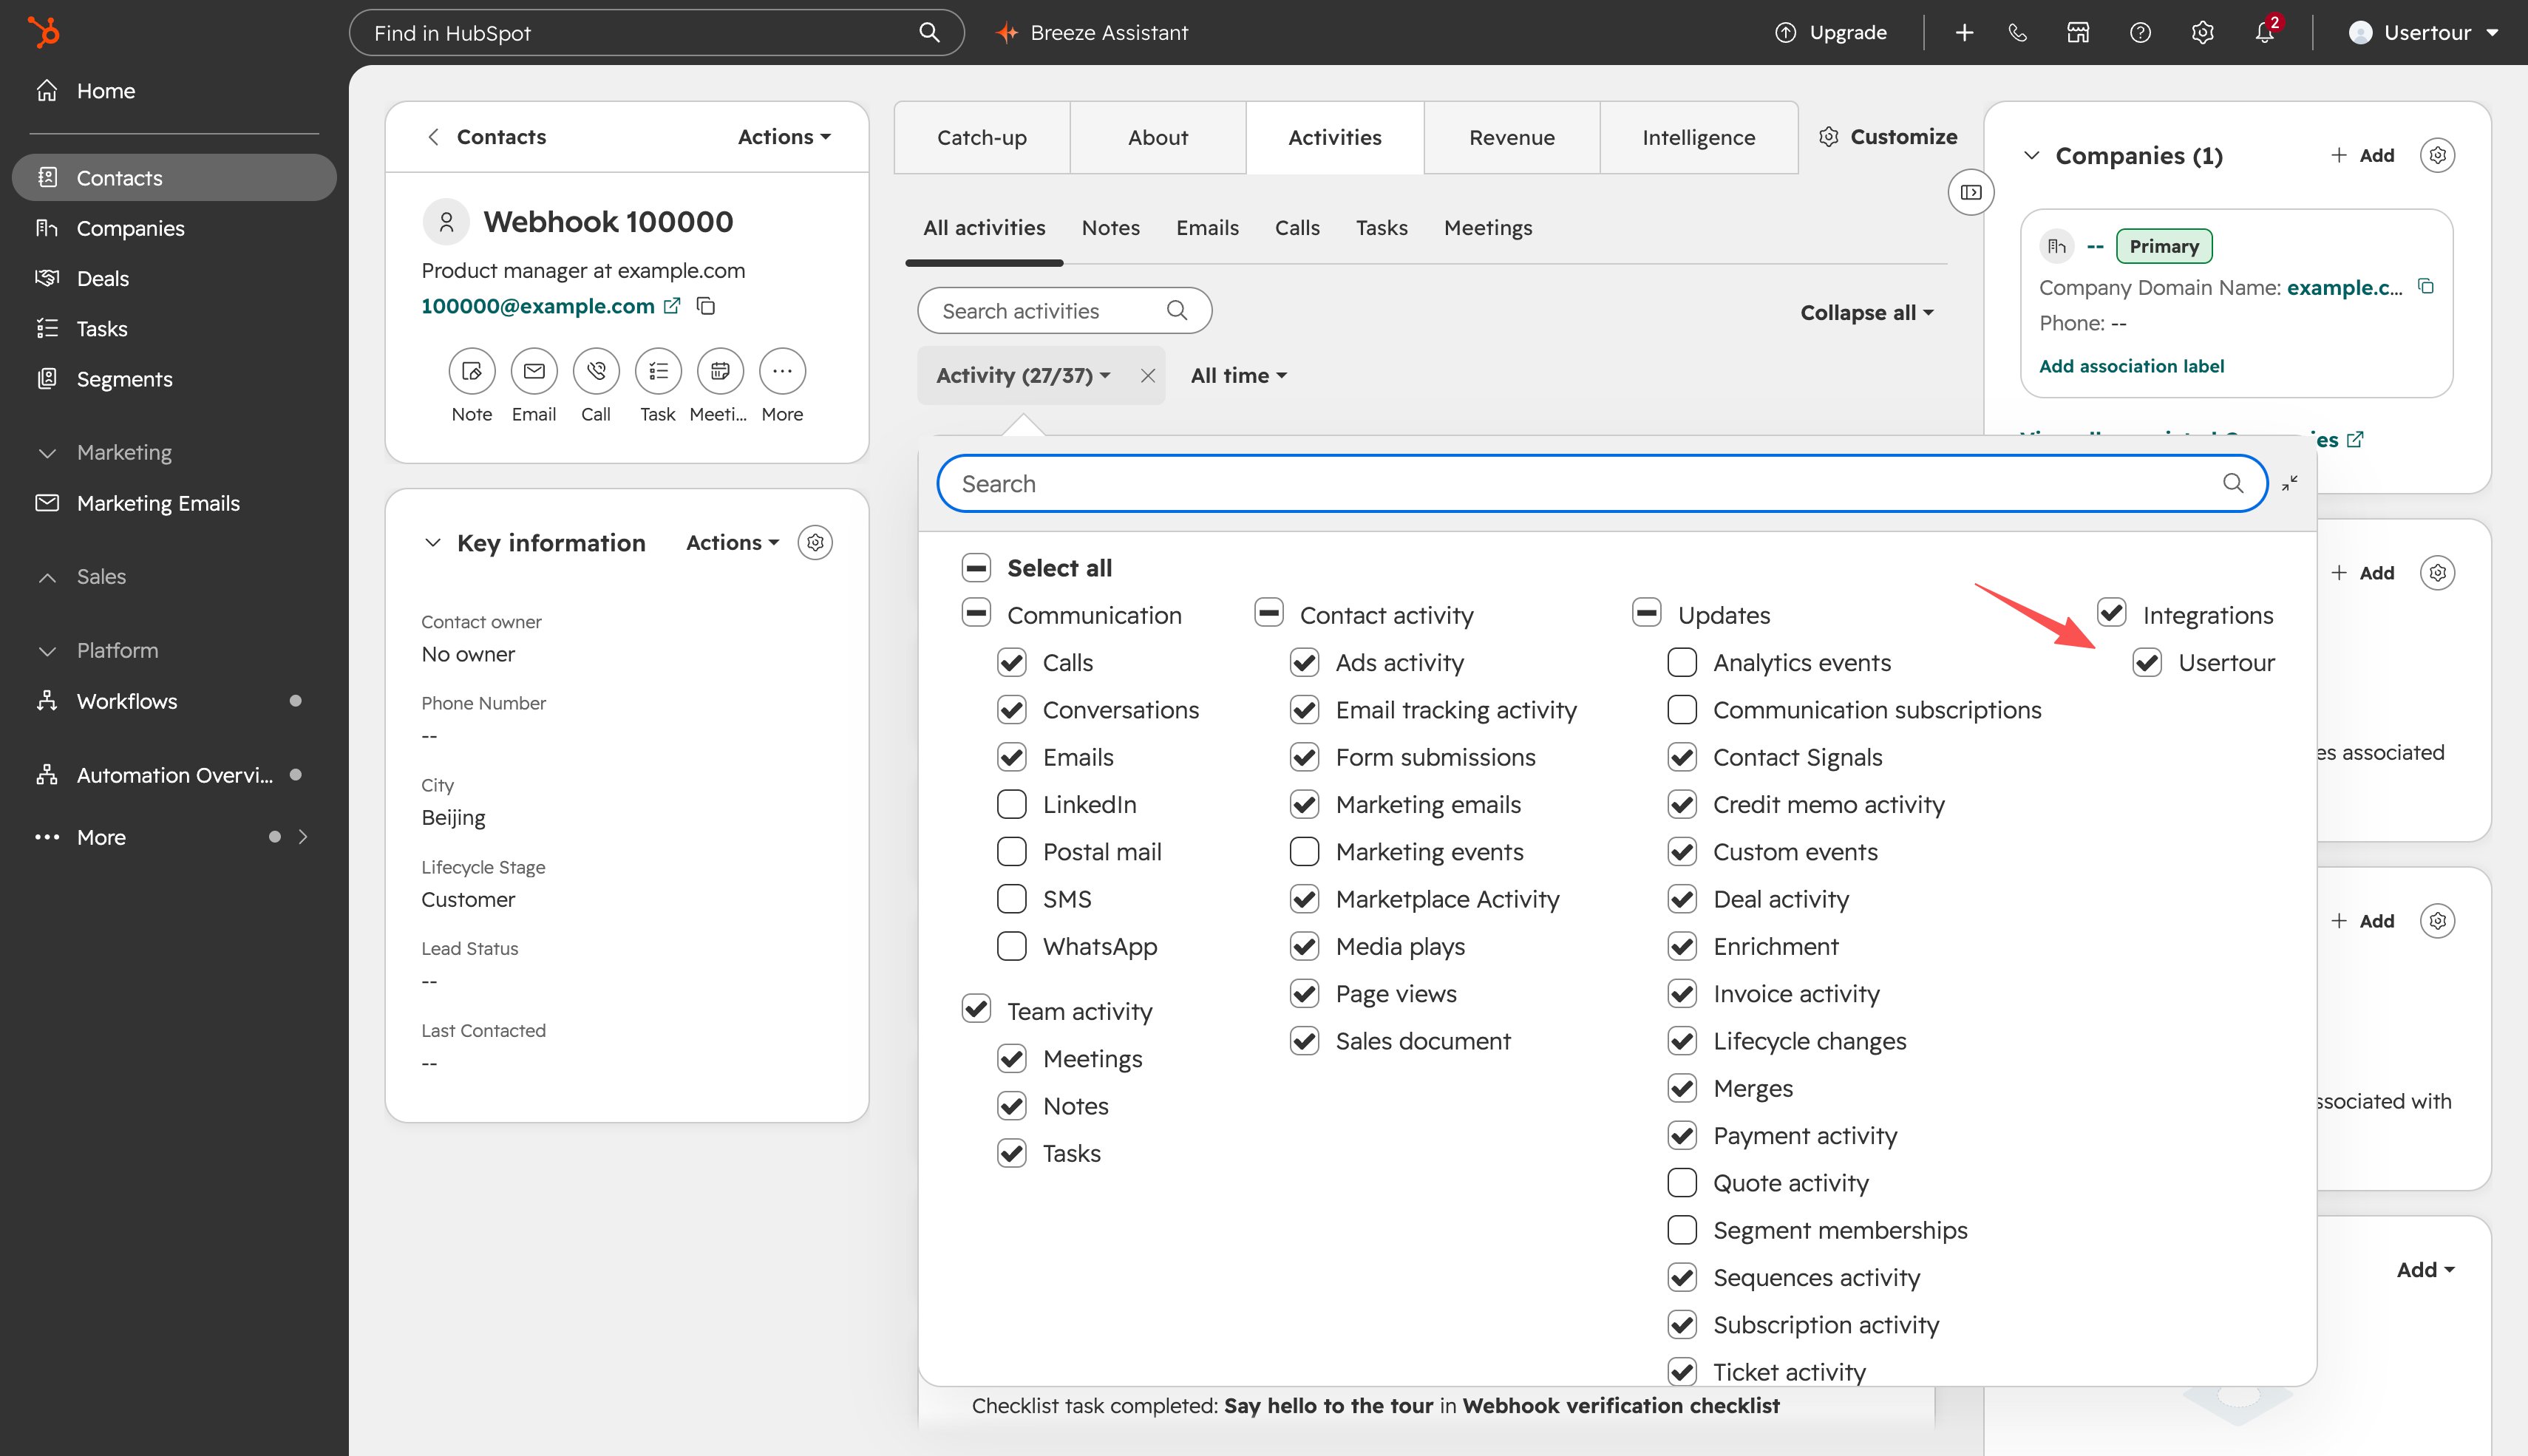
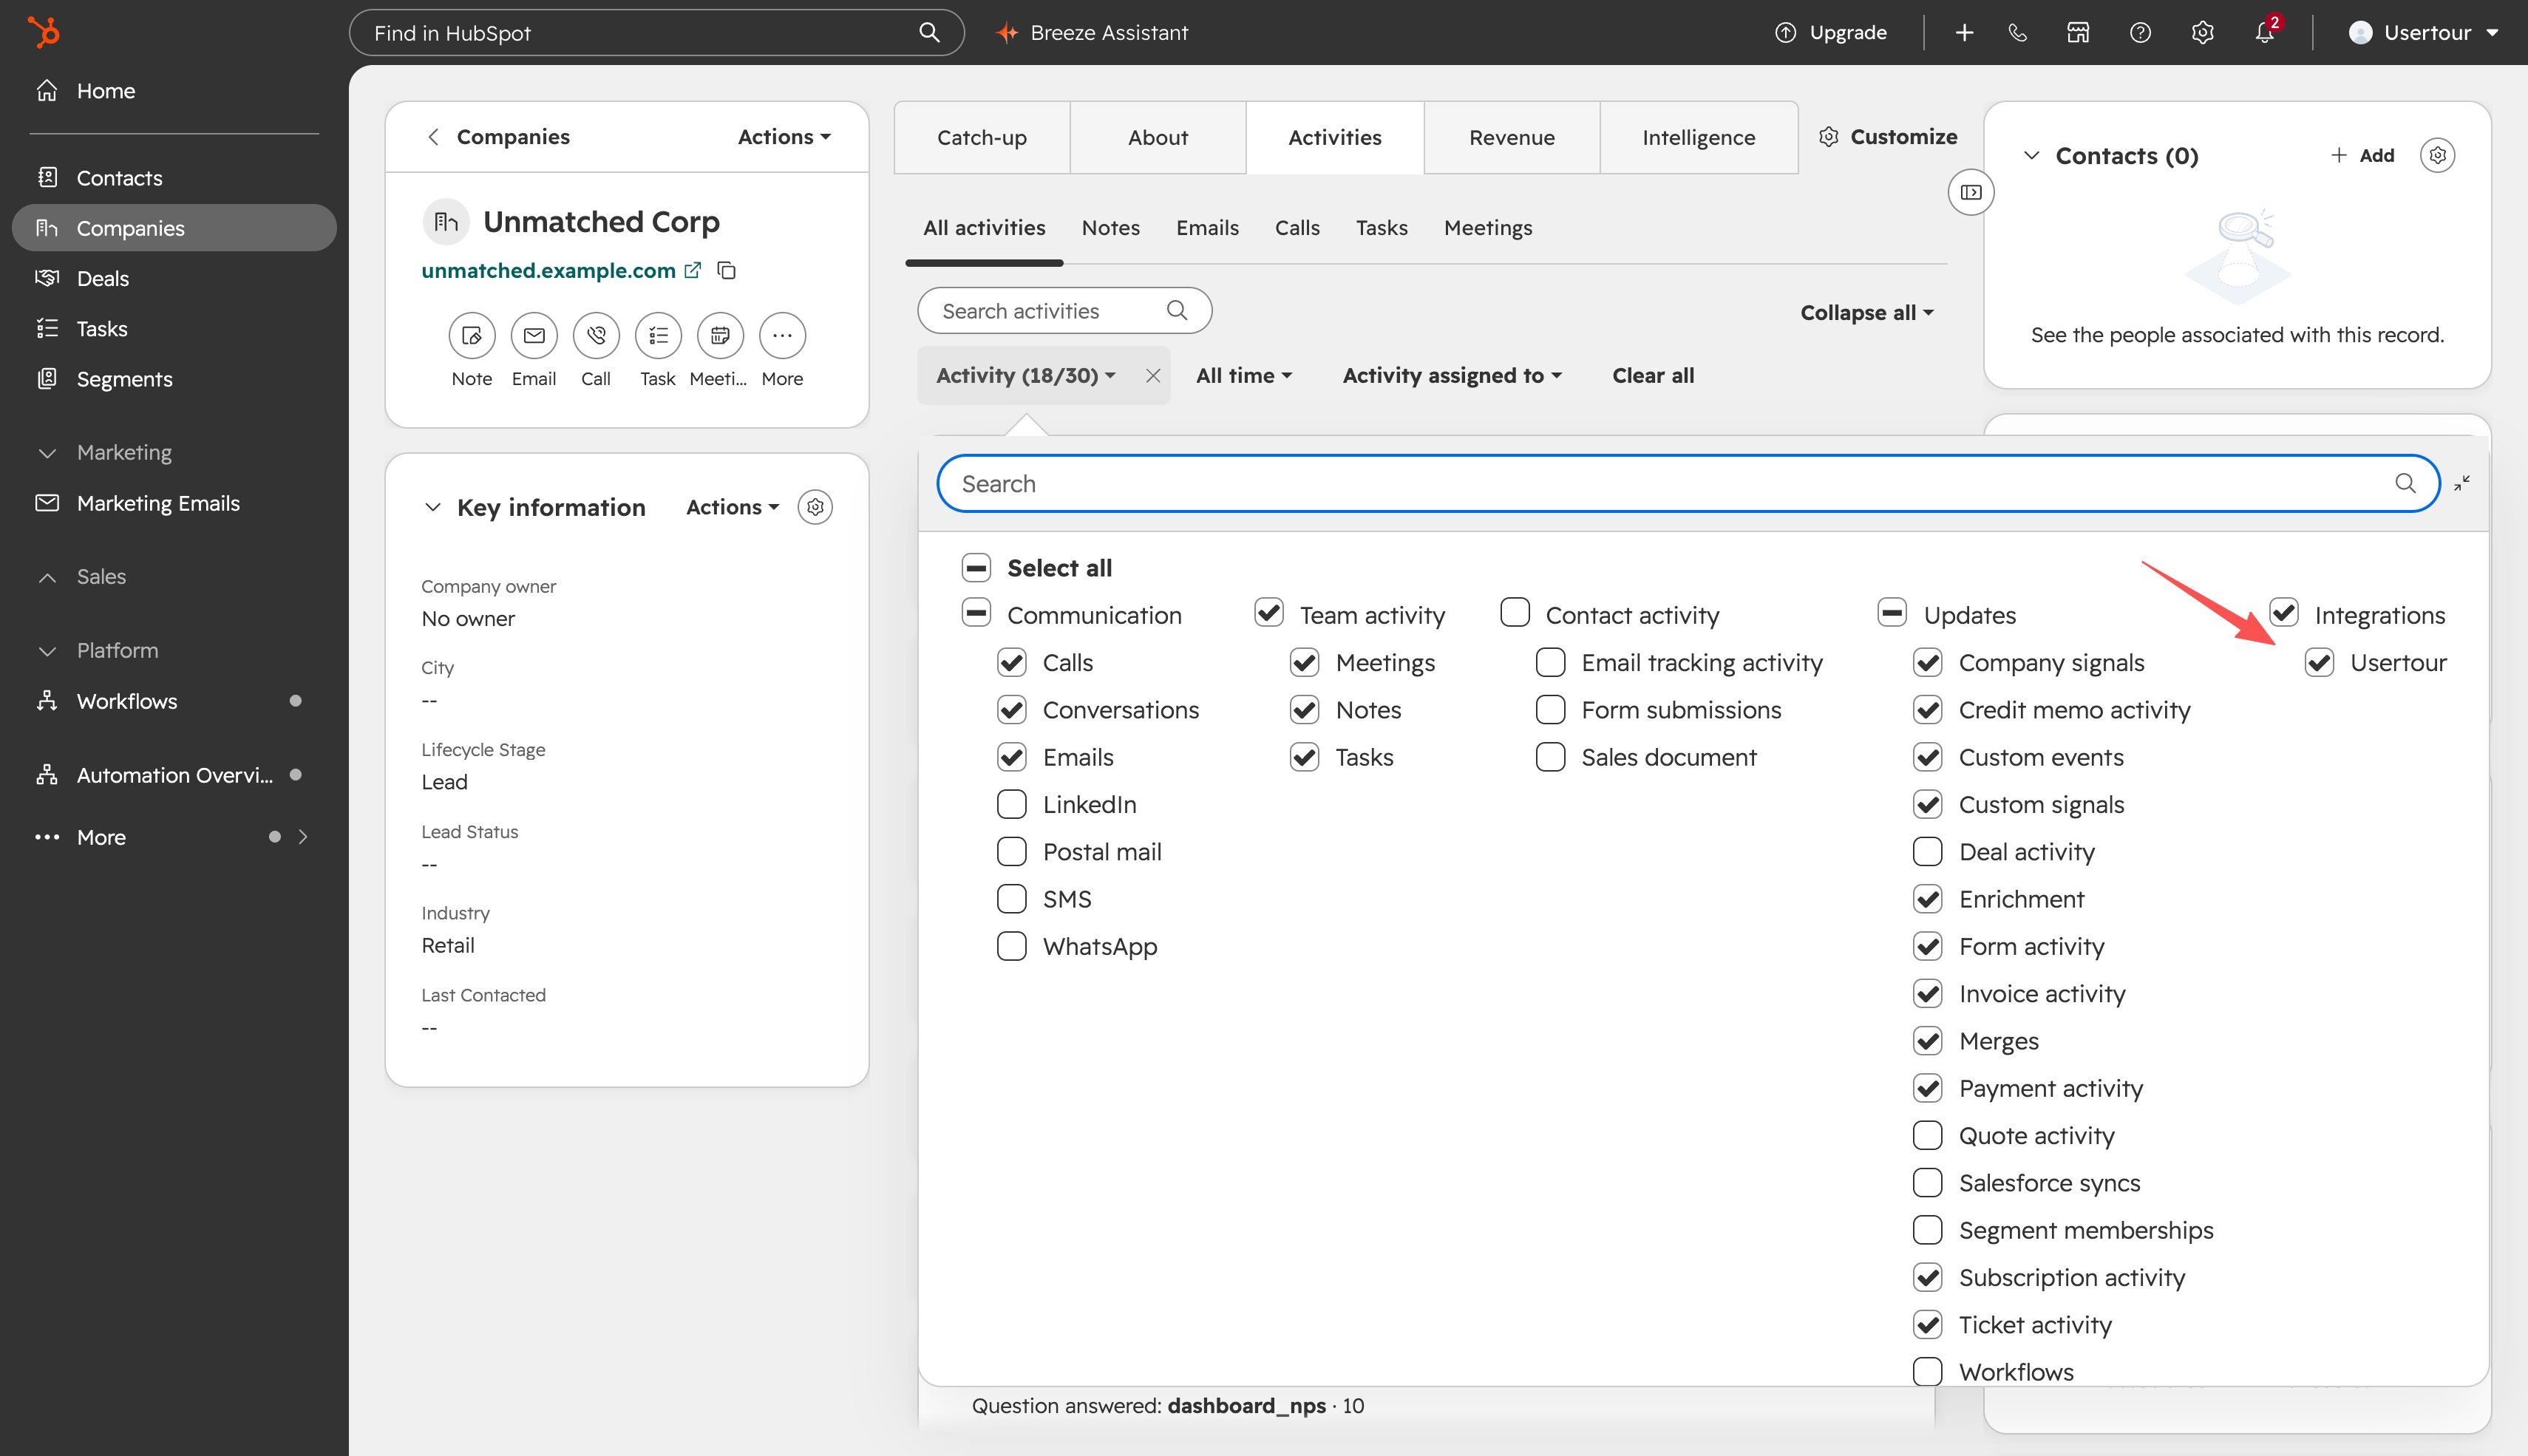
In HubSpot, open the contact’s Activities tab, open the Activity
filter and tick Usertour under Integrations — app events are not shown
until their integration is ticked.
Disconnect or uninstall
Disconnect in the connection card’s menu revokes Usertour’s access in HubSpot and stops all syncing — full rounds, incoming changes, write-backs and timeline events. Nothing is deleted on either side:- Mappings, links and the message log stay in Usertour, so reconnecting the same HubSpot account picks up where you left off.
- Attributes owned by HubSpot keep their values and stay read-only until you remove them from a mapping (or remove the mapping), which hands them back as ordinary attributes.
- The
Usertourproperty group, its values and the timeline events stay in HubSpot.
Where synced attributes show up
Attributes owned by HubSpot carry the HubSpot mark next to their name in Settings → Attributes, in the attributes panel of a user or company page, and in the condition builder — so anyone targeting content can see which values come from the CRM.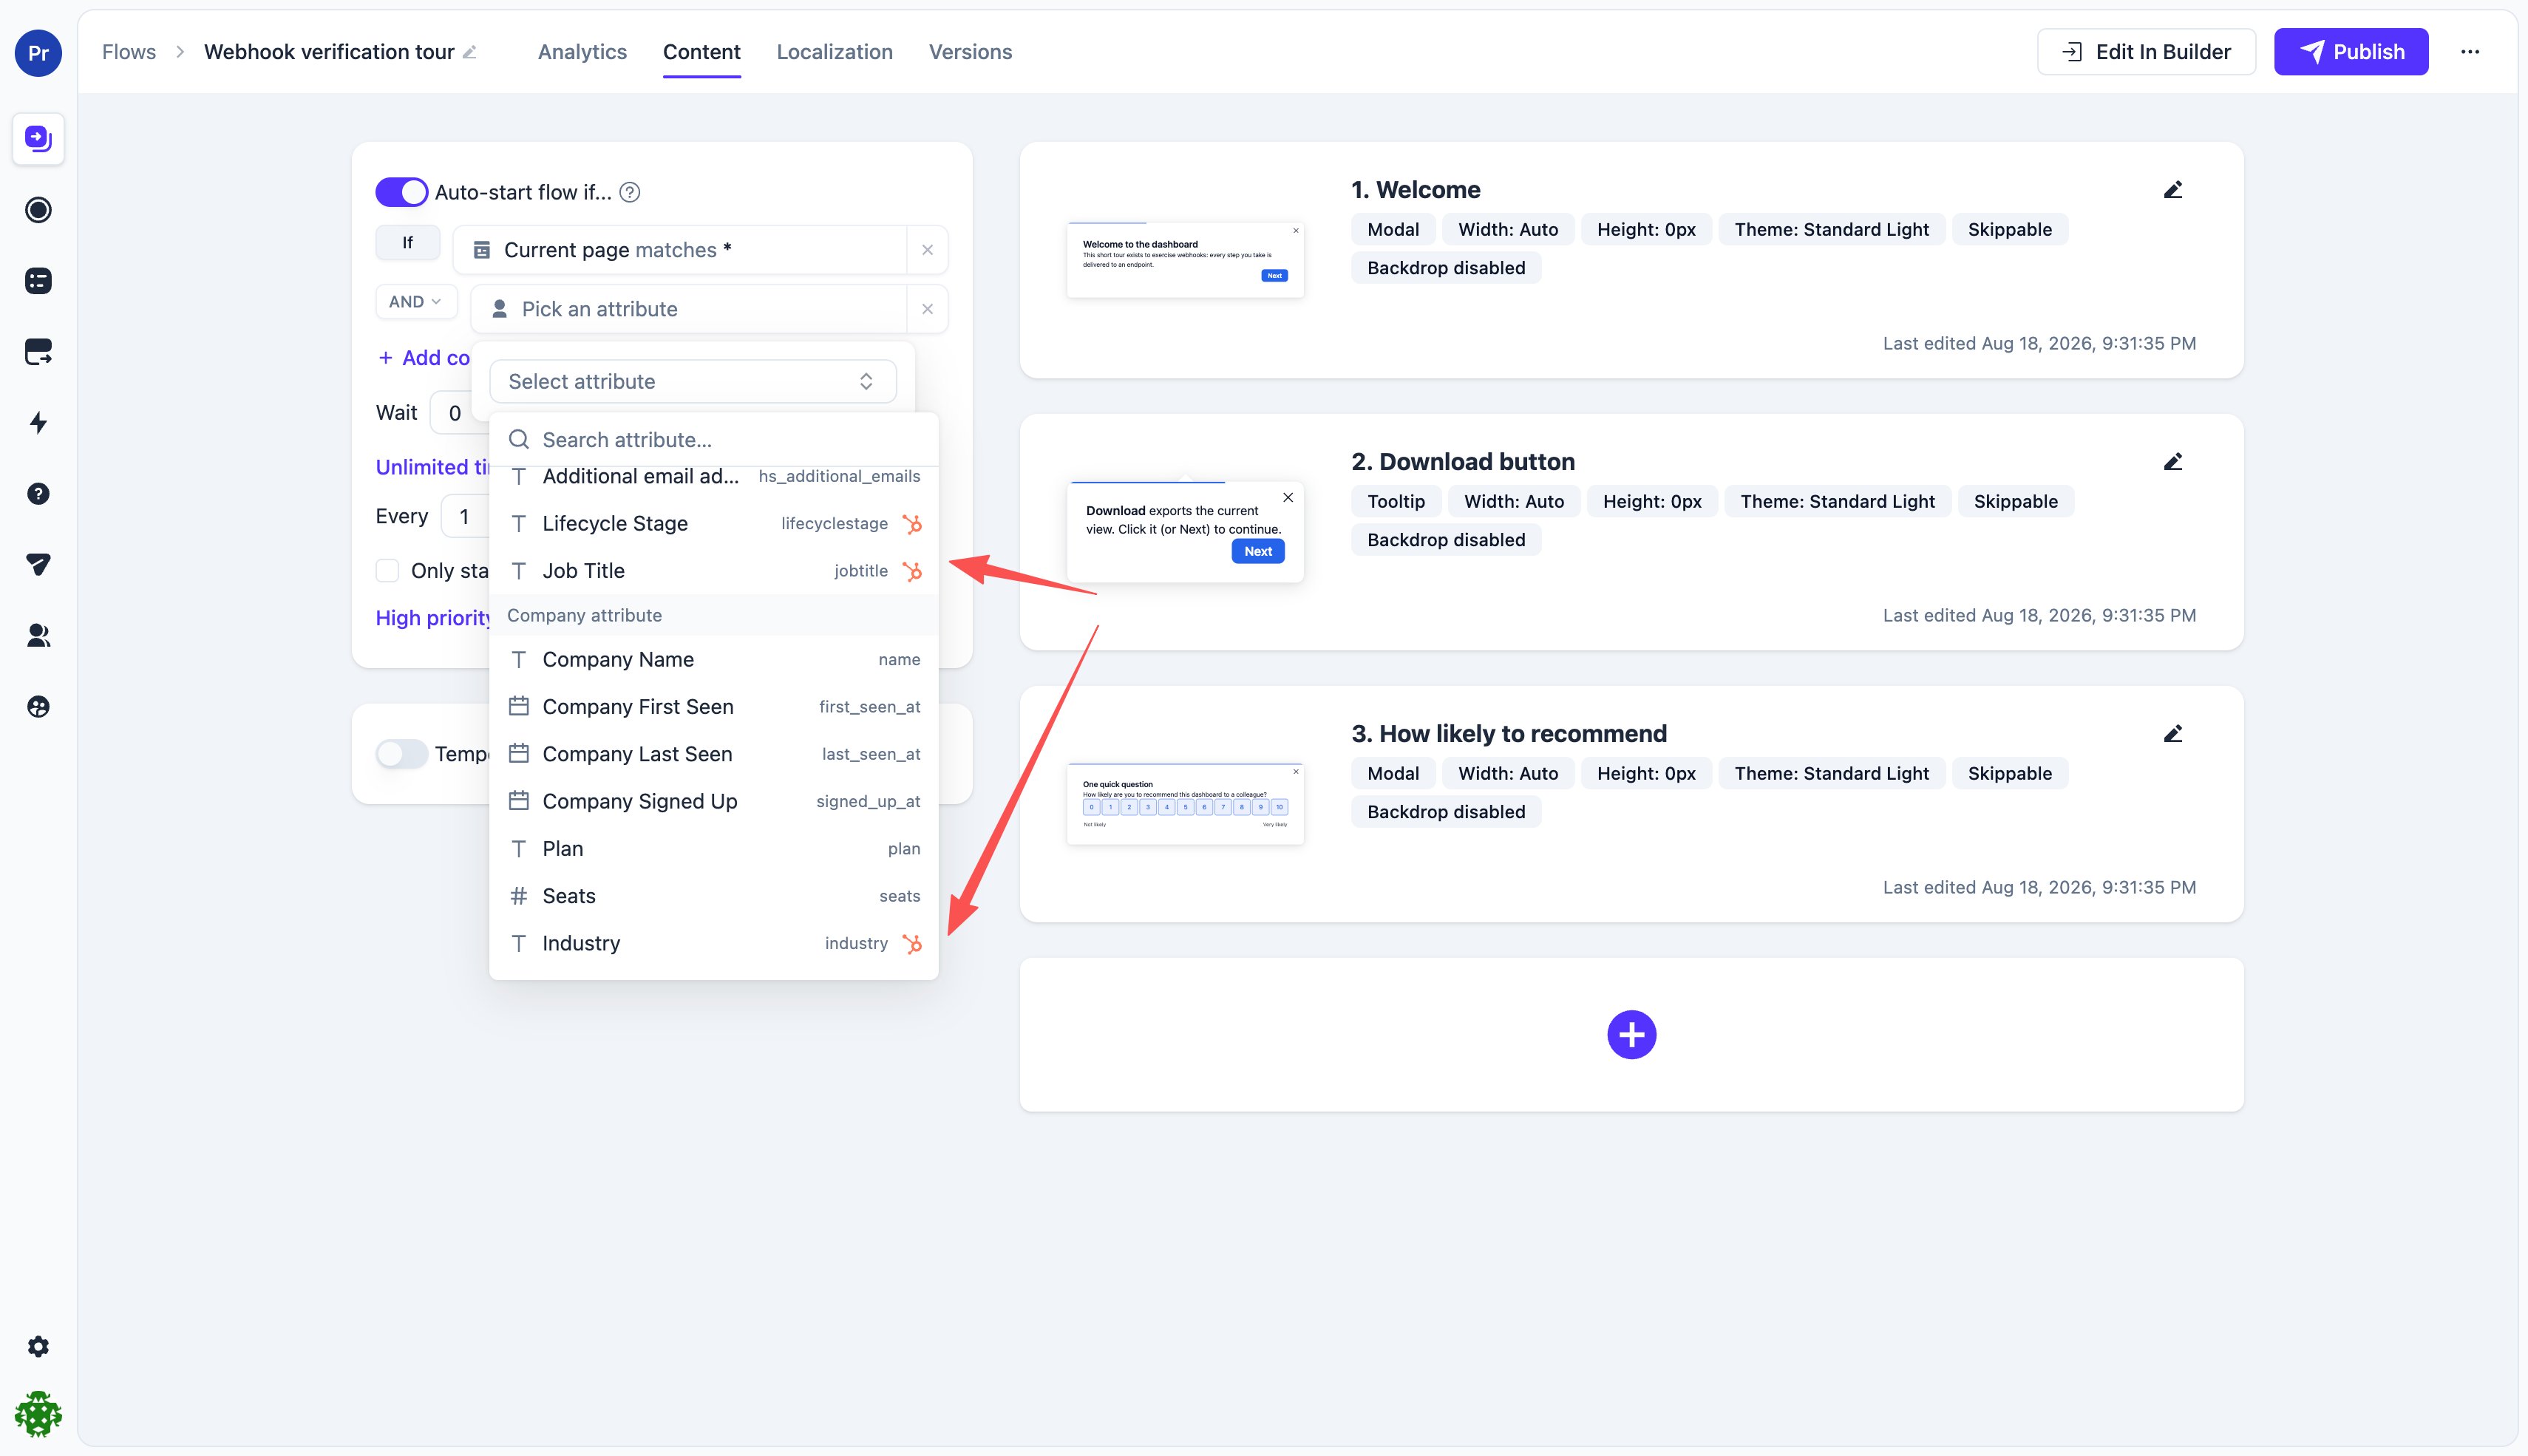
Self-hosted setup
A self-hosted instance cannot use the app deployed for Usertour Cloud — HubSpot ties an app’s redirect URL and secret to one deployment — so you register your own copy of the app once, in a free HubSpot developer account. It takes about ten minutes and needs no code changes.- Create a HubSpot developer account
and install the HubSpot CLI:
Pick the developer account when prompted.
- Copy the
integrations/hubspotdirectory from the Usertour repository and editsrc/app/app-hsmeta.json: setdistributionto"private", and replace the redirect URL withhttps://<your-api-host>/api/integrations/hubspot/oauth/callback. It must be HTTPS, served by the same host your dashboard sends API requests to, and reachable by the browser of the person connecting; HubSpot’s servers never call it. - Run
hs project uploadin that directory. The first upload creates the app in your developer account. - In the developer account, open the app: under Distribution, add the HubSpot account(s) you will connect to the allowlist (a private app can be installed in up to 10 accounts); under Auth, copy the Client ID and Client secret.
- Add them to the Usertour server environment and restart:
- In Usertour, go to Settings → Integrations → HubSpot and click Connect with HubSpot.
Troubleshooting
- A high Unmatched count: the records exist on one side only, or the match field disagrees — different emails in the two systems, or the ID property empty on the HubSpot record. Fix the data or switch the match strategy; the next round re-checks everything.
- “Attributes already exist” when saving: a Usertour attribute with the same code name is about to be taken over by HubSpot. Confirm to proceed, or remove the row. A data type mismatch blocks the save.
- A warning icon on a write-back row: that attribute changes on every visit (for example Last seen), so writing it back produces a steady stream of HubSpot updates. Keep it only if the CRM needs it live.
- The SDK or API reports a rejected attribute: the attribute is owned by HubSpot. Change the value in HubSpot, or remove the property from Sync from HubSpot to hand it back.
- Auto-disabled after failures: Usertour’s access was most likely revoked in HubSpot (the app uninstalled, or the authorizing user removed). Click Connect with HubSpot again to re-authorize.
- “HubSpot isn’t set up on this server yet” (self-hosted): the server
is missing
HUBSPOT_CLIENT_ID/HUBSPOT_CLIENT_SECRET— see self-hosted setup.